The Secret to Perfect Strawberry Shortcake Bars (Tested Recipe)
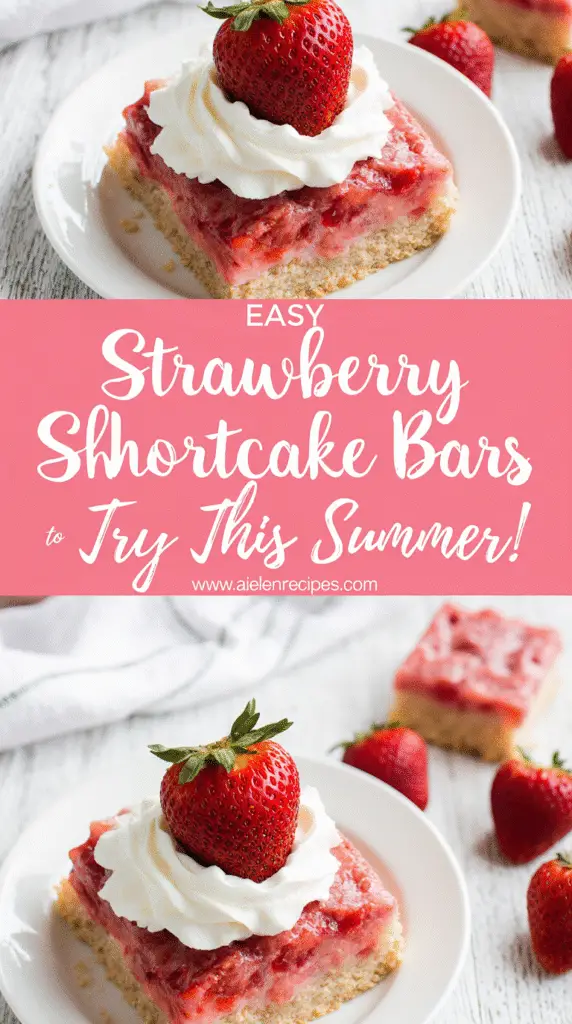
Strawberry shortcake bars bring together the perfect balance of sweet, refreshing flavors in an incredibly easy-to-make dessert. With just five ingredients and no ice cream maker required, these bars are a delightful treat anyone can master in their kitchen.
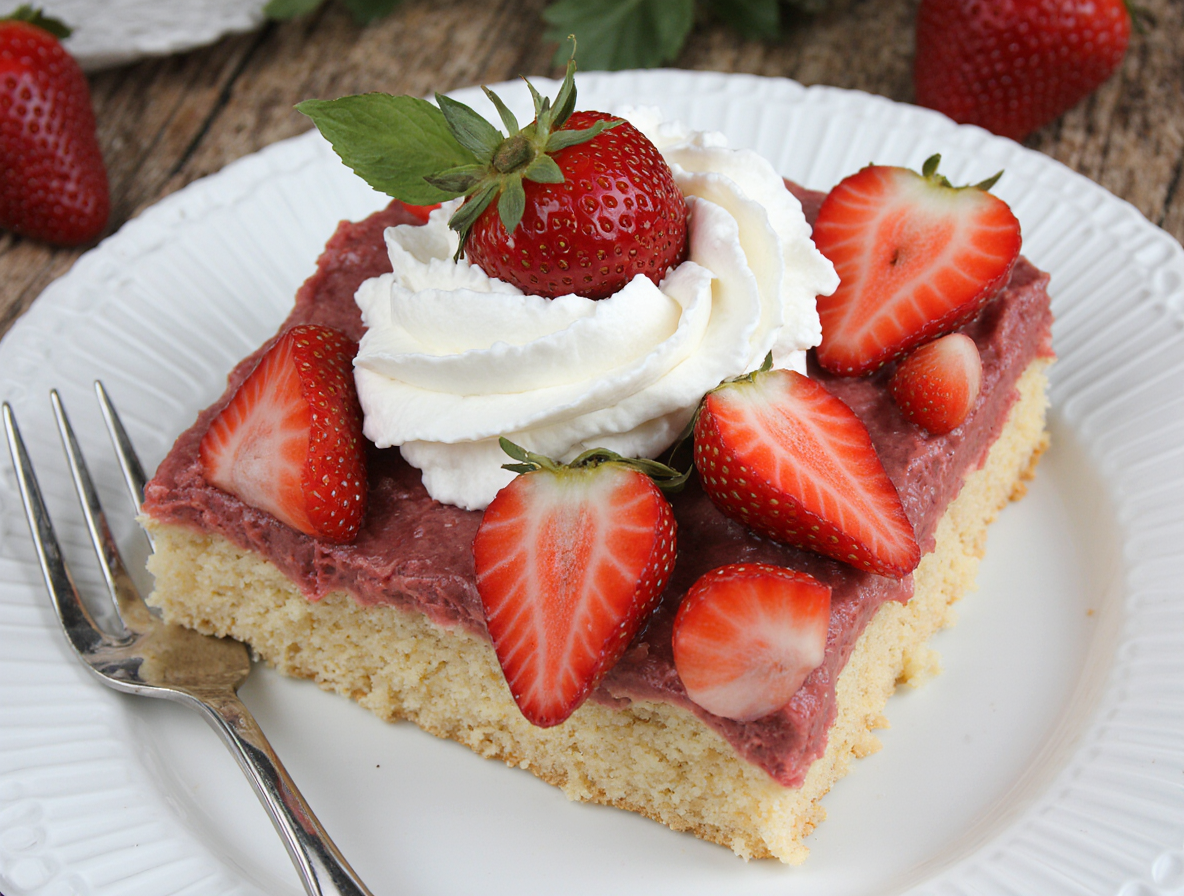
These tasty, fruity strawberry dessert bars feature a streusel topping and an abundant layer of bright, delectably sweet strawberries that explode with flavor in your mouth, followed by subtle creaminess and a slightly crunchy crust. What makes this strawberry shortcake bars recipe super easy to follow is that the base and topping are made from the same dough. We’ve tested this recipe thoroughly to ensure you get consistent results every time, creating the perfect sweet summer dessert that balances cake sweetness with the natural tartness of fresh strawberries.
Why These Strawberry Shortcake Bars Stand Out
What sets these strawberry shortcake bars apart from other desserts is their perfect combination of simplicity and indulgence. Unlike traditional strawberry shortcake, these bars offer convenience without sacrificing the classic flavors we all love.
Easy one-dough method for crust and topping
One of the most brilliant aspects of these strawberry shortcake bars is their streamlined preparation. Instead of making separate components, you’ll create just one versatile dough that serves double duty as both the base and the crumbly topping. This smart approach significantly reduces prep time while maintaining the delicious contrast between the buttery crust and the crisp crumble on top. Furthermore, this single-dough method ensures consistency in flavor throughout the entire dessert.
Fresh strawberry flavor without artificial taste
These bars capture the essence of real strawberries without any artificial flavoring. The filling consists purely of fresh strawberries sweetened with sugar and thickened with flour. Using fresh berries is absolutely essential – frozen strawberries would create a soggy crust and compromise the texture. For those seeking even more intense berry flavor, freeze-dried strawberries can be incorporated into the topping, providing concentrated strawberry taste with zero added moisture. Additionally, a small amount of rose water can enhance the natural aroma of strawberries, which sometimes becomes muted in baked goods.
Perfect balance of texture: soft, crumbly, and creamy
Each bite of these strawberry shortcake bars delivers a harmonious textural experience. The base is buttery and flaky, creating a perfect foundation. Meanwhile, the filling offers a delightful contrast – fruity and creamy with crisp, buttery crumbles. Though cream cheese appears in the ingredients, these bars truly capture the essence of strawberry shortcake rather than tasting like cheesecake. The combination of creamy vanilla, sweet strawberry center, and irresistible crumb coating creates a perfectly balanced dessert.
Tested recipe with consistent results
This recipe has been thoroughly tested to ensure reliable outcomes every time. The bars are finished baking when the crumble turns golden and the berry filling bubbles around the edges. The key to achieving perfect texture lies in the combination of ingredients: a rich, flexible base, a stabilized cream that maintains its structure, and a preserve-style strawberry filling that holds its shape without bleeding into other layers. With clear indicators for doneness and precise techniques, even first-time bakers can achieve professional-quality results.
Ingredients Breakdown by Layer
The quality of ingredients makes all the difference in creating truly exceptional strawberry shortcake bars. Let’s break down exactly what you’ll need for each delicious layer of this classic dessert.
Crust and crumb topping
The genius of these strawberry shortcake bars lies in using one versatile dough for both the base and crumbly topping. For this all-important foundation, you’ll need:
All-purpose flour (3-3¼ cups) forms the structure of your crust and crumble. Cold unsalted butter (¾-1 cup) creates that irresistible shortbread-like texture. Granulated sugar combined with light brown sugar provides the perfect sweetness balance, with brown sugar adding subtle caramel notes.
Most recipes include vanilla extract (1 teaspoon) for warmth and depth, along with a pinch of salt to enhance all flavors. Some versions incorporate an egg yolk to bind the mixture, ensuring the perfect crumbly-yet-cohesive texture.
The consistency should resemble a crumbly texture that just begins to clump together when pressed. This versatile dough serves as both your sturdy base and the delightful crumb topping that gives these bars their signature appeal.
Strawberry filling
The star of these bars is undoubtedly the vibrant strawberry layer. First and foremost, you need:
Fresh strawberries (2-3 cups when chopped) – using fresh berries is essential, as frozen ones would create a soggy crust. The strawberries should be chopped into small pieces to create an even layer.
To enhance and stabilize the filling:
- Granulated sugar (¼ cup) to sweeten and draw out juices
- Lemon juice (1 tablespoon) for brightness
- Cornstarch (1 tablespoon) to thicken the filling and prevent sogginess
Essentially, this creates a preserve-style filling that maintains structure without becoming runny or bleeding into other layers.
Vanilla glaze or whipped topping
For the finishing touch, you have two delicious options:
A vanilla glaze provides a sweet finish and sets beautifully. The simplest version combines powdered sugar (½-1 cup), a splash of milk or heavy cream (2-4 tablespoons), and vanilla extract (¼-½ teaspoon). For extra richness, some recipes include a tablespoon of melted butter.
Alternatively, a whipped topping creates a more traditional strawberry shortcake experience. This typically combines cream cheese (8 oz) with powdered sugar (¼-1 cup) and vanilla extract, folded together with whipped cream or whipped topping (8 oz). This creates a luscious, cloud-like layer that perfectly complements the strawberry filling.
Both options work beautifully depending on whether you prefer a sweet glaze or creamy topping for your strawberry shortcake bars.
Step-by-Step Instructions for Perfect Bars
Creating perfect strawberry shortcake bars is simple if you follow these detailed steps. With a bit of patience and attention to detail, you’ll have a delicious treat that showcases the bright flavor of fresh strawberries.
1. Prepare the crust and topping
Begin by combining flour, both white and brown sugars, and a pinch of salt in a medium bowl. Mix these dry ingredients thoroughly, breaking up any lumps of brown sugar. Pour in melted butter and stir until the mixture is evenly combined. For the perfect texture, toss the mixture with your fingertips until large crumbs form. This single versatile dough will serve as both your crust and crumbly topping, simplifying the process considerably.
2. Pre-bake the crust for structure
Press about two-thirds of your crumb mixture firmly into the prepared pan, creating an even layer. If the dough sticks to your hands, lightly flour your fingertips. Smooth the surface with an offset spatula for a perfectly level base. Bake at 350°F for 15-20 minutes until the crust becomes lightly golden. This crucial pre-baking step prevents the dreaded soggy bottom that can ruin otherwise perfect bars.
3. Mix and layer the strawberry filling
As your crust cools slightly, prepare the strawberry filling. In a medium bowl, combine chopped fresh strawberries with sugar and a bit of flour, tossing gently to coat. The sugar draws out the fruit’s natural juices while the flour helps thicken the mixture, creating a jam-like consistency that won’t make your crust soggy.
4. Add crumb topping and bake again
Spread the strawberry mixture evenly over your pre-baked crust. Sprinkle the remaining one-third of your crumb mixture over the top of the strawberries. Return the pan to the oven and bake for 30-35 minutes until the strawberry juices are bubbling and the crumb topping turns golden brown.
5. Cool completely before glazing
Once baked, set the pan aside and allow your bars to cool entirely. Patience is key here—rushing this step could result in a runny glaze and messy cuts. Complete cooling ensures the filling sets properly, allowing for clean slices later.
6. Slice and serve
For the finishing touch, prepare a simple glaze by combining powdered sugar, cream, and vanilla in a small bowl. Whisk until smooth, then drizzle over the cooled bars. Cut into squares with a sharp knife, wiping the blade between cuts for the cleanest results. Serve and enjoy these irresistible strawberry shortcake bars!
Expert Tips and Troubleshooting
After testing this recipe numerous times, I’ve discovered several crucial tips that make the difference between good and exceptional strawberry shortcake bars. These troubleshooting techniques will help you avoid common pitfalls and achieve perfect results every time.
Use fresh strawberries only
For strawberry shortcake bars, fresh berries are absolutely essential. Despite what you might think, frozen strawberries aren’t a suitable substitute since they release too much moisture, potentially resulting in a soggy crust. The best time to make these bars is during summer when strawberries are in season—those fragrant, sweet berries that capture your attention from across the kitchen. In fact, this recipe showcases summer’s sweetest berries, so save it for when you have access to truly ripe, aromatic fruit.
Cool butter before mixing
Notably, the temperature of your butter plays a significant role in the texture of your crust and crumble. After browning the butter, make sure to cool it completely before incorporating it into your dry ingredients. Having melted butter cooled to lukewarm or room temperature ensures your crust and crumble don’t turn out greasy. This simple step makes a substantial difference in achieving that perfect shortbread-like texture.
Avoid soggy crust with pre-baking
Primarily, pre-baking the crust is crucial to prevent the dreaded soggy bottom. This process allows the bottom crust to set before the wet filling has a chance to soak into it. During pre-baking, the crust browns and sets, creating a barrier against moisture from the strawberry filling. Generally, eight minutes of pre-baking is sufficient, but remember to keep your oven on for the final baking stage.
How to know when bars are done
Determining when your strawberry shortcake bars are perfectly baked is straightforward once you know what to look for. The bars are finished when the crumble on top turns golden and the juices from the berry filling bubble around the edges. For the crust, watch for the tiniest hint of light browning around the edges. Surprisingly, it’s better to do a “wiggle test” rather than using a toothpick—look for a small wiggle in the center to know they’re properly set.
Chilling for clean slices
For picture-perfect presentation, chilling your strawberry shortcake bars is non-negotiable. Let the bars cool completely in the pan before refrigerating for at least two hours or overnight. In fact, placing them in the freezer for at least one hour before cutting will give you those crisp, clean lines. Use a sharp, warm knife for cutting, and clean the blade between each slice for professional-looking results.
Conclusion
These strawberry shortcake bars truly represent the perfect balance of simplicity and indulgence. Throughout our testing, we discovered that this dessert captures all the beloved flavors of traditional strawberry shortcake while offering the convenience of an easy-to-slice bar format.
The genius behind this recipe lies primarily in its streamlined approach. You’ll save significant time by creating just one versatile dough that functions beautifully as both crust and topping. Additionally, the fresh strawberry filling delivers authentic fruit flavor without artificial additives, making these bars a celebration of summer’s finest produce.
Texture plays an equally important role in what makes these bars special. Each bite delivers the perfect combination of buttery crust, jammy strawberry filling, and crumbly topping. Therefore, following our expert tips—especially using fresh berries and pre-baking the crust—will ensure your bars achieve that ideal textural contrast.
While this recipe works year-round, we strongly recommend making these bars during strawberry season when the fruit reaches peak sweetness and aroma. Undoubtedly, your family and friends will be impressed by these professional-looking treats that require surprisingly little effort to create.
Finally, don’t forget the importance of patience during the cooling and chilling process. Although waiting can be difficult with such a tempting dessert, this crucial step ensures clean slices and fully developed flavors. Once you’ve mastered this tested recipe, these strawberry shortcake bars might just become your signature summer dessert!
FAQs
Q1. How long should I chill the strawberry shortcake bars before serving? For the best results, chill the bars in the refrigerator for at least two hours or overnight. For clean, crisp slices, you can even place them in the freezer for about an hour before cutting.
Q2. Can I use frozen strawberries instead of fresh ones? It’s best to use only fresh strawberries for this recipe. Frozen strawberries release too much moisture, which can result in a soggy crust. Save this recipe for when you have access to ripe, sweet, fresh strawberries.
Q3. What’s the secret to achieving the perfect crust texture? The key is to use cooled melted butter when mixing the crust ingredients. This ensures that the crust and crumble don’t turn out greasy. Also, pre-baking the crust for about 15-20 minutes helps prevent sogginess.
Q4. How do I know when the strawberry shortcake bars are fully baked? The bars are done when the crumble on top turns golden and the strawberry filling bubbles around the edges. You can also do a “wiggle test” – look for a slight jiggle in the center to know they’re properly set.
Q5. Can I make these bars ahead of time? Yes, these bars are great for making ahead. They can be stored in the refrigerator for up to 3-4 days. Just make sure to cool them completely before storing and cover them tightly to maintain freshness.