The Perfect Chocolate Roll Cake: Secret Baker’s Method [Test Kitchen Approved]
Chocolate roll cake might seem intimidating, but I’ve discovered it’s actually one of the most rewarding desserts to master in your home kitchen. After years of testing and retesting, I’ve finally perfected a recipe that creates a chocolate cake roll that never cracks and delivers that melt-in-your-mouth experience that keeps you coming back for seconds (and thirds!).
In fact, my journey with chocolate cake rolls began back in 2019 when I first published a recipe that, however good, still left some bakers struggling with dry sponge and cracking issues. This updated chocolate roll cake recipe solves those common problems. Firstly, we substitute some all-purpose flour with cornstarch for a softer cake, creating that light, fluffy texture that’s essential for perfectly rolled chocolate cake. Additionally, we’ve enhanced the pure cocoa flavor and paired it with a sweet vanilla whipped cream filling topped with rich dark chocolate ganache. This is truly the lightest and softest chocolate Swiss roll cake you will ever make.
The science behind the perfect chocolate sponge
Creating the perfect chocolate sponge for a roll cake requires understanding key scientific principles that affect texture, moisture, and flavor. Let me break down what makes a chocolate roll cake truly exceptional.
Why oil is better than butter for moisture
The texture of cakes made with oil is superior to those made with butter. Oil cakes bake with a more even crumb and stay moist significantly longer than butter-based cakes. Furthermore, oil is 100% fat, whereas butter contains about 20% water that evaporates during baking. This water loss explains why butter cakes tend to dry out faster.
Most importantly for roll cakes, oil remains liquid at room temperature while butter firms up when cool. This property keeps the sponge flexible after baking, making it less prone to cracking during rolling. Even though butter provides excellent flavor, the texture benefits of oil simply cannot be ignored, especially for a cake that needs to bend without breaking.
The role of whipped eggs in sponge texture
Eggs are the true workhorses of chocolate roll cakes, providing both structure and moisture. During whipping, egg proteins unfurl and bond, trapping air bubbles that create the light, airy texture essential for a good sponge.
The science is fascinating – whole eggs can increase up to 5 times in volume when whipped, while egg whites alone can expand 6-8 times their original volume. For perfect results, whip eggs until you can lift the mixture and draw a figure-8 pattern that slowly disappears back into the bowl. Nevertheless, be careful not to overmix after adding flour, as this forces out those precious air bubbles, resulting in a flat, rubbery cake.
How espresso powder enhances chocolate flavor
Despite what you might think, espresso powder doesn’t make chocolate cake taste like coffee. Instead, it magically intensifies the chocolate flavor. Espresso and chocolate share similar flavor profiles – both have notes of fruitiness, bitterness, and acidity that complement each other perfectly.
Just ½-1½ teaspoons is enough to transform a cake from merely “dark brown and sweet” to “super chocolatey”. This enhancement works because coffee’s bitterness and earthiness magnify chocolate’s complex flavors without overwhelming them.
Cake flour vs. all-purpose flour: does it matter?
The protein content makes all the difference – cake flour contains only 6-8% protein compared to all-purpose flour’s 10-12%. Lower protein means less gluten formation, resulting in a more tender crumb that’s ideal for delicate sponges.
Though some bakers report successful results with either flour, cake flour’s finer milling creates softer, airier layers that practically melt in your mouth. If you only have all-purpose flour, create a suitable substitute by replacing 2 tablespoons of flour with cornstarch for each cup used. This simple adjustment reduces the gluten content, helping achieve that perfect tender texture needed for a beautifully rolled chocolate cake.
Step-by-step method for a flawless rolled chocolate cake
After exploring the science behind our chocolate sponge, let’s move forward with the practical steps. The success of a chocolate roll cake largely depends on proper technique and timing. Moreover, following these precise steps will ensure you achieve that perfect spiral without any dreaded cracks.
1. Preparing the baking pan and tools
Begin by preheating your oven to 350°F (177°C). Select a 10×15-inch or 12×17-inch jelly roll pan—the shallow edges are crucial for easy cake removal. Line the bottom with parchment paper, extending it slightly up the short sides. Subsequently, lightly grease both the pan and parchment paper to create a nonstick surface. Dust with cocoa powder rather than flour to avoid white streaks on your chocolate cake. Alongside, prepare a clean lint-free kitchen towel dusted generously with cocoa powder for later use.
2. Mixing and folding the batter correctly
The key to a light, airy sponge lies in proper mixing. In one bowl, whip egg whites until they form medium peaks. In another, beat egg yolks with sugar until pale and ribbony (about 5-7 minutes). Gently fold half the whites into the yolk mixture. Next, sift dry ingredients directly over this mixture and fold carefully using a silicone spatula. Lastly, incorporate remaining whites and drizzle in oil/milk mixture, folding just until combined. The final batter should be thick yet flowing—overmixing will deflate those precious air bubbles.
3. Baking and testing for doneness
Spread batter evenly in your prepared pan and bake for 10-12 minutes only. A properly baked chocolate roll cake springs back when lightly touched in the center. Look for edges pulling slightly away from the pan (about 1/8 inch gap). The cake should feel springy—not firm or wobbly. Remember, an overbaked cake will crack when rolled, so vigilance is essential.
4. Rolling the cake while warm
Once out of the oven, let rest for 1-2 minutes only. Quickly run a knife around the edges, then invert onto your prepared towel. Carefully peel off the parchment paper. Starting at the short end, immediately roll the cake with the towel inside.
5. Cooling the cake in rolled shape
Allow the rolled cake to cool completely (about 3 hours) while wrapped in the towel. This crucial step “teaches” the cake to hold its rolled shape. Cool at room temperature—refrigerating while warm can cause condensation and sogginess.
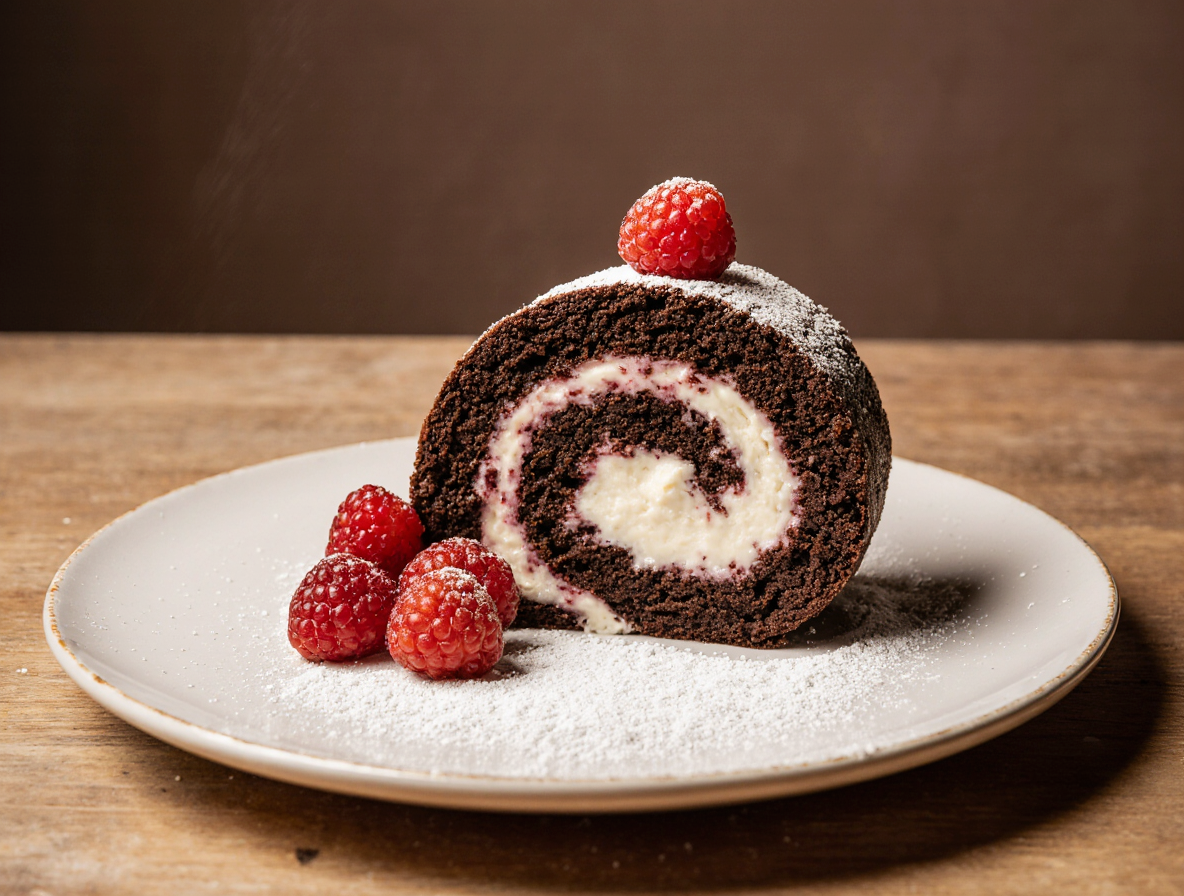
Filling and topping: the secret baker’s touch
The magic of a truly exceptional chocolate roll cake lies in what goes inside and on top. The filling and topping aren’t merely decorative elements—they’re essential components that balance moisture, texture, and flavor in the final dessert.
Choosing between whipped cream and pastry cream
When selecting a filling for your chocolate roll cake, consider both flavor and structural integrity. Whipped cream offers lightness that perfectly complements the chocolate sponge, creating an airy contrast that makes each bite delightful. Certainly, pastry cream provides more stability and richness, essentially functioning as the “backbone” of your cake roll. For beginners, I recommend starting with whipped cream, as it’s more forgiving during the rolling process and less likely to ooze out the sides.
How to stabilize whipped cream for better structure
Plain whipped cream can weep and lose structure quickly, potentially making your cake soggy. To prevent this, I’ve found several effective stabilizing methods:
- Add 2-3 tablespoons of instant vanilla pudding mix per cup of cream before whipping
- Incorporate 1-2 tablespoons of sifted powdered sugar per cup of cream
- Dissolve 1 teaspoon of unflavored gelatin in 1 tablespoon of water, then fold into partially whipped cream
Specifically for chocolate roll cakes, I prefer the powdered sugar method as it maintains the pure cream flavor without altering the texture dramatically.
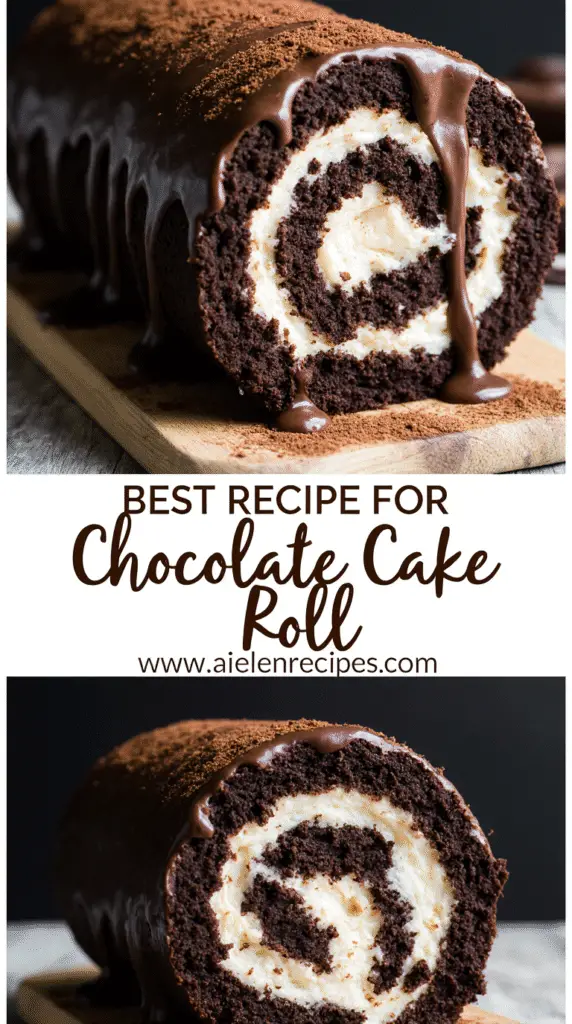
Making glossy ganache with real chocolate
Quality matters tremendously when creating ganache. Always opt for real chocolate with at least 60% cocoa content rather than chocolate chips, which contain stabilizers that affect melting. For the perfect glossy finish, use a 1:1 ratio of heavy cream to chocolate for spreading, or 2:1 chocolate to cream for a firmer, more truffle-like texture. Heat cream just until it simmers, then pour over finely chopped chocolate and let sit undisturbed for 2 minutes before gently stirring.
Layering ganache inside and outside for flavor depth
Primarily, I recommend using different chocolate percentages for interior and exterior ganache. A 70% dark chocolate ganache inside provides intense flavor contrast against the sweet whipped cream, while a 55-60% semi-sweet ganache creates a more approachable outer coating. This layering technique creates complexity that elevates your chocolate roll cake from homemade to professional quality.
Troubleshooting and pro tips from the test kitchen
Even with perfect ingredients and careful technique, chocolate roll cakes can present challenges. Fortunately, my test kitchen experience has revealed solutions to the most common problems you might encounter.
Preventing cracks during rolling
The secret to crack-free chocolate roll cakes lies primarily in timing. Always roll your cake while it’s still warm—waiting until it cools completely practically guarantees cracks. In addition to this, roll the cake slowly and gently, applying even pressure throughout. For extra insurance against cracking, flip your cake onto parchment paper dusted with cocoa powder before rolling. If your cake does crack despite these precautions, don’t panic! You can often piece it back together, then cover with filling to hide any imperfections.
Avoiding dry or dense sponge
To prevent a dry chocolate roll cake, watch your baking time vigilantly. Even 30 seconds of overbaking can transform a perfect sponge into a dry disappointment. Generally, bake for the minimum time specified—the cake should spring back when touched but still feel slightly moist. If you accidentally overbake, brush the cooled sponge with simple syrup before adding filling. For dense cakes, be careful not to overmix the batter after adding flour, as this forces out air bubbles, resulting in a rubbery texture.
Fixing deflated whipped cream
Overbeaten whipped cream quickly turns from fluffy clouds to grainy mess, but it’s often salvageable. For slightly overwhipped cream, fold in 1-2 tablespoons of cold, unwhipped cream with a rubber spatula. For more severely overwhipped cream, you may need to add 25-50% of the original amount. Incorporate the fresh cream gradually until the mixture returns to a smooth consistency. If your cream has separated into butter and buttermilk, embrace your happy accident and use it as a spread instead.
How to slice cleanly without smearing
For picture-perfect slices, chill your finished cake for 10-15 minutes before cutting. Then use a tomato knife (surprisingly perfect for cake!) or another serrated knife with wide teeth. Dip your knife in hot water, dry it thoroughly, and cut while the knife is still warm. Clean the blade between each slice to prevent frosting buildup and smearing.
Mini roll variation for individual servings
Creating mini chocolate roll cakes requires some adjustments. Cut your baked sheet cake into four equal pieces before rolling each segment individually. Use a 13×9-inch pan that’s 1cm deep—if your pan is too small, the sponge will be too thick and difficult to roll tightly. For best results, freeze the filled mini rolls for 10-15 minutes before glazing to help them hold their shape.
Conclusion
After years of testing chocolate roll cakes in my kitchen, I can confidently say that mastering this impressive dessert comes down to understanding a few key principles. Oil rather than butter creates that essential moisture and flexibility, while properly whipped eggs give your cake its cloud-like texture. Additionally, espresso powder works magic to enhance chocolate flavor without adding coffee taste.
Timing truly matters throughout the entire process. Your cake should be rolled while warm, cooled completely in its spiral shape, and filled with care. Furthermore, the right balance of fillings – whether stabilized whipped cream or rich ganache – transforms a simple chocolate roll into something truly special.
Though challenges might arise during your first attempt, the solutions provided here will help you troubleshoot any issues. Certainly, preventing cracks, avoiding dry sponge, and achieving clean slices become second nature with practice. Most importantly, remember that even imperfect chocolate roll cakes taste delicious!
This recipe represents the culmination of countless test kitchen experiments and refinements. The result? A foolproof method for creating a chocolate roll cake that stays moist, rolls beautifully, and delivers intense chocolate flavor with every bite. Whether for special occasions or weekend baking projects, this chocolate roll cake will undoubtedly become one of your signature desserts. Now that you understand the science and technique behind it, you’re ready to create a bakery-worthy chocolate roll cake right in your own kitchen.
FAQs
Q1. What’s the secret to preventing cracks in a chocolate roll cake? The key is to roll the cake while it’s still warm, immediately after removing it from the oven. Roll slowly and gently, applying even pressure throughout. If cracks do occur, you can often piece the cake back together and cover imperfections with filling.
Q2. Why is oil preferred over butter in chocolate roll cake recipes? Oil is better for moisture retention and flexibility in roll cakes. It remains liquid at room temperature, keeping the sponge pliable and less prone to cracking when rolled. Oil also creates a more even crumb and helps the cake stay moist for longer.
Q3. How can I ensure my chocolate roll cake has a light and airy texture? Properly whipped eggs are crucial for a light texture. Whip whole eggs until they increase in volume and you can draw a figure-8 pattern that slowly disappears. Be careful not to overmix after adding flour to avoid deflating the air bubbles.
Q4. What’s the best way to enhance the chocolate flavor in my roll cake? Adding a small amount of espresso powder (½-1½ teaspoons) can significantly intensify the chocolate flavor without making the cake taste like coffee. The espresso complements and enhances the complex flavors of chocolate.
Q5. How do I achieve clean slices when cutting a chocolate roll cake? For perfect slices, chill the finished cake for 10-15 minutes before cutting. Use a serrated knife with wide teeth, dip it in hot water, dry it thoroughly, and cut while the knife is still warm. Clean the blade between each slice to prevent frosting smears.