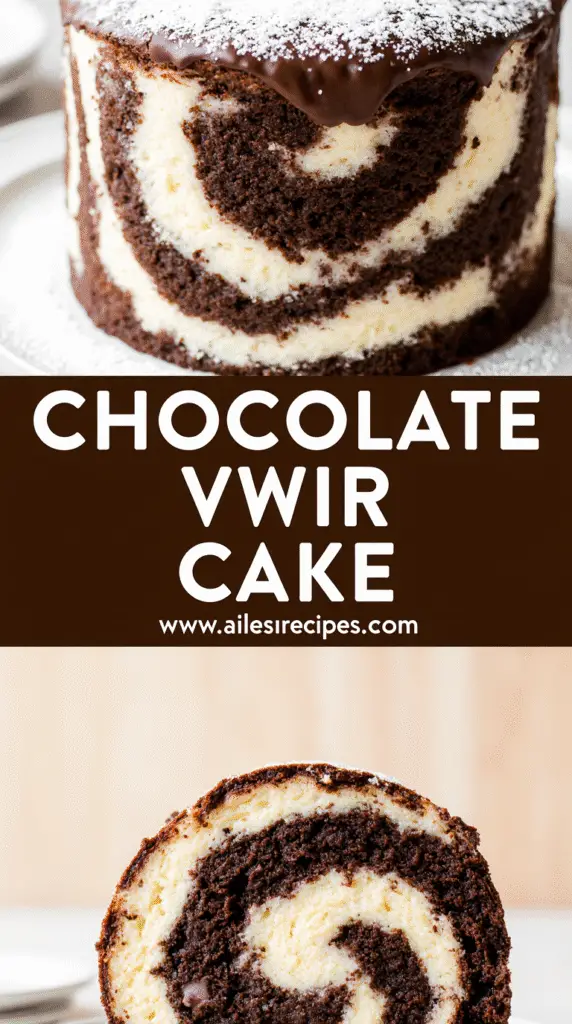
The Secret to Perfect Chocolate and Vanilla Swirl Cake (Beginner-Friendly Guide)
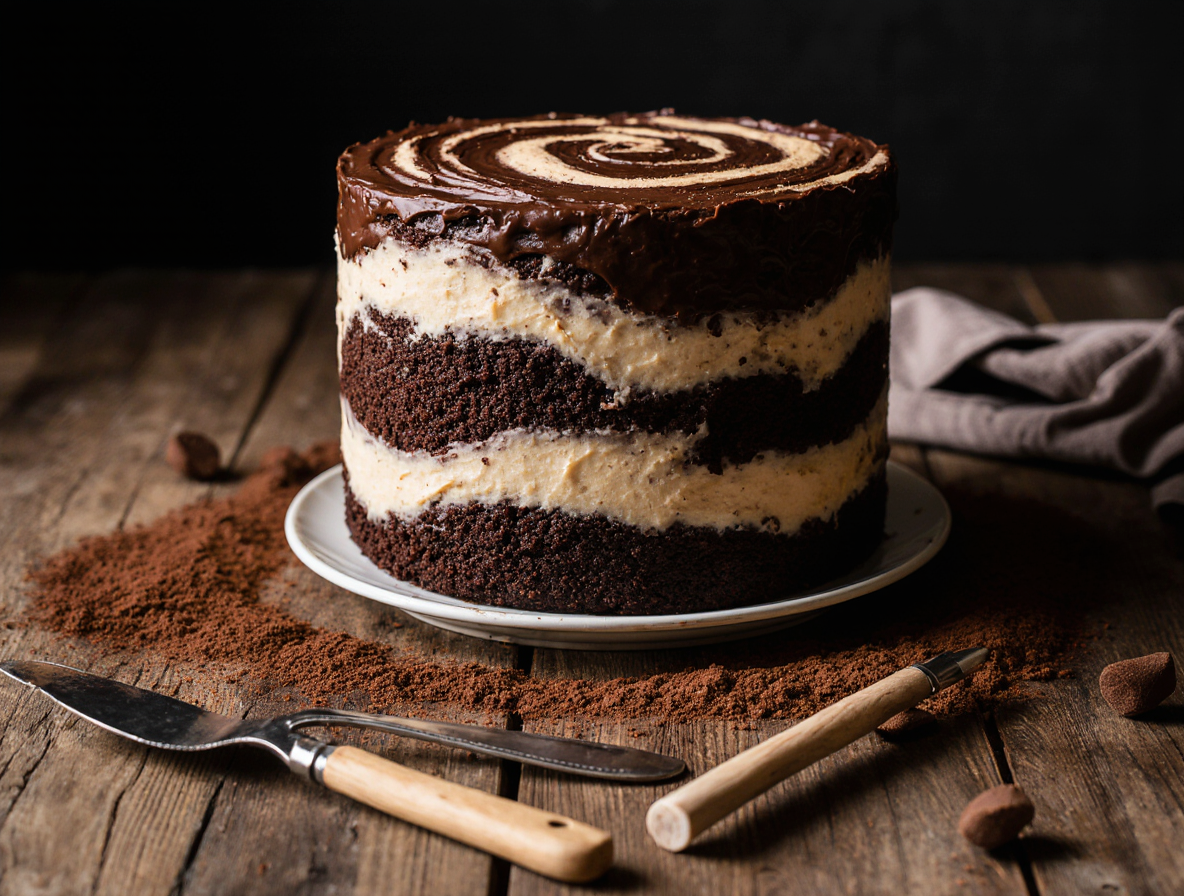
Chocolate and vanilla swirl cake is the ultimate crowd-pleaser, combining two beloved flavors in a beautiful, marbled masterpiece. There’s something undeniably festive and appealing about cutting into a cake and revealing those perfect swirls of vanilla and chocolate blending together. Surprisingly, this impressive-looking dessert is shockingly easy to make and tastes as good as it looks!
When I first attempted to make a chocolate vanilla swirl cake, I worried the process would be complicated. However, I discovered that mastering how to swirl cake batter properly is simpler than it appears. The trick lies in finding the balance—not under-swirling (which creates a spotted pattern) or over-swirling (which results in a muddy appearance). In this beginner-friendly guide, we’ll walk through everything you need to know about how to make a chocolate and vanilla swirl cake from scratch. From selecting the right ingredients to perfecting that signature marble pattern, I’ll share all the techniques that will help you create a moist, fluffy cake that’s both impressive and delicious.
Choosing the Right Ingredients for a Balanced Flavor
The secret to creating the perfect chocolate and vanilla swirl cake begins with selecting quality ingredients that complement each other. Getting this foundation right means your cake will have balanced flavors where neither chocolate nor vanilla overpowers the other.
Butter vs. oil: what works best
Butter and oil serve different purposes in cake recipes. Butter primarily delivers rich flavor but can sometimes result in a denser cake. Oil, meanwhile, creates a reliably moister texture since it remains liquid at room temperature. For chocolate and vanilla swirl cakes, I’ve found a combination often works best—using butter for its superior flavor while adding some oil for moisture. This combination gives you the melt-in-your-mouth texture from butter coupled with the moisture retention from oil. In recipes with bold flavors like chocolate, oil sometimes works better as butter can compete with other flavors.
Why buttermilk makes a difference
Buttermilk acts as a tenderizer in cakes, creating remarkably moist textures. Additionally, it adds a subtle tangy background flavor that balances the sweetness of your cake. For chocolate and vanilla swirl cakes, buttermilk helps both batters rise properly while giving them a soft, tender crumb. If you don’t have buttermilk on hand, you can make a substitute by adding 1 tablespoon of lemon juice or white vinegar to a cup of milk and letting it sit for about 10-15 minutes.
Using real chocolate vs. cocoa powder
This choice significantly impacts your cake’s flavor profile. Cocoa powder generally provides a more concentrated, bold chocolate flavor, while real chocolate contributes roundness from its cocoa butter content. In thorough testing, cakes made with only unsweetened chocolate had a milder, well-rounded flavor but lighter color. Cakes made with only cocoa powder featured deeper color and more intense chocolate flavor. Interestingly, the best results came from using both—combining unsweetened chocolate and cocoa powder creates the ideal balance of intensity, richness, and depth.
Cake flour vs. all-purpose flour
The protein content in flour directly affects your cake’s texture. Cake flour contains around 6-8% protein compared to all-purpose flour’s 10-12%. This lower protein content means less gluten forms during mixing, resulting in a finer, more tender crumb. For vanilla portions of your swirl cake, cake flour creates that delicate, soft texture characteristic of great vanilla cake. Nevertheless, chocolate portions often benefit from all-purpose flour’s slightly higher protein content, especially since they already contain cocoa powder—a very fine ingredient that can make cakes too delicate.
How to Make a Chocolate and Vanilla Swirl Cake
Creating a perfect chocolate and vanilla swirl cake requires following a sequence of simple steps. Let me walk you through the process that yields beautiful marble patterns and balanced flavors.
Step 1: Prepare your pans and preheat the oven
First, preheat your oven to 350°F (175°C). This temperature works perfectly for most swirl cakes. For pan preparation, you have three effective options: grease and flour, grease with parchment paper lining, or use a baking spray with flour. My favorite method is spraying the sides with cooking spray and fitting a parchment circle on the bottom—this ensures your cake releases cleanly every time. Remember to prepare your pans before mixing the batter to avoid letting the batter sit too long.
Step 2: Make the vanilla base batter
Begin by creaming butter and sugar until light and fluffy (about 2-4 minutes). Next, add eggs one at a time, beating well after each addition. Add vanilla extract and mix thoroughly. In a separate bowl, combine your dry ingredients. Alternate adding dry ingredients and buttermilk to the butter mixture, starting and ending with the dry ingredients. Mix just until combined—overmixing develops too much gluten, resulting in a tough cake.
Step 3: Create the chocolate batter from the base
Take approximately one-third of your vanilla batter and place it in a separate bowl. Add 1/4 to 1/2 cup of unsweetened cocoa powder to this portion. For deeper chocolate flavor, mix cocoa powder with 2 tablespoons of hot water or coffee before adding it to the batter. This “blooms” the cocoa, intensifying its flavor. Add 1-2 tablespoons of extra sugar and a splash of milk to balance the bitterness and maintain moisture.
Step 4: Layer and swirl the batters
Alternate spoonfuls of vanilla and chocolate batters in your prepared pans. Some bakers prefer a checkerboard pattern, while others simply dollop randomly. Once all batter is used, take a butter knife and gently swirl through the batters. Draw the knife in both horizontal and vertical lines using one continuous motion. Important: don’t over-swirl or you’ll lose the distinct marbling effect.
Step 5: Bake and test for doneness
Bake for approximately 30-35 minutes. Your cake is done when: a toothpick inserted comes out with a few moist crumbs (not wet batter); the sides pull slightly away from the pan; the cake springs back when lightly touched; and it smells fragrant. Let cool in pans for 10-15 minutes before inverting onto a cooling rack.
How to Swirl Cake Batter Like a Pro
The art of swirling batters is what transforms a basic cake into a stunning marble masterpiece. Creating those perfect swirls isn’t just about random mixing—it requires technique and precision.
Checkerboard layering technique
For perfect marbling, start with a strategic layering approach. Create a checkerboard pattern by alternating dollops of vanilla and chocolate batters across the bottom of your pan. Then, add a second layer, placing chocolate batter over the first layer’s vanilla and vice versa. This foundation creates much better marbling than random dolloping because it distributes both batters evenly throughout the cake. Some bakers even extend this to three layers for more complex patterns.
Using the right tool for swirling
Forget the knife! Although many recipes suggest using a knife or spatula, these tools are actually too thin and often create wispy, uneven swirls. Instead, opt for something thicker like the handle end of a wooden spoon or a skewer for deeper, more substantial swirls. These tools displace more batter, creating those beautiful, defined swirls that make marble cakes so appealing.
How much swirling is too much?
The perfect swirl exists in a delicate balance. Too little swirling creates a spotted “bovine” look rather than elegant marbling; too much produces a muddy, blended appearance. Aim for just 3-4 deliberate swirling motions. I recommend making three big horizontal swirls across the pan, then three in the opposite direction. Finish with one large Z-shaped swirl from top to bottom. Be decisive with your movements—hesitation creates messy patterns.
Common swirl mistakes to avoid
The most frequent mistake is over-swirling, which results in a single-colored, muddled cake rather than distinct marbling. Additionally, many bakers use the wrong swirling pattern—random zigzags instead of deliberate, structured movements. Another error is neglecting to reach the bottom of the pan while swirling, resulting in uneven marbling throughout the cake. Finally, inconsistent batter consistency makes proper swirling impossible—both batters must have similar textures to swirl properly.
Frosting, Glazing, and Storing Your Swirl Cake
After perfecting your chocolate and vanilla swirl cake, the final touches of frosting and glazing will elevate it to bakery-quality status. Proper storage techniques subsequently ensure your masterpiece stays fresh and delicious for days.
Best frosting options for swirl cakes
For chocolate and vanilla swirl cakes, several frosting options complement the dual flavors perfectly. American buttercream offers sweet simplicity and holds up well at room temperature for 2-3 days. Swiss meringue buttercream provides a less sweet, silkier alternative that works beautifully for more elegant presentations. Cream cheese frosting adds a tangy note that balances the cake’s sweetness, making it an excellent choice for those who prefer less sugary options.
Chocolate ganache creates a rich, glossy finish that enhances the chocolate elements of your swirl cake. For those seeking lighter options, both vanilla and chocolate whipped cream frostings work wonderfully, though these require refrigeration.
How to make a simple chocolate glaze
A simple chocolate glaze adds sophistication to your swirl cake with minimal effort. In a small saucepan over low heat, melt 5 tablespoons of butter with 6 tablespoons of cocoa powder. Once smooth, remove from heat and stir in 1 cup of confectioners’ sugar plus ¾ teaspoon vanilla extract. Gradually add hot water, one teaspoon at a time, until reaching your desired consistency. The glaze should be thick enough to stay on top yet thin enough to drip slightly down the sides.
Storage tips to keep your cake moist
Frost your cake immediately after cooling to seal in moisture. For unfrosted cakes, wrap tightly in plastic wrap followed by aluminum foil to prevent air exposure. Frosted cakes can remain at room temperature (covered with a cake dome) for up to three days. Once cut, press plastic wrap against exposed cake surfaces to prevent drying.
Freezing and reheating tips
For optimal results, freeze cake layers before frosting and make the frosting fresh on assembly day. Properly wrapped unfrosted cakes maintain quality in the freezer for up to 2 months, whereas frosted cakes should be limited to 1 month. To freeze a frosted cake, place it uncovered in the freezer until firm (about 2 hours), then wrap in plastic wrap and foil. When ready to serve, thaw overnight in the refrigerator while still wrapped, then let stand at room temperature for 1-2 hours before serving.
Conclusion
Mastering the art of chocolate and vanilla swirl cake ultimately comes down to balance and technique. Throughout this guide, we’ve seen how seemingly small details—from choosing the right combination of fats to the number of swirls you make—significantly impact your final creation.
Your first attempt might not yield bakery-perfect results, though practice will certainly improve your skills. Remember that both under-swirling and over-swirling represent common pitfalls that many bakers face. After following the checkerboard layering technique and using the proper swirling tool, you’ll likely achieve those beautiful marble patterns that make this cake so special.
Beyond the visual appeal, this cake stands out because it satisfies different flavor preferences simultaneously. Consequently, it makes an excellent choice for gatherings where you want to please everyone without making multiple desserts.
The beauty of this recipe lies in its adaptability. You can pair it with various frostings depending on the occasion or personal taste. Additionally, proper storage techniques ensure your cake remains moist and delicious for days—if it lasts that long!
While chocolate and vanilla swirl cake might look impressive, you now know it doesn’t require professional baking skills. Armed with the techniques and tips from this guide, you have everything needed to create this classic dessert that tastes as good as it looks. Give it a try—your friends and family will undoubtedly be impressed by both your baking skills and the beautiful marbled masterpiece you’ve created.
FAQs
Q1. How do I achieve the perfect swirl in a chocolate and vanilla cake? To create the perfect swirl, use a checkerboard layering technique and swirl with the handle of a wooden spoon or a skewer. Make 3-4 deliberate swirling motions, including horizontal and vertical swirls, followed by a large Z-shaped swirl from top to bottom.
Q2. What’s the best type of flour to use for a chocolate and vanilla swirl cake? For the best texture, use cake flour for the vanilla portions and all-purpose flour for the chocolate portions. Cake flour creates a delicate, soft texture for vanilla, while all-purpose flour provides better structure for the chocolate parts.
Q3. Can I freeze a chocolate and vanilla swirl cake? Yes, you can freeze the cake. For best results, freeze unfrosted cake layers for up to 2 months. If freezing a frosted cake, limit freezing time to 1 month. Always wrap the cake tightly in plastic wrap and foil before freezing.
Q4. What’s the secret to keeping a swirl cake moist? To keep your swirl cake moist, frost it immediately after cooling to seal in moisture. For unfrosted cakes, wrap tightly in plastic wrap and aluminum foil. Once cut, press plastic wrap against exposed surfaces to prevent drying.
Q5. What’s the best frosting for a chocolate and vanilla swirl cake? Several frostings complement chocolate and vanilla swirl cakes well. American buttercream is a classic choice, while Swiss meringue buttercream offers a silkier texture. Cream cheese frosting provides a tangy balance, and chocolate ganache enhances the chocolate elements of the cake.