The Perfect Black Forest Cake Roll: Secret Baker’s Method Revealed
The black forest cake roll took me nine separate recipe tests to perfect. After countless batches and adjustments, I’ve finally mastered this stunning dessert that combines a light chocolate sponge with cherry compote and cream filling. Indeed, this recipe is something I’m extremely proud of—not overly complicated to make, yet visually impressive.
Our black forest roll cake (sometimes called a black forest roulade or black forest swiss roll) creates the perfect harmony of chocolate, cherries, and cream. The traditional combination features a chocolate cake roll filled with fresh cream and cherries, often enhanced with cherry liqueur for authentic flavor. Furthermore, this showstopping black forest roll is both an eye-catching centerpiece and a delicious dessert that’s sure to impress your guests. In this guide, I’ll share all my hard-earned secrets for creating the perfect black forest cake roll recipe from scratch.
The foundation: mastering the chocolate sponge
A chocolate genoise sponge forms the essential foundation of any successful black forest cake roll. Unlike standard cakes, getting this delicate base right requires understanding specific techniques that make all the difference between a perfect spiral and a cracked disappointment.
Why genoise sponge is ideal for a black forest roll cake
Genoise, an Italian sponge cake named after the city of Genoa, offers distinct advantages for roll cakes. Unlike other cake varieties, genoise doesn’t require separating egg whites from yolks, making the initial preparation simpler. Additionally, its remarkably flexible texture allows it to be rolled without cracking – a crucial quality for any successful roulade. Perhaps most importantly, genoise acts like a true sponge, absorbing cherry syrup beautifully while maintaining its structure. This quality creates the perfect balance with light, airy whipped cream filling, resulting in that signature black forest texture.
Getting the ribbon stage right
The ribbon stage represents the most critical step in creating your black forest roll cake. This stage occurs when:
- Your egg-sugar mixture becomes so thick it falls from the beater like a ribbon, leaving a visible trail on the surface for several seconds
- The mixture triples in volume and turns noticeably pale
- The consistency becomes foamy and aerated
Achieving this stage typically requires 8-9 minutes of continuous beating. Essentially, the ribbon stage creates the foundation for your cake’s structure, particularly since genoise relies primarily on whipped eggs rather than chemical leaveners for its rise.
Sifting and folding: preserving air in the batter
After achieving the perfect ribbon stage, maintaining those air bubbles becomes your primary focus. Consequently, sifting dry ingredients is non-negotiable – first to remove lumps, then again as you add them to your egg mixture. Rather than dumping everything at once, add dry ingredients gradually in 5-6 small batches.
When folding, use a specific motion: cut through the center with your spatula, scrape along the bottom, then gently fold over the top. Generally, this should be done in a large bowl using a flexible silicone spatula. Stop folding the moment ingredients are combined to preserve as much air as possible.
Avoiding overbaking and dryness
Chocolate genoise can go from perfectly moist to disappointingly dry in just 30 seconds. Accordingly, the typical baking time hovers around 10-15 minutes, but visual cues matter more than timers. Test for doneness by gently pressing the center – the cake should spring back immediately. Although slightly underbaking is preferable to overbaking (you can always return an underbaked cake to the oven), once overbaked, there’s no recovery.
For extra moisture insurance, consider substituting oil for butter in your recipe. The oil creates a moister crumb that maintains flexibility after cooling – crucial for that perfect black forest roll.
Rolling secrets: how to avoid cracks and breaks
The rolling technique often determines whether your black forest cake roll becomes a stunning spiral or a cracked disappointment. Mastering this crucial skill requires understanding several key principles that professional bakers rely on.
Pre-rolling while warm
Rolling your black forest cake while it’s still hot is absolutely critical for success. Fresh from the oven, the cake maintains maximum flexibility, which helps “train” it to hold its spiral shape. In fact, this pre-roll step ensures the cake remains pliable enough to roll seamlessly with fillings later without breaking into pieces. Moreover, this initial roll creates a physical memory in the cake structure, making the final assembly significantly easier.
Using parchment or tea towels effectively
Before your cake even leaves the oven, prepare a clean dish towel or parchment paper dusted generously with powdered sugar or cocoa powder. This preparation prevents the hot cake from sticking to itself or the rolling surface. Subsequently, turn your hot cake onto this prepared surface, peel off the baking paper, and immediately begin the rolling process. Primarily, the powdered sugar or cocoa powder creates a barrier between the cake and towel, ensuring a clean release later.
Making the first roll count
Start rolling from one short end, moving slowly and deliberately. The initial roll is especially important—begin by folding the edge of the towel over the top portion of the cake, then continue rolling tightly but gently. Oftentimes, cracks occur due to rushing this process. Roll gradually, applying even pressure throughout. Naturally, some minor cracks may still appear—this is normal even for professional bakers.
Cooling before final assembly
Once rolled, place your cake (still in its towel) on a cooling rack for 1-3 hours at room temperature. Notably, refrigerating the rolled cake can cause it to become brittle and tear when unrolled. Upon cooling completely, your black forest roll cake will maintain its shape, ready for the luscious cherry and cream filling that awaits in the next step.
The perfect filling: cream, cherries, and balance
Creating the perfect filling for your black forest cake roll requires precision and balance between the cream and cherries. First of all, these components transform your chocolate sponge from ordinary to extraordinary.
Whipping cream to stiff peaks
The secret to a stable black forest roll cake filling starts with properly whipped cream. Chill your mixing bowl and beaters in the refrigerator for at least 15-20 minutes before beginning. Using cold equipment helps the cream whip faster and hold its shape longer. Pour cold heavy whipping cream into your chilled bowl, add powdered sugar (about 1/4 cup per 2 cups of cream), and 1/2 teaspoon vanilla. Beat at high speed until stiff peaks form – this happens when the cream holds its shape and the peaks stand straight up when beaters are lifted. Above all, be careful not to overwhip, as the cream will become grainy and eventually turn into butter.
Draining cherry pie filling or making compote
For an authentic black forest swiss roll, homemade cherry compote offers superior flavor compared to canned options. To make your own, pit fresh cherries (leaving about 10 whole for decoration), halve them, then combine with sugar, lemon juice, and cornstarch in a saucepan. Bring to a boil over medium-high heat, thereafter reduce heat and simmer for about 5 minutes until thickened. If using canned cherries, drain thoroughly but reserve 1/4 cup of the juice for added flavor. Primarly, the goal is creating a thick filling that won’t seep through your cake layers.
Using kirsch or cherry syrup for flavor
Traditional black forest roll recipes call for kirsch (cherry liqueur) to enhance flavor. Add 3-4 tablespoons of kirsch to your cooled cherry compote. For an alcohol-free version, make cherry syrup by cooking reserved cherry juice with sugar until reduced by half. Next, brush this syrup generously on your cake layers before adding cream and cherries. This step ensures moisture and intensifies the cherry flavor throughout your black forest cake roll recipe.
Layering for even distribution
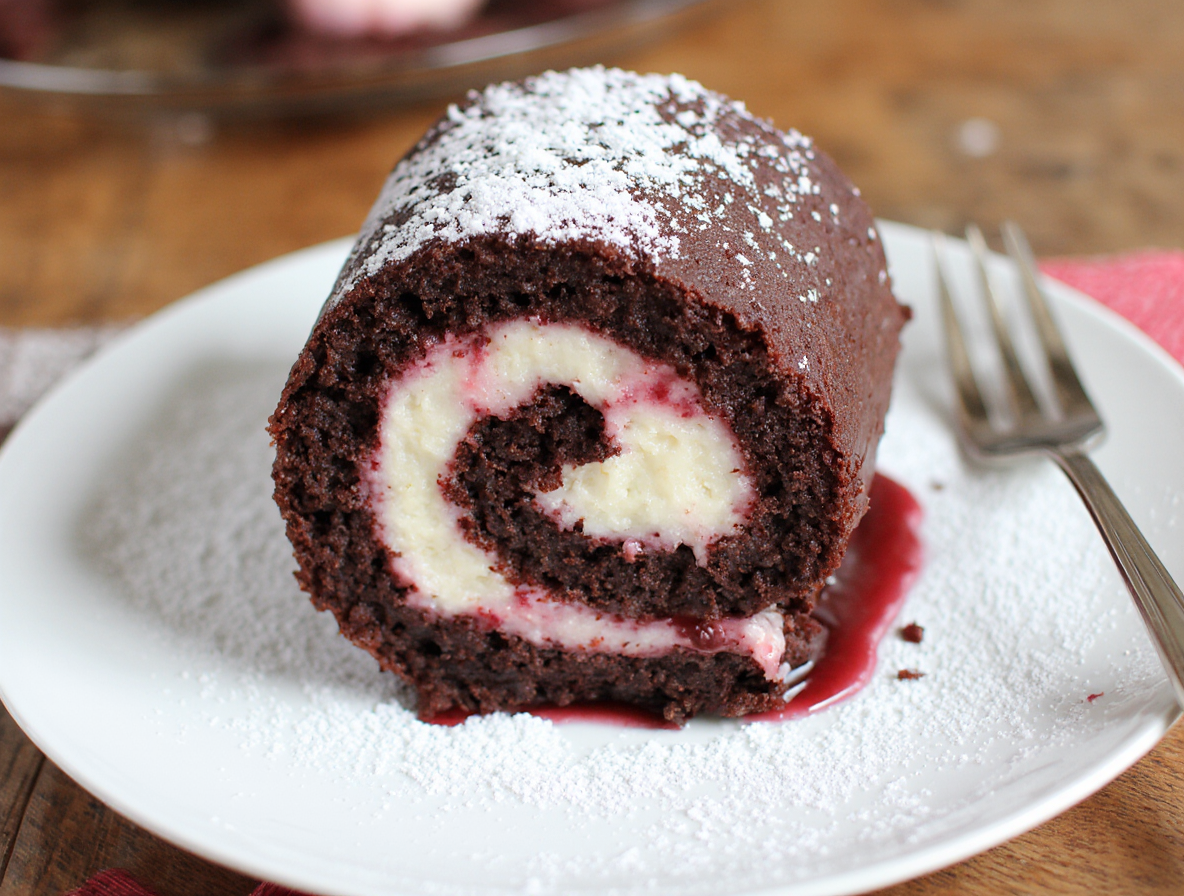
Perfect assembly begins with unrolling your pre-rolled sponge. Spread a thin layer of whipped cream first, which creates a barrier preventing cherry juice from discoloring the cake. Pipe a ring of whipped cream around the edge, acting as a dam to hold the cherry filling. Spoon cherry filling inside this border, distributing evenly. Finally, add another layer of cream over the cherries before re-rolling the cake. This technique ensures every slice of your black forest swiss roll contains the perfect balance of chocolate cake, cream, and cherries.
Assembling and decorating your black forest cake roll
Now comes the exciting part where your black forest cake roll takes its final form. The assembly process requires patience but rewards you with that classic swirled appearance that makes this dessert so impressive.
Unrolling and layering the filling
Once your cake has completely cooled, carefully unroll it from the towel or parchment paper. Don’t worry if the cake remains slightly curled at the ends—this is completely normal. Gently unroll until the cake lies relatively flat without forcing it completely flat, which could cause breakage. Prior to adding fillings, consider brushing the surface with cherry syrup or kirsch to add moisture and flavor.
Spread your whipped cream evenly across the surface, leaving approximately a 1/2-inch border on all sides to prevent overflow. For the classic black forest roll, apply the cream in a layer about 1/2-inch thick. Next, distribute your drained cherries evenly over the cream, occasionally setting aside a few cherries for decoration.
Final roll and seam placement
Begin re-rolling from the same short end where you started your initial roll. Roll slowly and deliberately, using the parchment paper or towel to guide your movement. Throughout this process, gently peel away the paper as you progress. The key is rolling tightly enough to create a beautiful spiral without squeezing out the filling.
Once completely rolled, position your black forest swiss roll with the seam side down on your serving platter. This placement both stabilizes the roll and creates a more attractive presentation. Oftentimes, trimming 1/2 inch from each end with a serrated knife creates cleaner edges that showcase the beautiful spiral inside.
Ganache or whipped cream topping
For a traditional black forest cake roll recipe, coat the exterior with additional whipped cream. Alternatively, prepare a rich chocolate ganache by pouring hot cream over chopped chocolate and stirring until smooth and glossy. Once slightly cooled, pour or spread this ganache over your roll cake for an elegant finish.
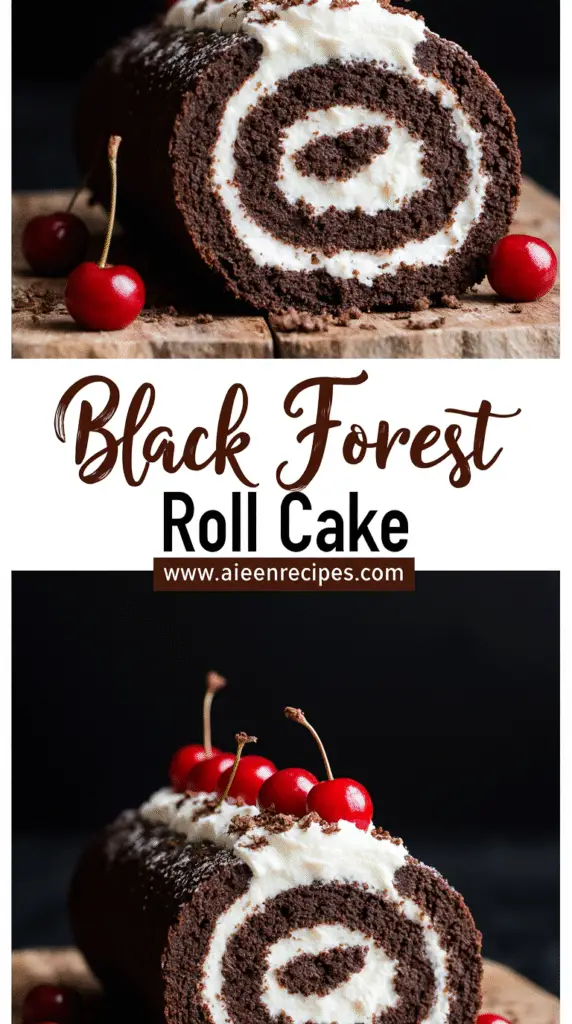
Adding chocolate shavings and cherries
Complete your black forest roulade with decorative elements. Sprinkle chocolate shavings or curls over the surface for both visual appeal and textural contrast. Pipe remaining whipped cream into rosettes along the top of the cake roll, then crown each rosette with a fresh cherry. For added polish, lightly dust with powdered sugar just before serving.
Conclusion
After countless hours of testing and refining, this black forest cake roll stands as a testament to patience and precision in baking. Throughout this guide, I’ve shared all the secrets I discovered during my journey to perfect this classic dessert. Most importantly, mastering the genoise sponge creates the foundation for success—its flexible texture absorbs cherry flavors while maintaining the structural integrity needed for rolling.
Certainly, the rolling technique might seem intimidating at first, but with the pre-rolling method I’ve outlined, you’ll achieve that beautiful spiral without frustrating cracks. Additionally, balancing the cream and cherry components ensures every bite delivers the perfect flavor combination that makes black forest cake so beloved.
Above all, remember that patience pays off when creating this showstopper. The careful attention to detail—from achieving the ribbon stage in your batter to the final decorative touches with chocolate shavings and cherries—makes this dessert truly special. Though it requires several steps, each one builds toward an impressive result that will leave your guests amazed.
Now that you have all my hard-earned tips and techniques, you’re ready to create your own perfect black forest cake roll. The combination of rich chocolate, tart cherries, and light cream creates a dessert that’s not just visually stunning but also incredibly delicious. Therefore, gather your ingredients, follow these tested methods, and enjoy the satisfaction of mastering this classic rolled dessert. Your black forest cake roll will undoubtedly become a signature bake you’ll be proud to share for years to come.
FAQs
Q1. What are the key ingredients for a Black Forest Cake Roll? A Black Forest Cake Roll typically consists of a chocolate genoise sponge, whipped cream, cherry filling, and kirsch (cherry liqueur) for flavoring. It’s often decorated with chocolate shavings and cherries on top.
Q2. How can I prevent my cake roll from cracking? To prevent cracking, roll the cake while it’s still warm from the oven. Use a clean dish towel or parchment paper dusted with powdered sugar, and roll slowly and gently from one short end. This “pre-rolling” helps train the cake to hold its shape.
Q3. What’s the secret to a moist Black Forest Cake Roll? The key to moisture is in the preparation and assembly. Brush the cake with cherry syrup or kirsch before adding the filling. Also, consider using oil instead of butter in the cake batter for a moister crumb that maintains flexibility after cooling.
Q4. How do I achieve the perfect whipped cream for my cake roll? For stable whipped cream, chill your mixing bowl and beaters before starting. Use cold heavy whipping cream and beat it with powdered sugar and vanilla until stiff peaks form. Be careful not to overwhip, as this can make the cream grainy.
Q5. What’s the best way to assemble a Black Forest Cake Roll? Start by unrolling the cooled pre-rolled cake. Spread a thin layer of whipped cream, then pipe a border of cream around the edge. Fill with cherry compote, add another layer of cream, and carefully re-roll the cake. Place it seam-side down on your serving platter and decorate with more cream, chocolate shavings, and cherries.