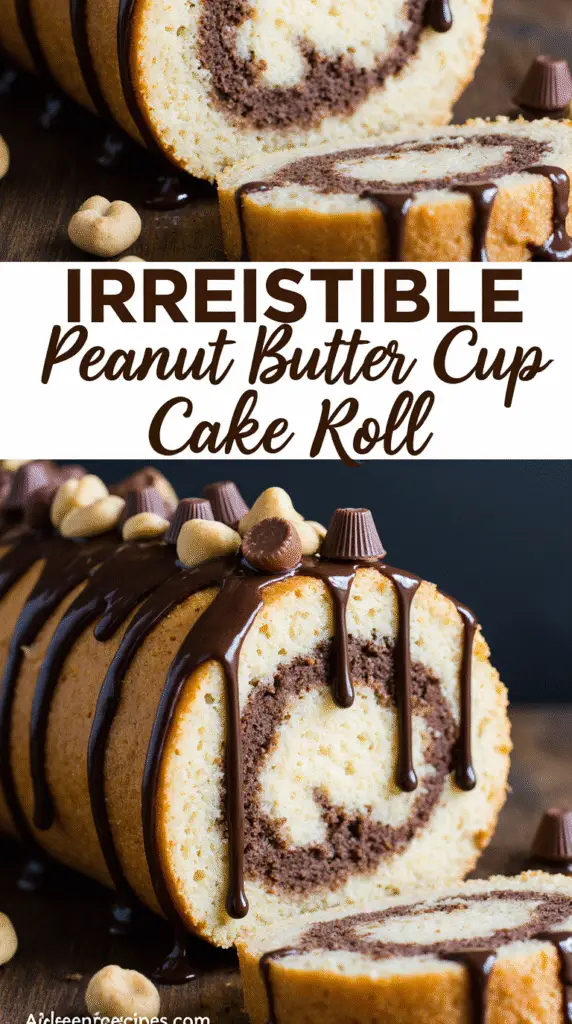
The Secret to Perfect Chocolate Peanut Butter Roll: A Baker’s Guide
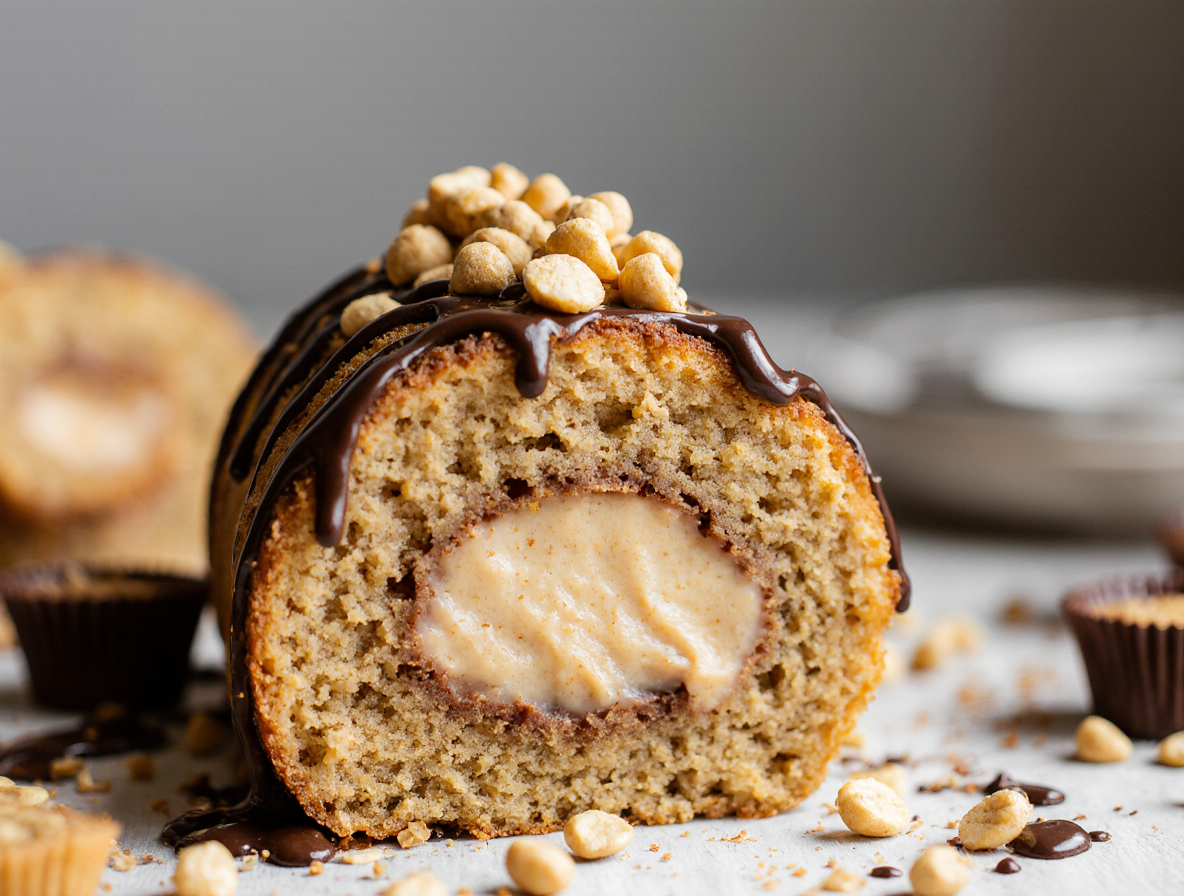
Chocolate peanut butter roll combines two of the most beloved flavors into one show-stopping dessert that’s surprisingly achievable. Despite looking complex, this rich chocolate cake filled with creamy peanut butter filling bakes in just 10-15 minutes and delivers all the flavors of a peanut butter cup in cake form.
In fact, making a chocolate peanut butter roll cake requires just one special piece of equipment: a 10×15 jelly roll pan. Once you have the right pan, the process becomes straightforward. Furthermore, this peanut butter cake roll offers impressive versatility—you can make it ahead and chill it for up to two days before frosting, or even freeze the unfrosted cake for up to a month or three months. With each slice containing the perfect balance of chocolate sponge cake and whipped peanut butter filling topped with chocolate ganache, I’m excited to guide you through creating this indulgent chocolate peanut butter swiss roll from start to finish.
Choosing the Right Tools and Ingredients
The foundation of a flawless chocolate peanut butter roll begins with having the right equipment and quality ingredients at your fingertips. Unlike ordinary cakes, roll cakes require specific tools and techniques to achieve that perfect spiral without cracks or tears.
Essential tools for cake roll success
A stand mixer with a whisk attachment is invaluable for achieving the proper volume in your egg whites, which need to be whipped to medium peaks. Additionally, you’ll need a clean, dry mixing bowl free from any oil residue when whipping egg whites. A fine mesh sieve or sifter is essential for combining the dry ingredients, helping to aerate the flour and cocoa powder while removing lumps.
For handling the delicate cake, you’ll need two offset spatulas—these versatile tools help spread filling evenly and assist with decorating. A bench scraper (also called a cake smoother) is crucial for achieving smooth sides and sharp edges. Finally, invest in a digital scale—certainly one of the best $10 investments you can make—as it ensures consistent results by providing precision that cup measurements simply cannot match.
Best type of pan for even baking
The most critical piece of equipment for your chocolate peanut butter roll is unquestionably the right pan. A jelly roll pan (10×15-inch) is absolutely necessary for this recipe. Some bakers prefer a slightly larger 12×17-inch half sheet pan, which produces a thinner cake that bakes in just 7-10 minutes.
Look for pans made of aluminum rather than dark metal, as aluminum heats up and cools quickly, allowing layers to bake evenly. Line your pan with parchment paper, then grease and flour it to ensure your delicate cake releases perfectly. This preparation step is essential—even expert bakers consider it standard procedure for any cake roll.
Recommended ingredients for flavor and texture
For the chocolate sponge, either cake flour or all-purpose flour works well. Cake flour has a lower protein content (6-8%) which creates a softer texture than all-purpose flour. When selecting peanut butter, unless specified otherwise, traditional processed varieties (like Jif or Skippy) generally perform better in baking than natural peanut butter.
Heavy cream with a minimum milk fat content of 36% produces the most stable whipped cream for your filling. To further enhance stability, many professional bakers add unflavored gelatin powder to prevent the cake from sagging. For chocolate elements, remember that higher cacao content results in a richer, darker flavor profile in ganache and other toppings.
Step-by-Step: Making the Chocolate Peanut Butter Roll
Creating the perfect chocolate peanut butter roll comes down to mastering a few key techniques. The magic happens in the precise execution of each step, from baking to rolling to filling. Let’s break down the process into manageable parts.
1. Preparing the chocolate sponge cake
The foundation of any great chocolate peanut butter roll begins with properly whipped eggs. Beat your eggs for 3 minutes until frothy and pale. Gradually add sugar and continue beating for 4-5 minutes until the mixture triples in volume and becomes thick and billowy like marshmallow fluff.
Next, sift together your dry ingredients—flour, cocoa powder, and baking powder—to remove lumps and incorporate air. When combining wet and dry ingredients, use gentle folding motions to maintain the air in your batter. Spread the batter evenly in your prepared jelly roll pan and bake at 350°F for 10-12 minutes, until the top springs back when touched.
2. Rolling the cake while warm
Timing is crucial in this stage. After removing the cake from the oven, let it cool for just 2-3 minutes. Meanwhile, prepare a clean kitchen towel dusted with cocoa powder.
Subsequently, run a knife along the edges of the pan to loosen the cake. Immediately invert the warm cake onto your prepared towel, gently peel off the parchment paper, and begin rolling from one short end. Don’t worry about rolling too tightly—gentle is better. This initial rolling “trains” the cake to hold its shape later.
3. Making the peanut butter filling
As your rolled cake cools completely, prepare the filling. For a classic peanut butter filling, mix peanut butter with powdered sugar until well combined. Add softened butter and vanilla extract for richness.
Alternatively, create a mousse-like filling by beating heavy cream until stiff peaks form, then folding it into your peanut butter mixture. The addition of cream cheese can provide a pleasant tanginess that balances the sweetness.
4. Unrolling and filling the cake
Once the cake has cooled completely, carefully unroll it. Don’t force it to lie completely flat—some curvature at the end is natural. Spread your peanut butter filling evenly across the surface, leaving a small border (about ½ inch) around the edges.
Notably, add more filling along the short edge that will be rolled first to prevent cracking due to gaps between folds.
5. Re-rolling and chilling before topping
Starting with the same short end you initially rolled, carefully re-roll the cake without the towel. If small cracks appear, don’t panic—they’ll be covered by your topping later.
Wrap your assembled roll in plastic wrap and refrigerate for at least 1-2 hours. This crucial chilling period allows the filling to set, preventing it from squishing out when sliced. For an even rounder shape, wrap the roll in a second piece of plastic wrap and gently roll it on your counter.
Topping It Off: Ganache and Decorations
The final flourish that elevates your chocolate peanut butter roll from delicious to spectacular is a glossy chocolate ganache topping complemented by eye-catching decorations. This finishing touch not only adds visual appeal but also introduces another layer of rich chocolate flavor.
How to make smooth chocolate ganache
A perfect ganache requires just two quality ingredients: chocolate and heavy cream. For the best results, use real chocolate bars rather than chips, as chips contain stabilizers that prevent proper melting. Chop the chocolate into fine pieces to ensure quick, even melting.
Begin by warming heavy cream in a saucepan until you see small bubbles forming around the edges—never let it boil. Pour the hot cream over your chopped chocolate and allow it to sit undisturbed for 3-5 minutes. Afterward, gently stir until completely smooth. For extra glossiness, consider adding a teaspoon of corn syrup, though this remains optional.
Tips for pouring and spreading ganache
After preparing your ganache, let it cool and thicken slightly—about 10-20 minutes at room temperature or 10 minutes in the freezer. The ideal consistency resembles maple syrup: pourable but not watery.
Place your chilled cake roll on a wire rack positioned over a cookie sheet to catch excess ganache. Starting at the center, pour the ganache in one continuous motion, working outward in a spiral pattern to ensure even coverage. Should ripples form, gently lift and set down the baking sheet to help the ganache settle.
For a thicker topping, wait until the first layer sets, collect the excess, and pour again.
Creative topping ideas with peanut butter cups
Immediately after applying ganache, decorate your chocolate peanut butter roll before the chocolate sets. Chopped peanut butter cups make an obvious yet perfect topping, creating visual interest while reinforcing the flavor profile.
Consider these additional garnishing options:
- Chocolate shavings or curls for elegant contrast
- A drizzle of melted peanut butter for visual pop
- Crushed peanuts for textural variety
- Whipped cream piped along the edges
Refrigerate your decorated roll for 20-30 minutes to set the ganache completely before slicing.
Troubleshooting and Pro Tips
Even masterful bakers encounter challenges when creating a chocolate peanut butter roll. Mastering this dessert involves overcoming common hurdles that can make the difference between a showstopper and a disappointment.
Avoiding cracks in your cake roll
The secret to a crack-free chocolate peanut butter roll begins with proper baking. Never overbake your cake—it should be just set and springy to the touch, as overbaking leads to dry, brittle cake that cracks easily. Rolling the cake while still warm is essential; this “trains” the cake to remember its shape. Nevertheless, be gentle and roll slowly to minimize stress on the sponge.
For thinner cakes that resist cracking, consider using a 12×17-inch half sheet pan instead of a 10×15-inch pan. Moreover, allow your cake to cool at room temperature after the initial rolling—chilling it can increase cracking when you unroll it to add filling.
Fixing common filling issues
Should your chocolate peanut butter roll crack despite your best efforts, don’t panic! Simply press the broken pieces together, using the peanut butter filling as “glue” to repair gaps. Consequently, once covered with ganache, those imperfections become invisible.
For filling that seems too runny, refrigerate it briefly before spreading. Accordingly, avoid overfilling, especially near edges, which can cause squeezing out during re-rolling.
Make-ahead and freezing tips
Your chocolate peanut butter swiss roll can be prepared through the filling stage and stored in the refrigerator for up to 2-3 days before adding ganache. Alternatively, the completely assembled cake roll (without ganache) freezes beautifully for up to 2-3 months. Primarily, ensure it’s wrapped tightly in plastic wrap followed by aluminum foil for freezer storage.
How to slice cleanly for presentation
For picture-perfect slices, chill your finished chocolate peanut butter roll for 20-30 minutes before cutting. Dip a thin serrated knife in hot water, wipe it dry, then slice with a gentle sawing motion. Clean your knife between cuts to prevent frosting smears. Firstly, mark your slices before cutting to ensure even portions.
Conclusion
Throughout this guide, we’ve explored every aspect of creating a stunning chocolate peanut butter roll that rivals professional bakery offerings. The process certainly requires attention to detail, yet remains achievable for home bakers willing to follow the crucial steps. Your success hinges primarily on proper preparation—having the right jelly roll pan, maintaining proper temperature control, and handling the cake with care during the rolling process.
Remember that mistakes happen even to experienced bakers. Cracks can be disguised with ganache, and minor imperfections often disappear beneath decorative toppings. After all, the delicious combination of chocolate and peanut butter will surely outshine any small flaws in presentation.
The versatility of this dessert makes it particularly valuable for busy schedules. You can prepare it days ahead for special occasions or freeze it for future enjoyment. Consequently, you’ll always have an impressive dessert ready when unexpected guests arrive.
Practice might be necessary before achieving perfection with this recipe. My first attempt resulted in several cracks, though subsequent tries improved dramatically as I became familiar with the proper techniques. The joy on my guests’ faces when presented with slices of this decadent treat made every effort worthwhile.
Armed with these instructions and troubleshooting tips, you’re now ready to create your own chocolate peanut butter roll masterpiece. This remarkable dessert balances simplicity and sophistication while combining two classic flavors everyone loves. Your friends and family will undoubtedly be impressed, not just by the beautiful spiral pattern but also by the heavenly taste of chocolate cake embracing creamy peanut butter filling topped with glossy ganache.
FAQs
Q1. What type of chocolate works best for a chocolate peanut butter roll? For a balanced flavor, use 70% dark chocolate. This provides the right amount of bitterness to complement the sweetness of the peanut butter filling. Milk chocolate can also be used for a sweeter taste, while higher percentage dark chocolate will result in a more intense, bitter flavor.
Q2. How can I prevent my chocolate roll from sticking when I roll it? To prevent sticking, lightly dust the top of the cake with cocoa powder before rolling. Apply an even, thin layer – not too much, not too little. This will create a barrier between the cake and the towel or parchment paper, allowing for smooth rolling.
Q3. Is it possible to combine melted chocolate and peanut butter? Yes, you can mix melted chocolate and peanut butter. Add the peanut butter to the melted chocolate and stir until smooth and well combined. The mixture will initially appear runny but will reach a perfect spreadable consistency as it cools to room temperature.
Q4. Why are chocolate and peanut butter such a popular flavor combination? Chocolate and peanut butter complement each other perfectly due to their contrasting yet harmonious flavors. The nuttiness of peanut butter adds depth to chocolate’s sweetness, creating a balanced sweet-savory profile. The creamy texture of peanut butter also pairs well with chocolate’s rich, velvety consistency, resulting in a luxurious taste experience.
Q5. What’s the best way to slice a chocolate peanut butter roll for a clean presentation? For clean, attractive slices, chill the finished roll for 20-30 minutes before cutting. Use a thin, serrated knife dipped in hot water and wiped dry. Slice with a gentle sawing motion, cleaning the knife between cuts. For even portions, mark your slices before cutting. This method ensures neat, professional-looking servings.