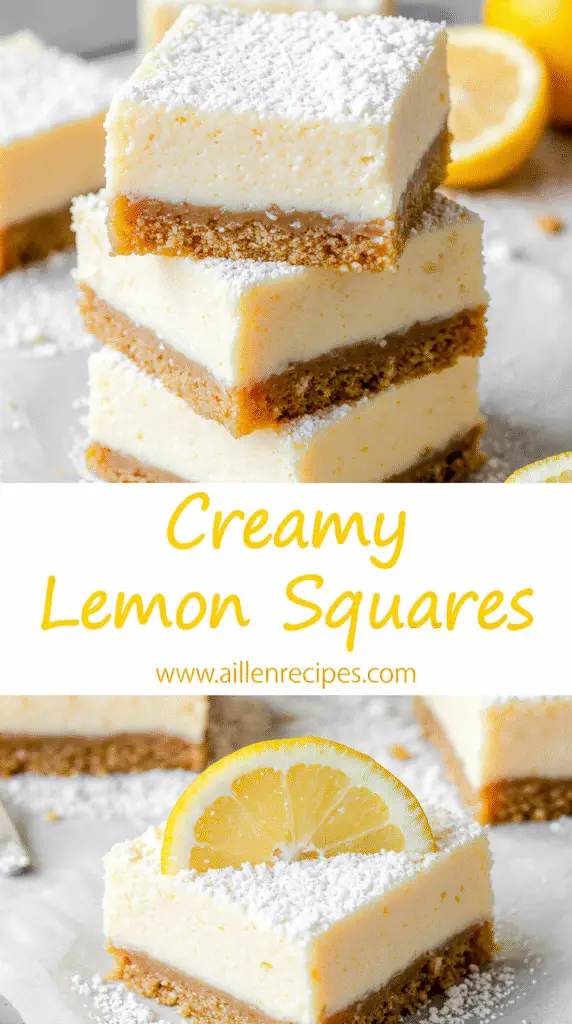
The Secret to Perfect Creamy Lemon Squares (Tested Recipe)
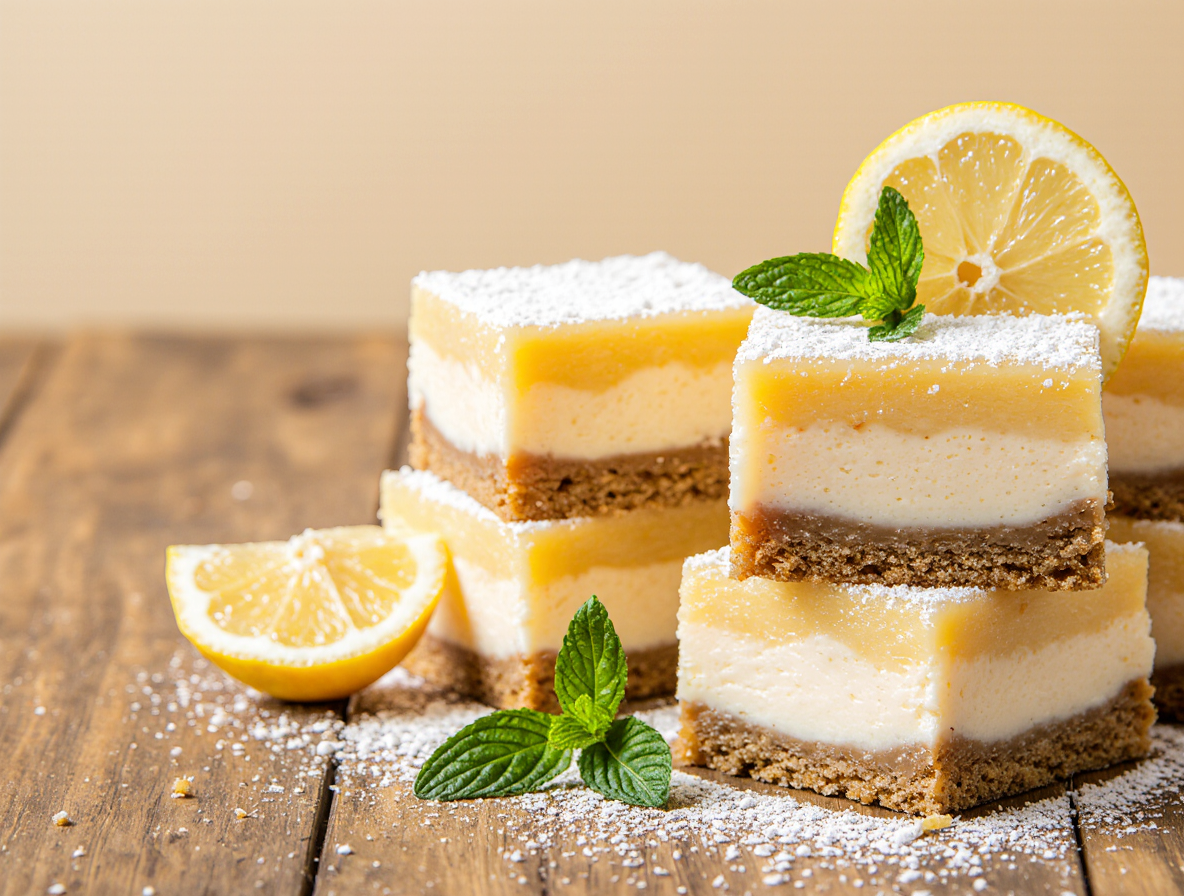
Creamy lemon squares combine a buttery crust with a smooth, tangy filling that satisfies any sweet tooth. It’s no secret that I’m partial to lemon-based desserts, especially if they involve a phenomenal buttery crust. These delightful treats require just 15 minutes of prep time and 45 minutes of baking, but patience is key as they need to chill for at least 4 hours (though overnight is best).
Looking for an easy creamy lemon squares recipe that delivers consistent results? This tested recipe for creamy lemon squares yields 16 perfect portions at just 102 calories per square. The assembly and baking are fairly quick, though the cooling time is significant. If you’re feeling adventurous, this same creamy lemon bars recipe can be transformed into key lime bars by simply substituting the lemons with key limes. Additionally, these versatile treats can be stored in the refrigerator for up to 3 days or frozen for up to 3 months when properly stored.
Essential Ingredients and Tools
The secret to making perfect creamy lemon squares lies primarily in using quality ingredients and having the right tools on hand. Unlike other desserts that can forgive substitutions, lemon squares demand precision for that perfect balance of tangy and sweet.
Key ingredients for creamy lemon squares
Fresh lemons are absolutely non-negotiable for this recipe. Bottled lemon juice simply won’t deliver the bright, vibrant flavor that makes these bars special. You’ll need about 3-4 large lemons for both juice and zest. Furthermore, the type of butter you use matters significantly—unsalted butter gives you control over the salt levels in your dessert.
For the filling, eggs provide structure (without them, you’d have lemon soup!). Some recipes call for whole eggs while others specify egg yolks for a creamier texture. Sugar is crucial not just for sweetness but also for setting the filling properly. Many recipes incorporate flour in both crust and filling, as it helps bind the lemon topping.
Essentially, two main variations exist: traditional lemon bars with egg-based fillings or creamy versions using sweetened condensed milk, which yields a milkier, creamier texture.
Choosing the right crust: graham cracker vs. shortbread
The crust debate generally comes down to two popular options: shortbread or graham cracker. Shortbread crusts typically combine butter, sugar, flour, and sometimes vanilla extract. They provide a cookie-like foundation that contrasts beautifully with the tangy filling.
Meanwhile, graham cracker crusts offer a quicker alternative with a distinctive flavor profile. These generally contain graham cracker crumbs, sugar, and melted butter. Initial taste tests showed that people often prefer a thicker graham cracker crust for more substantial texture.
Shortbread yields a more traditional lemon bar experience, whereas graham cracker creates something closer to a lemon pie bar. Your choice ultimately depends on whether you prefer the buttery, tender bite of shortbread or the sweeter, crumbly texture of graham crackers.
Recommended tools for easy prep and clean cuts
A 9×13-inch glass or metal baking pan serves as the standard vessel for these bars. Lining this pan with parchment paper extending over the sides creates a “sling” that makes removal and cutting significantly easier.
A food processor proves invaluable for quickly turning graham crackers into fine crumbs or mixing shortbread dough. Other essential tools include a zester/grater for capturing the lemon’s aromatic oils, a juicer for efficiently extracting juice, and a sharp knife for clean cuts.
For perfectly neat squares, many chefs recommend dipping your knife in hot water between cuts and wiping it clean each time. An offset spatula or bench scraper helps press crust evenly into the pan.
Step-by-Step: How to Make Creamy Lemon Squares
Step-by-Step: How to Make Creamy Lemon Squares
Making these delectable treats requires attention to detail at each stage. Let’s dive into the process that will reward you with perfectly balanced sweet-tart squares.
1. Preparing the crust
Begin by preheating your oven to 350°F. For a graham cracker crust, pulse 24 graham crackers in a food processor until finely ground. Mix in 4 tablespoons melted butter and ¼ cup sugar until thoroughly combined. Alternatively, for a shortbread crust, mix flour, powdered sugar, and salt, then incorporate cold cubed butter until the mixture resembles coarse crumbs.
Line your 8×8-inch baking pan with parchment paper, leaving overhang on two sides for easy removal later. Press your chosen crust mixture firmly into the bottom of the pan, creating a 1-inch border up the sides for graham cracker crusts. Bake until lightly golden—about 10-12 minutes for graham cracker or 20 minutes for shortbread.
2. Mixing the creamy lemon filling
As the crust bakes, prepare your filling. For traditional creamy lemon squares, whisk egg yolks with sweetened condensed milk until smooth. Add fresh lemon juice (approximately ½-⅔ cup) and 1-2 teaspoons of lemon zest. Whisk until fully combined, being careful not to incorporate too much air.
For extra-creamy texture, beat cream cheese with sugar until well blended before adding eggs, vanilla, and a small amount of flour. Finally, blend in lemon zest and juice.
3. Baking and cooling the bars
Pour your prepared filling onto the hot crust immediately after removing it from the oven. Return to the oven and bake until the center is just set—about 15-20 minutes for condensed milk versions or 25-30 minutes for cream cheese versions. The filling should no longer jiggle when gently shaken.
Place the pan on a wire rack to cool at room temperature for 1-2 hours. The lemon filling will continue to set during this time.
4. Chilling for best texture
Once cooled to room temperature, cover the pan and refrigerate for at least 2 hours, preferably overnight. This chilling time is non-negotiable as it allows the bars to set completely for clean cutting and optimal creamy texture.
Before serving, use the parchment overhang to lift the entire dessert from the pan. For neat squares, use a sharp knife dipped in hot water and wiped clean between cuts.
Tips for Perfect Results Every Time
Even with the best recipe, achieving truly exceptional creamy lemon squares requires attention to a few critical details. Indeed, these final touches can transform good lemon bars into memorable ones.
Use fresh lemon juice and zest
Nothing compares to the bright flavor of freshly squeezed lemons in your creamy lemon squares. Bottled lemon juice simply won’t deliver the same results and may give your bars a weird, artificial taste. Always opt for fresh lemons, preferably ones that are firm and bright yellow. When zesting, remember to capture only the yellow outer layer, avoiding the bitter white pith underneath. For optimal flavor, most recipes recommend using both the juice and zest of your lemons to carry lemon flavor through every bite.
Avoid overbaking the filling
One common mistake is leaving your creamy lemon squares in the oven too long. The filling should still have a slight jiggle when you remove it from the oven – don’t worry if they seem not quite done, as they will continue to set as they cool. Look for edges that are set while the center remains slightly soft. Most recipes suggest baking at a moderate temperature around 350°F for 20-25 minutes. Using a toothpick can help determine doneness – it should come out clean or with just a few moist crumbs.
How to cut clean, neat squares
For perfectly presentable creamy lemon squares, patience is key. Allow them to cool completely at room temperature, subsequently refrigerate for at least 2-4 hours (overnight is best). Once chilled, use the parchment paper overhang to lift the entire dessert from the pan. For pristine cuts, dip a very sharp knife in hot water, dry it quickly, then slice. Clean and re-wet the knife after each cut. For particularly sticky tops, pre-scoring with a razor blade before cutting can help prevent tearing.
When to add powdered sugar or whipped cream
Due to the moist nature of creamy lemon squares, powdered sugar melts quickly into the surface. Consequently, dust with powdered sugar right before serving for the prettiest presentation. As an alternative finishing touch, consider a dollop of freshly whipped cream. For added stability, some recipes suggest mixing mascarpone into the whipped cream to give it body so it holds up longer without falling flat.
Storage, Freezing, and Variations
Once you’ve mastered the basic creamy lemon squares recipe, exploring storage options and variations opens up new possibilities. Proper handling ensures your treats remain fresh, moreover, experimenting with different flavors can transform this classic dessert.
How to store creamy lemon squares
Creamy lemon squares must be refrigerated to prevent spoilage and maintain optimal texture. Place them in an airtight container and store in the refrigerator for up to 5-7 days. For stacking multiple layers, insert parchment paper between them to prevent sticking. Although these treats can safely sit at room temperature for a few hours during serving, they should return to the fridge promptly thereafter. As a result, these squares make an excellent make-ahead dessert for gatherings. For best flavor intensity, some bakers recommend chilling overnight, as the cold temperature helps the crust achieve a pleasant, firm texture.
Freezing tips for long-term storage
Freezing extends the life of your creamy lemon squares substantially—up to 3-4 months when properly stored. Prior to freezing, allow them to cool completely and cut into individual portions. Importantly, skip dusting with powdered sugar, as freezing transforms it into a gummy texture. Instead, wrap each square individually in plastic wrap or wax paper, then add a protective layer of aluminum foil or place in a resealable freezer bag. Alternatively, freeze the entire uncut dessert by wrapping it thoroughly and placing it in an airtight container. Upon thawing, unwrap and let defrost in the refrigerator overnight or at room temperature for about 30 minutes. Dust with fresh powdered sugar just before serving.
Flavor variations: lime, orange, or berry
The basic creamy lemon squares recipe adapts beautifully to other citrus fruits. Replace lemon juice with lime or key lime for a different tangy profile. In fact, you can substitute grapefruit, blood orange, or regular orange juice for exciting variations. For less tartness without increasing sugar, replace one-third of the lemon juice with orange or mandarin juice. Another option involves introducing complementary ingredients like blueberries or cranberries for added color and flavor complexity. These additions create delightful counterpoints that elevate the dessert’s taste profile.
Making gluten-free or dairy-free versions
For gluten-free creamy lemon squares, simply substitute all-purpose flour with gluten-free flour blends. King Arthur gluten-free all-purpose flour works particularly well in these recipes. In conjunction with dietary restrictions, dairy-free versions require replacing butter with plant-based alternatives. Options include Earth Balance buttery sticks, Spectrum non-hydrogenated vegetable shortening, Melt Vegan Butter, or Miyoko’s Kitchen Vegan Butter. Remember that butter substitutes tend to be saltier than regular butter, necessitating adjustments to your recipe’s salt content. Nonetheless, the egg-based filling makes complete vegan conversion challenging without significant recipe modifications.
Conclusion
Creamy lemon squares certainly stand as one of the most delightful desserts you can master at home. After all, the combination of that buttery crust with the smooth, tangy filling creates a perfect balance that few other treats can match. Though the process requires attention to detail, your efforts will be rewarded with impressive results that friends and family will rave about.
Fresh ingredients undoubtedly make the biggest difference in these squares. Therefore, always opt for real lemons rather than bottled juice – this simple choice elevates your dessert from good to exceptional. Additionally, patience plays a crucial role, especially during the chilling phase. Those four hours (or preferably overnight) in the refrigerator allow the flavors to develop fully while ensuring the perfect creamy texture.
The versatility of this recipe also makes it worth adding to your regular dessert rotation. You can easily transform these lemon bars into key lime, orange, or even berry-infused treats. Furthermore, dietary restrictions need not prevent anyone from enjoying these squares, thanks to the gluten-free and dairy-free adaptations.
Storage options add another layer of convenience to these treats. You can keep them refrigerated for several days or freeze them for months, making them an excellent make-ahead option for gatherings or personal indulgence.
My love for lemon-based desserts has led me to test countless variations, but this recipe consistently delivers outstanding results. The secret ultimately lies in respecting the process – using quality ingredients, avoiding overbaking, allowing proper cooling time, and cutting with care. These steps might seem fussy, but they distinguish ordinary lemon bars from the perfectly creamy squares that will have everyone asking for your recipe.
FAQs
Q1. How long do creamy lemon squares need to chill? For the best texture and flavor, chill creamy lemon squares in the refrigerator for at least 4 hours, but preferably overnight. This allows the flavors to develop fully and ensures a perfect creamy consistency.
Q2. Can I use bottled lemon juice instead of fresh lemons? It’s highly recommended to use fresh lemons rather than bottled juice. Fresh lemons provide a brighter, more vibrant flavor that is essential for achieving the best taste in your creamy lemon squares.
Q3. How do I prevent overbaking the lemon filling? To avoid overbaking, remove the squares from the oven when the edges are set but the center still has a slight jiggle. The filling will continue to set as it cools. Bake at around 350°F for 20-25 minutes, checking with a toothpick for doneness.
Q4. What’s the best way to cut neat lemon squares? For clean cuts, chill the squares thoroughly, then use a sharp knife dipped in hot water and wiped clean between each cut. You can also pre-score the top with a razor blade to prevent tearing.
Q5. Can creamy lemon squares be frozen? Yes, creamy lemon squares can be frozen for up to 3-4 months. Cool them completely, cut into portions, wrap individually in plastic wrap and foil, and store in an airtight container. Thaw in the refrigerator overnight before serving.