The Secret to Perfect Garlic Butter Rolls (Tested 50+ Times)
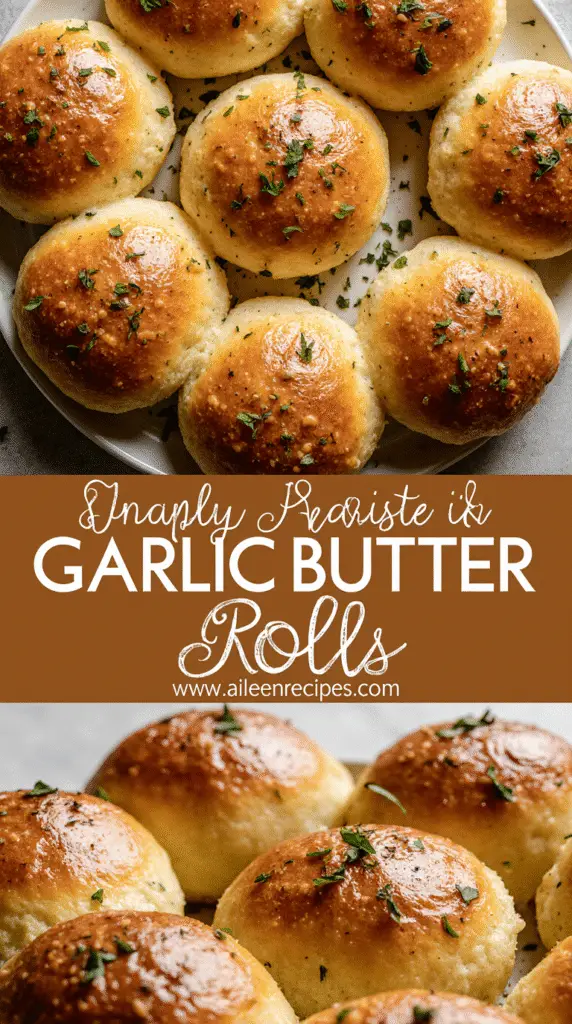
Garlic butter rolls have become the non-negotiable side dish at every holiday dinner I host, and for good reason. These pillowy soft, garlicky delights bring an irresistible aroma to the table that few can resist. If you’re someone who doesn’t feel a meal is complete without a hearty serving of carbs, this recipe is absolutely for you.
After testing this homemade garlic butter rolls recipe more than 50 times, I’ve discovered that kneading is undoubtedly the most crucial step for achieving that coveted light and fluffy texture. Furthermore, what makes these rolls truly special is how the fresh garlic gets incorporated directly into the dough and then enhanced with even more garlic herb butter brushed on top after baking. The best part? These rolls are surprisingly simple to make – they don’t require a mixer and are remarkably fuss-free. Additionally, they freeze beautifully for up to 2-3 months, making them perfect for advance preparation.
In this guide, I’ll share everything I’ve learned about creating perfect garlic butter rolls from scratch, including the ideal garlic butter topping for rolls that delivers loads of flavor in every bite. Whether you’re preparing for a special occasion or simply craving a delicious homemade treat, these rolls are guaranteed to impress.
What Makes Garlic Butter Rolls So Irresistible
Have you ever wondered what makes certain bread rolls stand out from others? The answer lies in the meticulous details. These garlic butter rolls combine the perfect texture with irresistible flavor that keeps people coming back for more.
Soft, fluffy texture with a golden crust
The magic of these rolls begins with their incredible texture—soft and pillowy on the inside with a beautiful golden exterior. The secret lies in the enriched dough that contains butter, milk, and eggs. These ingredients create a brioche-like texture that practically melts in your mouth with every bite.
When properly made, these rolls should be incredibly light and airy. To achieve this, the dough needs to triple in volume during proofing. This extensive rising creates that distinctive fluffy interior that makes them so satisfying to pull apart.
The exterior develops a gorgeous golden-brown color during baking, especially when brushed with egg wash before entering the oven. This creates the perfect contrast between the crispy outside and tender inside—precisely what makes great bread rolls so memorable.
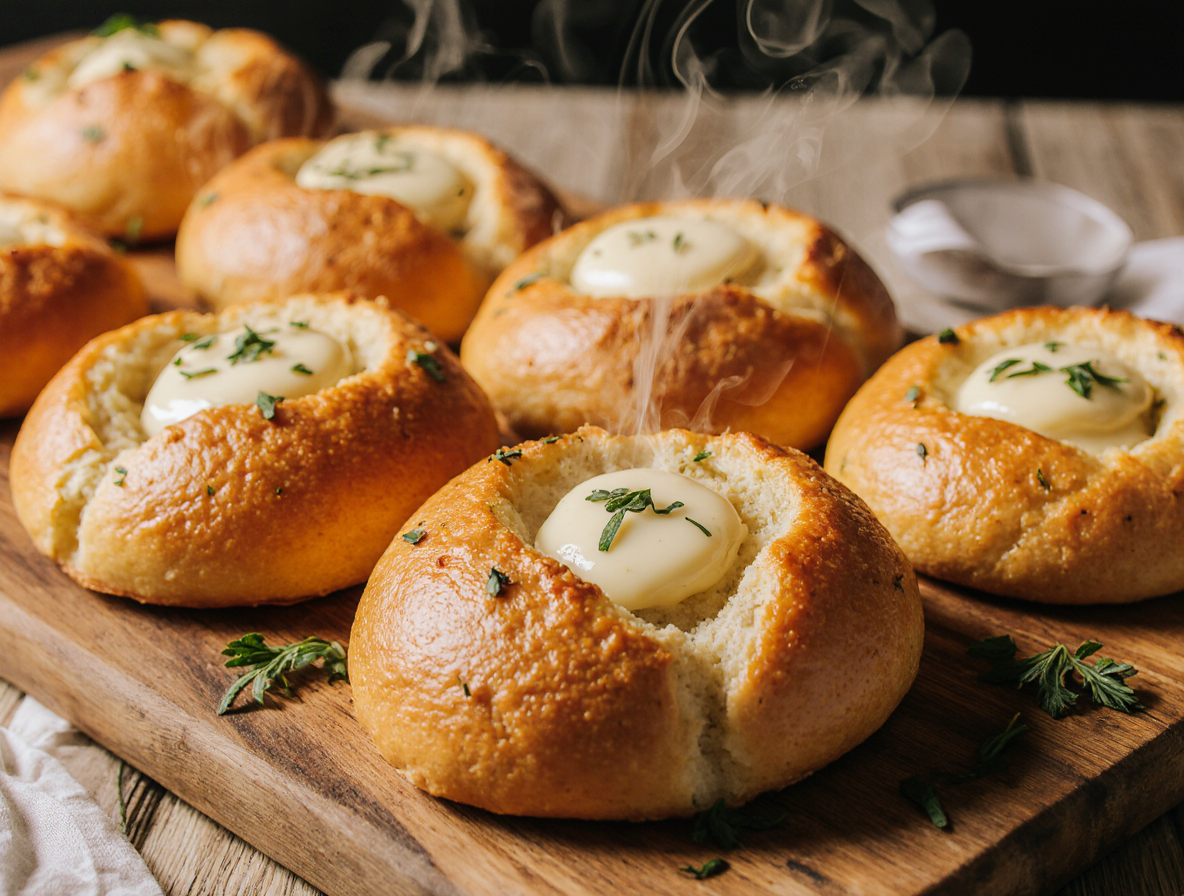
The magic of garlic butter topping for rolls
What truly elevates these rolls is the garlic butter that gets brushed on immediately after baking. This timing is crucial—applying the butter while the rolls are still hot allows them to fully absorb the flavors and softens the crust. The result is a roll that tastes remarkably similar to garlic bread and brioche combined into one heavenly creation.
The garlic butter mixture typically combines melted butter with minced fresh garlic and sometimes garlic powder for an extra flavor dimension. Many recipes call for simmering the garlic briefly in butter to take the edge off raw garlic while infusing the butter with its essence. This creates a rich, aromatic coating that transforms ordinary dinner rolls into something extraordinary.
Why this recipe was tested over 50 times
Creating the perfect garlic butter roll isn’t as simple as it might seem. Multiple factors affect the final result—from flour type to proofing time, temperature variables to butter ratios.
Through extensive testing, I discovered that bread flour produces taller, fluffier rolls with a slightly chewy texture compared to all-purpose flour. Moreover, the dough needs careful handling—it starts quite wet before the gluten develops fully.
Repeated testing also revealed that brushing the rolls with garlic butter multiple times (2-3 applications) ensures maximum flavor infusion. This technique allows the rolls to soak in all the garlicky goodness rather than just coating the surface.
Each test brought incremental improvements to texture, flavor balance, and consistency—all leading to the perfect recipe that produces reliably outstanding results every time.
Essential Ingredients and Tools for Success
Getting perfect garlic butter rolls starts with understanding the exact ingredients and tools needed. Through my extensive testing, I’ve found that certain elements make all the difference between good rolls and exceptional ones.
Flour, yeast, and enriched dough basics
The foundation of outstanding garlic butter rolls begins with the right flour. Bread flour with its higher protein content (12-14%) creates taller, chewier rolls that rise beautifully. All-purpose flour works in a pinch but produces slightly shorter, less chewy results. For absolute precision, I recommend using a kitchen scale—this single tool dramatically improves consistency in baking.
Fresh yeast is non-negotiable. I test mine by combining warm water (110°F-115°F), a teaspoon of sugar, and the yeast—it should bubble and foam within 10 minutes. If nothing happens, your yeast is dead—toss it and buy fresh.
An enriched dough makes these rolls exceptional. Unlike lean bread doughs, enriched doughs contain fat (butter), milk, eggs, and sugar, creating that signature soft, tender texture we’re after.
Choosing the right butter and garlic
High-quality butter with higher fat content (like European-style) provides superior flavor. For the garlic butter topping, I combine softened unsalted butter with freshly minced garlic—using a Microplane grater makes this effortless. Fresh garlic delivers noticeably better flavor than jarred alternatives. Essentially, the garlic butter mixture should contain butter, minced garlic, parsley, and sometimes Parmesan for extra depth.
Kitchen tools that make a difference
Beyond basic measuring tools, several items significantly improve your results:
- A digital kitchen scale for precise measurements (especially flour)
- A stand mixer with dough hook attachment for proper gluten development
- An oven thermometer (since most ovens run hotter or cooler than indicated)
- Silicone pastry brush for evenly applying garlic butter
- Bench scraper for easily handling sticky dough
Interestingly, most baking failures stem not from lack of skill but from imprecise measurements or incorrect temperatures.
Step-by-Step Garlic Butter Rolls Recipe
Now I’ll walk you through the exact steps to create these heavenly garlic butter rolls. After testing this recipe countless times, these techniques consistently deliver perfect results.
1. Make the garlic butter sauce for rolls
Melt 6 tablespoons of butter in a saucepan over medium-low heat, then add 5 minced garlic cloves and 1/4 cup chopped parsley. Cook until the garlic becomes fragrant, about 2 minutes – be careful not to burn it or it will taste bitter. Remove from heat and let cool for 3 minutes. This garlic butter will be used both in the dough and as a topping.
2. Mix and knead the dough
In a bowl, combine 3 3/4 cups (500g) bread flour, 2 tablespoons sugar, 1 1/2 teaspoons salt, and 1 tablespoon instant yeast. In your stand mixer bowl, add 1 1/4 cups warm milk and 1 egg, then gradually add the dry ingredients while mixing on low. Switch to the dough hook, add half the garlic butter, and knead for 5 minutes until the dough pulls away from the bowl. Without a mixer, knead by hand for 10 minutes.
3. First proof: how to get it right
Place the dough in an oiled bowl, cover with plastic wrap, and let rise for 2 hours or until doubled in size. The visual cue is more important than time – properly proofed dough should triple in volume. For an ideal environment, place the bowl in a warm spot like near a sunny window.
4. Shape the rolls evenly
Transfer the dough to a floured surface and divide into 20 equal portions using a bench scraper. For perfectly consistent rolls, use a kitchen scale. Roll each portion into a ball by cupping your hand around the dough and moving in a circular motion against the work surface to create tension. This technique creates a smooth, taut surface that bakes beautifully.
5. Second rise and egg wash
Arrange the shaped rolls in a buttered baking dish with slight spacing between them. Cover with plastic wrap and allow to rise for another 30-40 minutes in a warm spot. The rolls are ready when they look puffy and jiggle slightly when you shake the pan – when gently poked, the indentation should slowly spring back but not completely disappear.
6. Bake and brush with garlic butter topping
Preheat your oven to 375°F and position the rack in the middle. Before baking, brush the rolls with egg wash for a beautiful golden sheen. Bake for 20-22 minutes until golden brown. Immediately upon removing from the oven, brush generously with the reserved garlic butter and sprinkle with flaky sea salt. Serve while still warm for maximum enjoyment.
Pro Tips and Common Mistakes to Avoid
Throughout my journey of testing these garlic butter rolls over 50 times, I’ve encountered numerous issues that can make or break your results.
How to avoid dense or dry rolls
Proper kneading is critical—aim for 6-7 minutes until the dough becomes smooth and elastic. Above all, avoid adding too much flour! Measure accurately by spooning flour into measuring cups rather than scooping directly from the bag. Dense rolls often result from rushing the proofing process—patience is key. Allow the dough to double in size during the first rise, approximately 1½ hours. Use the finger dent test: if your finger impression slowly rebounds, the dough is ready.
What to do if your dough doesn’t rise
Firstly, check if your yeast is still active by mixing it with warm water (110°F) and sugar—it should bubble within 10 minutes. Consequently, if nothing happens, your yeast is dead. Room temperature matters immensely—yeast thrives between 75-80°F. In fact, most errors come from underproofing. For slow-rising dough, place it near a warm radiator or in an oven with just the light on.
Using a kitchen scale for consistency
A kitchen scale is possibly the most transformative tool for baking success. It ensures:
- Identical sized rolls for even baking
- Precise flour measurement (1 cup = 120g)
- Elimination of the 25% excess flour common with cup measuring
Make-ahead and freezing tips
Prepare the dough and refrigerate in an airtight container for up to 1 day. Alternatively, freeze shaped rolls by flash-freezing for 30 minutes before transferring to a freezer container for up to 3 months. For already baked rolls, store in an airtight container in the freezer.
Conclusion
After countless hours in the kitchen perfecting these garlic butter rolls, I can confidently say they’re worth every minute of effort. The combination of pillowy soft texture and rich garlic flavor creates something truly special that will elevate any meal from ordinary to memorable. Most importantly, you now have all the secrets that took me over 50 test batches to discover.
Remember that proper kneading stands as the cornerstone of achieving that perfect texture, while quality ingredients—especially fresh garlic and good butter—make all the difference in flavor. The technique of brushing the rolls with garlic butter while still hot allows for maximum flavor absorption, essentially transforming simple bread into an irresistible treat.
These rolls certainly shine at holiday gatherings, though they’re simple enough for everyday meals as well. Their versatility extends beyond freshly baked enjoyment, since they freeze beautifully for up to three months. This makes them perfect for busy home cooks who appreciate advance preparation.
Should you encounter any issues during your first attempt, don’t worry! Nearly every problem has a straightforward solution—whether it’s adjusting your proofing environment or checking your yeast activity. The finger dent test will become your trusted guide for perfectly proofed dough.
Finally, I encourage you to make these rolls your own. Once you’ve mastered the basic recipe, feel free to experiment with additional herbs or perhaps a sprinkle of Parmesan cheese. Your family will undoubtedly request these garlic butter rolls time and again, potentially starting a delicious tradition at your table. The only real challenge? Making enough so everyone gets their fill!
FAQs
Q1. What’s the secret to achieving soft and fluffy garlic butter rolls? The key is proper kneading and proofing. Knead the dough for 5-7 minutes until smooth and elastic, and allow it to triple in volume during proofing. Use bread flour for a taller, chewier texture, and brush with garlic butter while still hot for maximum flavor absorption.
Q2. Can I make these rolls ahead of time? Yes, you can prepare the dough and refrigerate it in an airtight container for up to 1 day. Alternatively, you can shape the rolls, flash-freeze them for 30 minutes, and then store them in a freezer container for up to 3 months. Baked rolls can also be frozen in an airtight container.
Q3. What should I do if my dough doesn’t rise? First, check if your yeast is active by mixing it with warm water (110°F) and sugar – it should bubble within 10 minutes. Ensure the room temperature is between 75-80°F, as yeast thrives in this range. For slow-rising dough, place it near a warm radiator or in an oven with just the light on.
Q4. How can I ensure my rolls are evenly sized and baked? Using a kitchen scale is the best way to achieve consistency. It allows you to measure ingredients precisely and divide the dough into identical portions. This ensures even baking and eliminates the common problem of adding too much flour when measuring by volume.
Q5. What’s the best way to apply the garlic butter topping? Brush the rolls generously with garlic butter immediately after removing them from the oven. This allows the rolls to fully absorb the flavors while they’re still hot. For maximum flavor, you can apply the garlic butter 2-3 times. Don’t forget to sprinkle with flaky sea salt for an extra flavor boost.