
Irresistible No-Bake Peanut Butter Delight Bars
Introduction
The perfect balance of flavors and textures, these No-Bake Peanut Butter Delight Bars are a must-try for anyone who loves a delicious and nutritious snack. Crafted with healthy ingredients and requiring no baking, this recipe is not only easy but also incredibly satisfying. Perfect for those busy days or as an after-school treat, these bars incorporate creamy peanut butter, sweet honey or maple syrup, and hearty rolled oats, making them delightful in every bite.
Imagine sinking your teeth into a bar where the smoothness of peanut butter meets the wholesomeness of oats, all tied together with the sweetness of honey. Whether you need a quick breakfast, an energy booster for your afternoon slump, or a guilt-free dessert to satisfy your sweet tooth, these bars offer all that and more. Their no-bake nature also means they require minimal kitchen effort, allowing you to whip up a batch in no time. Plus, they’re versatile enough to be customized with your favorite nuts or chocolate, catering to a variety of taste buds.
Enjoying these bars doesn’t just fill your stomach; it feels like a warm embrace on busy days. They are perfect for potluck gatherings, packed lunches, or simply as a comforting post-dinner snack. With their simple preparation and delightful taste, No-Bake Peanut Butter Delight Bars are bound to become a staple in your recipe collection.
Recipe Overview
– Preparation Time: 15 minutes
– Total Time: 1 hour 15 minutes
– Servings: 12 bars
– Difficulty: Not specified in the recipe
Ingredients
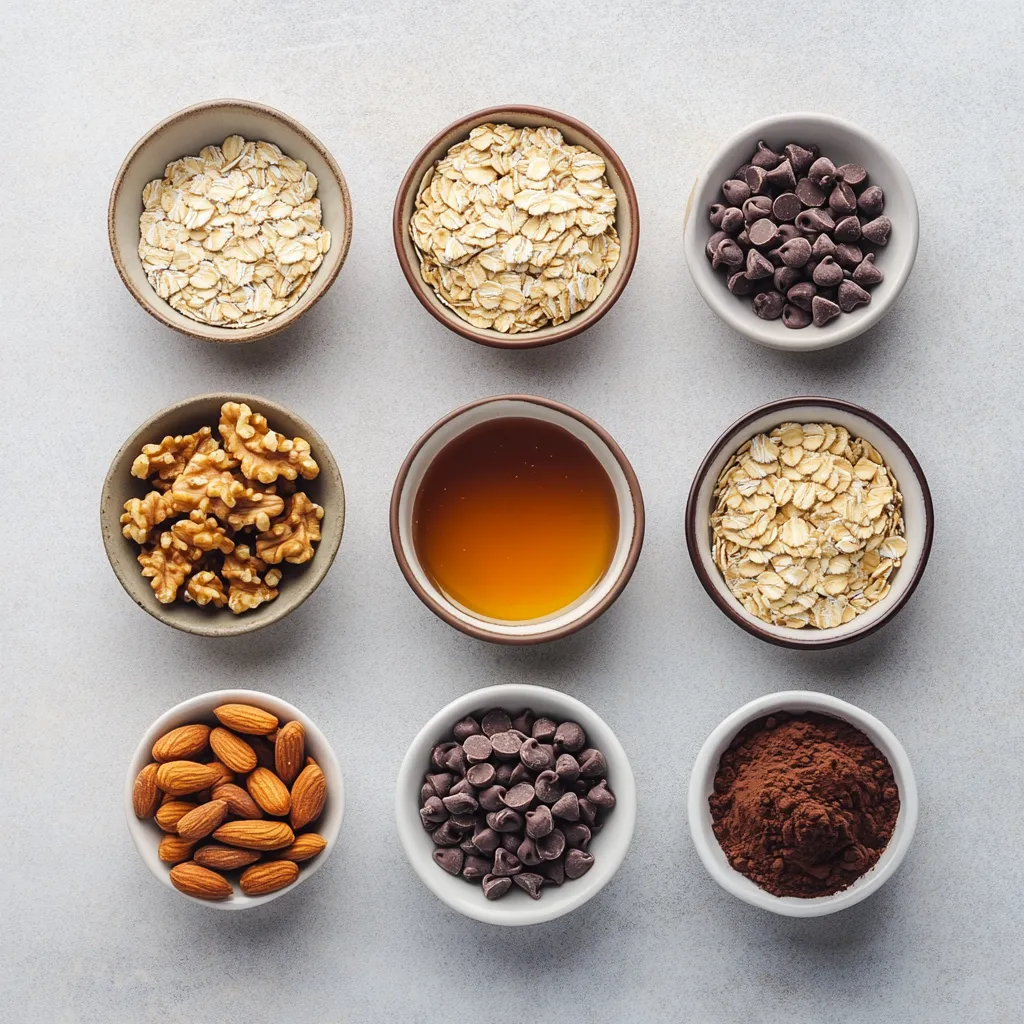
– 1 cup creamy peanut butter
– 1/2 cup honey or maple syrup
– 1 teaspoon pure vanilla extract
– 2 cups rolled oats
– 1/2 cup semi-sweet chocolate chips (optional)
– 1/4 cup unsweetened cocoa powder
– A pinch of sea salt
– 1/2 cup chopped nuts (such as almonds, walnuts, or pecans) – optional
Instructions
1. In a medium mixing bowl, combine the creamy peanut butter, honey (or maple syrup), and pure vanilla extract. Use a spatula to mix until the mixture is smooth and well incorporated.
2. In a large mixing bowl, combine the rolled oats, unsweetened cocoa powder, and a pinch of sea salt. If you’re using chopped nuts, add them to this bowl as well for extra texture.
3. Pour the peanut butter mixture into the bowl with the dry ingredients. Stir thoroughly until all the ingredients are evenly coated, creating a thick and sticky dough.
4. If you opt for chocolate chips, gently fold them into the mixture, ensuring they are evenly distributed without breaking them.
5. Line an 8×8 inch (or equivalent size) square baking dish with parchment paper, allowing some overhang for easy removal. Firmly press the mixture into the bottom of the dish, making sure it reaches all corners and is evenly spread.
6. Place the dish in the refrigerator for at least 1 hour to allow the bars to set. Once firm, use the parchment overhang to lift the bars out and cut them into squares or rectangles.
7. Store the bars in an airtight container in the refrigerator for up to one week, or freeze them for longer-lasting indulgence.
Mixing the Wet Ingredients
Start by blending the creamy peanut butter, honey or maple syrup, and pure vanilla extract in a medium mixing bowl. This initial step is crucial as it creates the flavorful base of the bars, bringing together the rich, nutty flavor of peanut butter with the natural sweetness from honey or maple syrup. The vanilla extract adds an aromatic depth that complements the other ingredients beautifully. Use a spatula to stir the mixture until it achieves a smooth and lump-free consistency. Achieving the right texture here is important, as it ensures that your bars will bind properly once mixed with the dry ingredients.
Combining the Dry Ingredients
In a large mixing bowl, combine the rolled oats, unsweetened cocoa powder, and a pinch of sea salt. The rolled oats serve as the hearty foundation, providing the necessary texture and fiber, while cocoa powder contributes a chocolatey flavor without excess sweetness. The pinch of sea salt helps to elevate the overall taste, contributing a delightful contrast to the natural sweetness of the bars. If you’re including chopped nuts, this is the step to add them. Nuts like almonds, walnuts, or pecans introduce a wonderful crunch and additional nutrients. Mix these dry ingredients thoroughly so that the cocoa powder distributes evenly, ensuring that every bite is flavored delightfully.
Incorporating the Wet and Dry Ingredients
Once your dry ingredients are mixed well, pour the smooth peanut butter mixture into the bowl with the oats and cocoa. This fusion is where the magic happens. Stir the two mixtures thoroughly until all dry ingredients are evenly coated, creating a thick and sticky dough. It’s important to ensure that the oats are fully integrated into the peanut butter mixture, as this will hold the bars together once they’re set. The texture should be thick and slightly tacky, which will help the bars maintain their shape after leaving the refrigerator.
Adding Optional Ingredients
If you choose to include semi-sweet chocolate chips, this step is where they come into play. Gently fold the chocolate chips into the mixture, distributing them evenly without breaking them. This optional addition can transform your bars from simply delightful to irresistibly indulgent, adding a touch of sweetness and a luxurious texture. Whether you decide to add them or not, the bars will be packed with flavor and nutrition, making them suitable for any snacking occasion.
Pressing into the Baking Dish
To prepare for setting your bars, line an 8×8 inch (or equivalent size) square baking dish with parchment paper. Ensure that some parchment overhangs the edges for easy removal later. Afterward, firmly press the mixture into the bottom of the dish, ensuring that it reaches all corners and is evenly spread. This guarantees that each bar will have a uniform shape and size when you’re ready to cut them. Pressing firmly will help to compact the ingredients together, creating a more cohesive bar that won’t crumble easily. The mixture should be level and smooth to set properly in the refrigerator.
Chilling the Bars
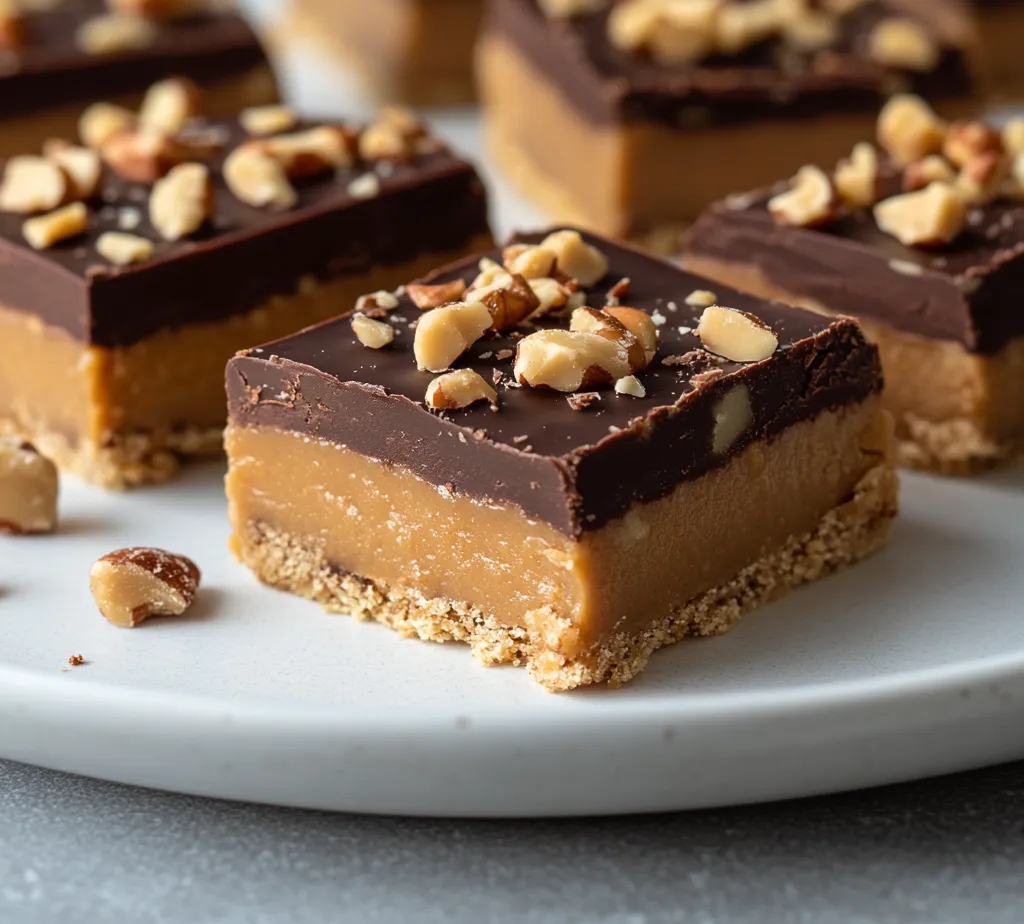
The final step before enjoying your tasty creation is to place the dish in the refrigerator for at least 1 hour. This chilling period is crucial as it allows the bars to firm up, making them easier to cut and handle later. After they have set, the bars will hold their shape and the flavors will meld beautifully. Once firm, you can utilize the parchment overhang to lift the bars out of the dish. Cutting them into squares or rectangles will reveal those delicious layers of peanut butter and chocolate, ready to be enjoyed at any time.
Part 1 has beautifully laid the foundation for creating these No-Bake Peanut Butter Delight Bars. The combination of flavors and textures in this easy recipe makes it a versatile and enjoyable treat for all occasions.
Combining the Dry Ingredients
To create a cohesive mixture, begin by combining the rolled oats, unsweetened cocoa powder, and a pinch of sea salt in a large mixing bowl. Ensure that these dry ingredients are thoroughly mixed before proceeding. The oats serve as the base of the bars, providing texture and structure, while the cocoa powder imparts a rich chocolate flavor. The pinch of sea salt balances the sweetness and enhances the overall taste of the bars. If you are including chopped nuts, now is the ideal time to fold them in with the dry ingredients. Nuts like almonds, walnuts, or pecans not only add crunch but also contribute beneficial fats and proteins.
Forming the Dough
Once the dry ingredients are properly blended, it’s time to introduce the wet mixture. Pour the peanut butter mixture into the bowl with the dry ingredients. Using a spatula or a sturdy wooden spoon, stir thoroughly to combine all components. This process will yield a thick, sticky dough. The texture should be firm enough to hold together while remaining pliable. It’s important to mix well, ensuring that every bit of the dry mixture is coated with the peanut butter and honey, creating a uniform dough. If the mixture appears too crumbly or dry, a slight addition of warm water or more peanut butter can help achieve the desired consistency.
Incorporating Chocolate Chips
If you choose to include semi-sweet chocolate chips for an extra layer of sweetness, this step is crucial. Gently fold the chocolate chips into the thick dough, taking care not to break them apart. The goal is to have an even distribution of the chocolate throughout the mixture. The chocolate will melt slightly upon setting, creating delightful pockets of melted chocolate in each bar. If you prefer a less sweet bar, you may reduce the amount of chocolate chips or omit them entirely, allowing the peanut butter and honey flavors to shine through.
Pressing into the Baking Dish
The next step involves preparing your baking dish. Line an 8×8 inch square baking dish with parchment paper, allowing some overhang around the edges for easy removal later. This lining not only prevents the bars from sticking but also makes cutting them into squares a lot easier. Firmly press the mixture into the bottom of the dish using your hands or the back of a spatula. Ensure it reaches all corners and is evenly spread; compacting the mixture is important for the bars to hold their shape when set. Aim for an even layer around 1 to 1.5 inches thick, as this will affect the texture and taste of the final product.
Chilling the Bars
After pressing the mixture into the baking dish, it’s essential to chill the bars to allow them to set properly. Place the dish in the refrigerator for at least one hour. During this time, the bars will firm up as the peanut butter solidifies, creating a chewy yet firm texture. Chilling also helps the flavors to meld together harmoniously. If you are short on time, you could place them in the freezer for about 30 minutes, but make sure to check periodically to avoid freezing them too hard.
Cutting and Storing
Once the bars are firm and set, carefully lift them out of the dish using the parchment paper overhang. Place them on a cutting board. Using a sharp knife, cut the bars into squares or rectangles, depending on your serving preference. The bars can be stored in an airtight container in the refrigerator, where they will keep fresh for up to one week. For longer storage, you can freeze the bars in a single layer, wrapped in parchment or plastic wrap, and then placed in a freezer-safe bag. They will maintain their flavor and texture for up to three months in the freezer. When ready to enjoy, allow the bars to thaw in the refrigerator or at room temperature.
Presentation Tips
Making the No-Bake Peanut Butter Delight Bars visually appealing can enhance the overall experience. Presentation plays a crucial role, especially if serving them at gatherings or as treats.
Drizzling with Chocolate
One of the simplest ways to elevate the appearance of your bars is by drizzling melted chocolate atop them just before serving. To do this, melt a small amount of semi-sweet or dark chocolate and use a spoon or a piping bag to create elegant swirls. This not only adds a gourmet touch but also a delicious extra layer of indulgence.
Adding a Sprinkle of Sea Salt
Another simple yet effective method to enhance flavor and presentation is by sprinkling a little flaky sea salt over the top of the chilled bars. This contrast between the sweet and salty notes will heighten the richness of the peanut butter and chocolate, making each bite more enjoyable. The visual appeal of the glistening salt against the chocolate will make these bars even more enticing.
Serving Suggestions
Consider presenting the bars on a decorative platter or individual serving plates. Pairing them with fresh fruit like sliced strawberries, banana, or raspberries can provide a refreshing contrast to the richness of peanut butter. Additionally, a dollop of Greek yogurt on the side not only adds a creamy texture but also a tang that complements the sweetness of the bars. For an even more decadent experience, serve them with a scoop of your favorite ice cream.
Nutritional Benefits
Beyond their delicious taste, these bars provide a variety of nutritional benefits, making them a healthy snack option.
Protein Powerhouse
The primary ingredient, creamy peanut butter, offers a substantial amount of protein. Each serving contributes to daily protein needs, making these bars an excellent choice for a post-workout snack. Protein aids in muscle recovery and supports overall health.
Fiber-Rich
Rolled oats are packed with dietary fiber, which promotes healthy digestion and can help keep you full longer. The fiber content also stabilizes blood sugar levels, making these bars a great option for maintaining energy throughout the day.
Natural Sweetness
Using honey or maple syrup as a sweetener eliminates the refined sugars often found in commercial snacks. These natural sweeteners also provide additional health benefits, such as antioxidants, contributing to a healthier snacking option without sacrificing taste.
Variations and Substitutions
Catering to various dietary restrictions and preferences can make your recipe more versatile.
Nut Butter Alternatives
For those with nut allergies or specific dietary restrictions, the creamy peanut butter can easily be replaced with alternatives such as sunflower seed butter or almond butter. These substitutions maintain the bars’ texture while accommodating different dietary needs. Just keep in mind that the flavor profile may slightly change, but the essence of the treat will remain intact.
Gluten-Free Options
To make this recipe gluten-free, ensure that the rolled oats used are certified gluten-free. Many brands offer oats processed in a gluten-free facility, ensuring no cross-contamination occurs.
Sweetener Adjustments
If preferred, alternative sweeteners can be used, such as agave nectar or stevia. However, adjustments may be needed in the quantity to achieve the desired sweetness level, as different sweeteners vary in sugar intensity.
In conclusion, these No-Bake Peanut Butter Delight Bars offer a delightful combination of rich flavors and satisfying textures. Their preparation is straightforward, with a total time of approximately 1 hour and 15 minutes. Ideal for snacking or dessert, these bars can be customized and stored for convenience, ensuring a sweet treat is always within reach.

Irresistible No-Bake Peanut Butter Delight Bars
Ingredients
- 1 cup creamy peanut butter
- ½ cup honey or maple syrup
- 1 teaspoon pure vanilla extract
- 2 cups rolled oats
- ½ cup semi-sweet chocolate chips
- ¼ cup unsweetened cocoa powder
- a pinch sea salt
- ½ cup chopped nuts
Instructions
- In a medium mixing bowl, combine the creamy peanut butter, honey, and vanilla extract until smooth.
- In a large bowl, mix the rolled oats, cocoa powder, and sea salt. Add chopped nuts if using.
- Pour the peanut butter mixture into the dry ingredients and stir until well combined.
- Fold in chocolate chips gently if desired.
- Line an 8x8 inch baking dish with parchment paper and press the mixture evenly into the dish.
- Refrigerate for at least 1 hour to set.
- Lift the bars out using the parchment paper and cut into squares.
- Store in an airtight container in the refrigerator for up to one week.