
Decadent Chocolate Peanut Butter Layer Dessert
Introduction
The Decadent Chocolate Peanut Butter Layer Dessert is an irresistible treat that perfectly marries two beloved flavors: rich chocolate and creamy peanut butter. Each layer brings its charm, creating an indulgence that not only satisfies your sweet cravings but also leaves a lasting impression on anyone who tries it. The visual appeal, with its distinct layers of colors and textures, makes it a showstopper at any gathering.
This dessert is versatile enough to fit a variety of occasions. Whether it’s a festive holiday celebration, a birthday party, or simply a family gathering, this dessert makes an exciting addition to your menu. The combination of textures—from the crunchy graham cracker crust to the smooth peanut butter layer and the silky chocolate topping—ensures that every bite is a delightful experience.
Recipe Overview
– Total Time: 4 hours 30 minutes
– Prep Time: 30 minutes
– Servings: 12
– Difficulty: Not specified in the recipe.
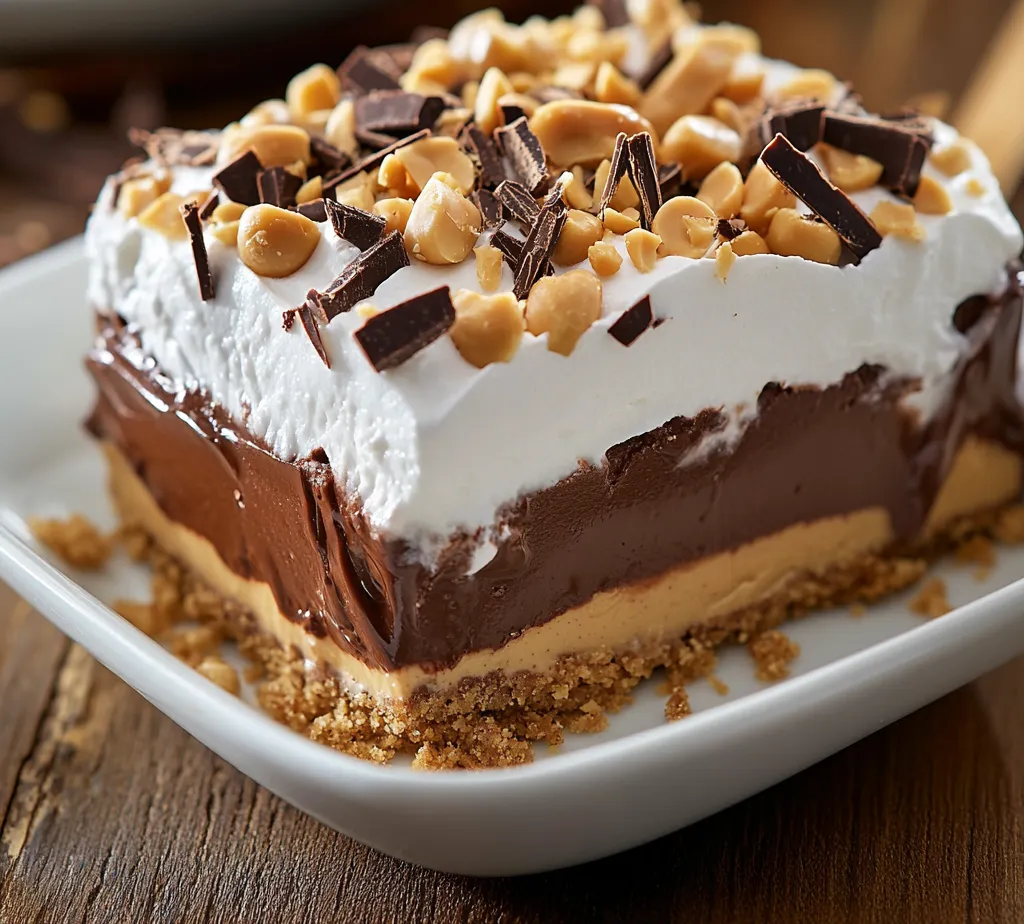
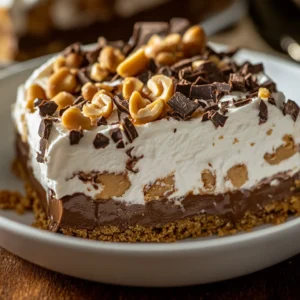
The Decadent Chocolate Peanut Butter Layer Dessert boasts a layered structure that enhances the overall experience. The base is a buttery graham cracker crust that provides a delightful crunch. On top, a creamy peanut butter layer offers a luscious, nutty flavor that is perfectly complemented by the semi-sweet chocolate layer. Finally, a blanket of whipped topping crowns the dessert, making it light and airy, ensuring it doesn’t feel too heavy despite its rich ingredients. This dessert is ideal for serving at gatherings, ensuring everyone leaves with satisfied smiles.
Ingredients
– 1 cup graham cracker crumbs
– 1/2 cup unsalted butter, melted
– 1/4 cup granulated sugar
– 1 cup creamy peanut butter
– 1 cup powdered sugar
– 1 cup cream cheese, softened to room temperature
– 2 cups whipped topping (like Cool Whip)
– 1 cup semi-sweet chocolate chips
– 1/2 cup heavy cream
– 1 teaspoon vanilla extract
– Chopped peanuts and chocolate shavings for garnish (optional)
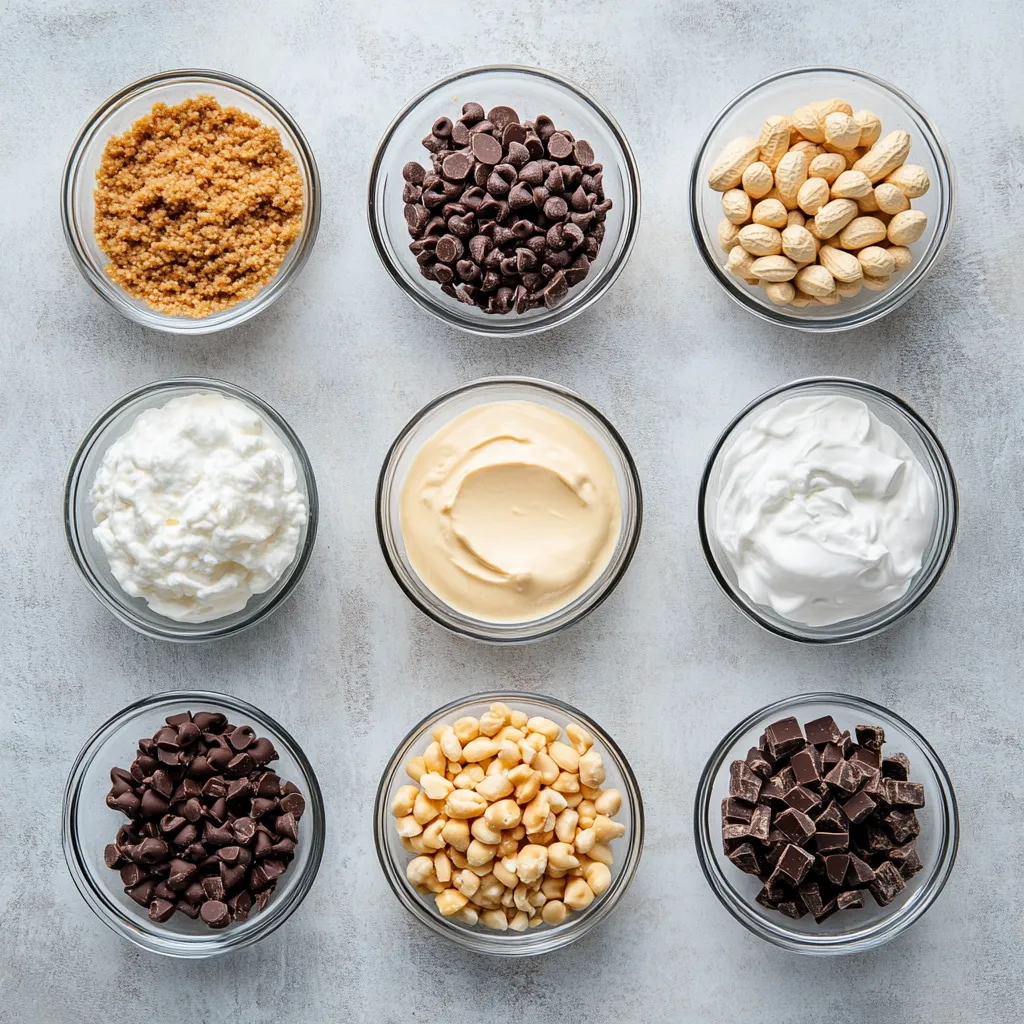
Each ingredient in this layered dessert plays a vital role in creating the perfect balance of flavors and textures. The graham cracker crumbs form a sturdy base that supports the rich fillings. Unsalted butter adds flavor and moisture, while granulated sugar enhances sweetness. The creamy peanut butter and softened cream cheese combine to create a rich, nutty texture that is beautifully complemented by the powdered sugar.
Heavy cream and chocolate chips come together in the chocolate layer, providing a decadent finishing touch. The whipped topping adds lightness and allows for an airy mouthfeel, making each bite feel luxurious. Optional garnishes like chopped peanuts and chocolate shavings not only enhance presentation but also add a little extra crunch.
Instructions
1. Prepare the crust: In a medium mixing bowl, combine the graham cracker crumbs, melted unsalted butter, and granulated sugar. Stir the mixture until everything is evenly blended. Firmly press the combination into the bottom of a 9×13 inch baking dish to create an even and compact crust.
2. Make the peanut butter layer: In a large mixing bowl, use an electric mixer to beat together the creamy peanut butter, powdered sugar, and softened cream cheese until the mixture is smooth and creamy. Gently fold in 1 cup of the whipped topping until fully incorporated. Spread this luscious peanut butter mixture evenly over the prepared graham cracker crust.
3. Add the chocolate layer: In a microwave-safe bowl, melt the semi-sweet chocolate chips together with the heavy cream. Heat in 30-second intervals, stirring after each interval until the mixture is completely melted and smooth. Once melted, stir in the vanilla extract and allow the chocolate mixture to cool slightly before pouring it over the peanut butter layer. Spread it out evenly for a beautiful finish.
4. Top with whipped topping: Carefully spread the remaining whipped topping over the chocolate layer, smoothing it out to create a uniform appearance.
5. Chill: Cover the dessert with plastic wrap and place it in the refrigerator to chill for at least 4 hours, or for best results, overnight. This chilling time allows the layers to set perfectly.
6. Garnish and serve: Just before serving, sprinkle chopped peanuts and chocolate shavings on top for an added decorative touch. Slice the dessert into squares and savor the delightful layers of flavor!
Preparing the Crust
To begin with the crust, take a medium mixing bowl and combine the graham cracker crumbs, melted unsalted butter, and granulated sugar. The melted butter is crucial as it acts as the glue, allowing the crumbs to bind together firmly. As you stir, ensure that all ingredients are evenly integrated, creating a uniform mixture. This process should take just a couple of minutes.
Once mixed, it’s essential to press the crust firmly into the bottom of a 9×13 inch baking dish. Achieving the right texture for the crust hinges on this step. A compact crust will hold the layers above it securely, preventing them from sliding around. Consider using the back of a measuring cup or your hands to achieve an even firmness throughout the base. This layer will later provide a satisfying crunch against the smoothness of the peanut butter and chocolate components.
Making the Peanut Butter Layer
Next, let’s create the peanut butter layer, which is the heart of this dessert. In a large mixing bowl, use an electric mixer to combine the creamy peanut butter, powdered sugar, and softened cream cheese. Be sure the cream cheese is at room temperature to facilitate a smooth mixture. Turn on the mixer and beat the ingredients until they form a smooth and creamy blend.
One of the key tips to achieve that perfect texture is to fold in 1 cup of whipped topping gently. This airiness adds volume and lightness to the heavy peanut butter filling. Using a spatula, carefully work the whipped topping into the mixture, ensuring there are no lumps. Once smooth, spread this delicious peanut butter mixture evenly over the prepared graham cracker crust. The combination of flavors and textures in this layer serves as a delightful foundation for the dessert.
Creating the Chocolate Layer
The chocolate layer is where the dessert’s richness truly shines. Begin by measuring out the semi-sweet chocolate chips and the heavy cream into a microwave-safe bowl. The heating process should be approached with care; heat the mixture in 30-second intervals, stirring after each interval. This technique prevents the chocolate from burning and ensures it melts evenly, resulting in a smooth and glossy layer.
Once you’ve melted the chocolate chips and cream, add the teaspoon of vanilla extract. This addition elevates the chocolate’s flavor profile, giving it a nuanced richness that perfectly balances the sweetness of the dessert. Allow the chocolate mixture to cool slightly before pouring it over the peanut butter layer. Make sure to spread it evenly for a beautiful appearance; this layer is not only about taste but also about visual appeal, ensuring the entire dessert looks as incredible as it tastes.
Topping with Whipped Cream
The final touch before chilling your dessert is an ample spreading of the remaining whipped topping over the chocolate layer. This tops off the beautifully layered dessert with a light and airy texture. Use a spatula to carefully smooth out the whipped topping, making sure it covers the chocolate layer completely and evenly. This step is vital, as it not only adds a soft visual contrast but also a refreshing taste that balances the density of chocolate and peanut butter.
Once this is done, the dessert is almost ready to chill. Cover it tightly with plastic wrap to keep the layers intact and place it in the refrigerator. The chilling time is a crucial aspect of this dessert, as it allows all layers to meld together seamlessly while setting properly. For the best results, it’s advisable to let the dessert chill overnight, letting the flavors enhance and the texture become perfectly creamy.
Spreading the Whipped Topping
When it comes to adding the final layer of whipped topping, precision is key to achieving a beautiful finish. Start by using a spatula to scoop the whipped topping directly from the bowl. It’s best to use a medium-sized, offset spatula as it allows for better maneuverability and control.
Using the spatula, place dollops of the whipped topping across the surface of the cooled chocolate layer. This technique helps prevent tearing of the chocolate layer beneath. Begin by spreading the topping from the center outwards in gentle, long, sweeping motions. Work gradually from the middle, pushing the whipped topping towards the edges of the dish. To achieve a smooth finish, avoid dragging the spatula too forcefully through the layers beneath. Instead, lift the spatula on each pass, allowing the topping to glide over the surface.
For an aesthetically pleasing final look, try to create soft peaks in the whipped topping as you spread it. This can be done by using the tip of the spatula to create waves or swirls in the topping. Not only does this enhance the texture, but it adds visual interest and can make for a more inviting dessert overall.
Carefully dollop any remaining topping onto the corners or edges, ensuring that the entire surface is evenly covered. A final gentle smoothing with the spatula will ensure that your layers are beautifully presented.
Chilling the Dessert
Chilling the dessert is a crucial step. For optimal results, let it chill in the refrigerator for a minimum of 4 hours; however, overnight is recommendable to achieve the best flavor and texture. This extended chilling time allows all layers to firmly set, enabling easier slicing and enhancing the melding of flavors.
When the dessert is exposed to a refrigerator, it’s an opportunity for odors to be absorbed. Therefore, it’s smart to cover your dessert tightly with plastic wrap or aluminum foil to avoid any unfriendly flavors. This also keeps it fresh while allowing the chocolate and peanut butter layers to develop their rich flavors.
During the chilling phase, the ingredients undergo a transformation. The whipped topping stabilizes, the chocolate becomes firmer, and the graham cracker crust retains its crunch while soaking up some moisture from the layers above. The result is a product that is both rich and perfectly set, creating the coveted texture that defines this dessert.
Garnishing the Dessert
Garnishing is an area where you can let your creativity shine! After you’ve spread the whipped topping, sprinkling the top with chopped peanuts adds a lovely texture contrast. Aim for bite-sized pieces to make them easy to enjoy with each slice.
Chocolate shavings, made using a vegetable peeler on a chocolate bar, can also be a delightful addition, providing a sophisticated appearance. For a richer flavor, consider drizzling a little melted chocolate over the top just before serving.
If you’re feeling adventurous, additional toppings like crushed pretzels or a drizzle of caramel sauce can enhance the flavor profile even further. A light dusting of cocoa powder or a few chocolate curls can add an extra layer of elegance and taste, especially for special occasions.
Serving Suggestions
When it’s time to serve, slice the dessert into neat squares using a sharp knife. Warm water can help to have a clean cut as it melts through the different layers. Presentation is important, so serving on a decorative platter can elevate the overall experience. Consider topping each square with a dollop of remaining whipped topping and a sprinkle of chopped peanuts for enhanced visual appeal.
This dessert pairs beautifully with a variety of beverages. Serving with a side of strong coffee can balance the dessert’s richness, while cold milk compliments the decadent chocolate and peanut butter tones. For celebratory gatherings, a glass of dessert wine or a scoop of vanilla ice cream could elevate the overall experience even further.
The Decadent Chocolate Peanut Butter Layer Dessert shines at festive occasions, from birthdays to holidays, providing a sweet ending that will delight guests of all ages. It’s also excellent for potluck gatherings, as its large batch size accommodates many people all at once.
Storage Instructions
To store your dessert, make sure it is tightly covered and sealed in the refrigerator. When properly stored, it can last up to 5 days without a noticeable compromise in taste or texture. Keep an eye on its freshness; if it starts to develop an off odor or texture, it is advisable to discard it.
If you find yourself with leftovers or wish to prepare the dessert in advance, freezing is an option. However, it is worth noting that the texture of the whipped topping may change slightly after freezing, affecting the overall consistency. When ready to consume, transfer it to the refrigerator a few hours before serving to allow it to thaw gradually. This method will help reintroduce a smoother texture.
Nutritional Information
Each serving of this decadent dessert offers a rich combination of flavors and textures but does come with a caloric punch. On average, a slice may contain around 350-400 calories, with a notable amount of fat and sugar content due to the incorporation of heavy cream, peanut butter, and sugar. It’s important to enjoy this dessert in moderation and balance it with healthier food choices throughout the day.
The layers provide protein from the peanut butter and cream cheese, while the graham cracker crust contributes carbohydrates. While the taste invites indulgence, keeping portions manageable ensures that these delightful flavors can be enjoyed without straying too far from nutritional goals.
Conclusion
The Decadent Chocolate Peanut Butter Layer Dessert is a luxurious fusion of textures and flavors, perfectly marrying creamy, crunchy, and smooth elements in each layer. The careful process of chilling allows the dessert to set, ensuring a well-defined structure for beautiful presentation. With its rich cocoa and peanut butter notes, this treat is positioned to impress at any gathering while remaining easy to prepare.
Decadent Chocolate Peanut Butter Layer Dessert
Ingredients
- 1 cup graham cracker crumbs
- ½ cup unsalted butter melted
- ¼ cup granulated sugar
- 1 cup creamy peanut butter
- 1 cup powdered sugar
- 1 cup cream cheese softened
- 2 cups whipped topping
- 1 cup semi-sweet chocolate chips
- ½ cup heavy cream
- 1 teaspoon vanilla extract
- Chopped peanuts and chocolate shavings for garnish
Instructions
- Prepare the crust by mixing graham cracker crumbs, melted butter, and sugar, then press into a baking dish.
- In a bowl, beat peanut butter, powdered sugar, and cream cheese until smooth, then fold in whipped topping.
- Spread the peanut butter mixture over the crust evenly.
- Melt chocolate chips with heavy cream in the microwave, stirring until smooth, then mix in vanilla.
- Pour the chocolate mixture over the peanut butter layer and spread evenly.
- Top with remaining whipped topping, smoothing it out.
- Cover with plastic wrap and chill in the refrigerator for at least 4 hours.
- Before serving, garnish with chopped peanuts and chocolate shavings.
- Slice into squares and enjoy the layers of flavor.