Foolproof Cheese Danish Recipe: Better Than Your Local Bakery

Cheese danish recipes might seem intimidating, but I’m here to tell you they’re surprisingly easy to master at home. Those fancy bakery danishes can cost up to $18 for just half a dozen, making your coffee shop visits quite expensive. Luckily, you can create these buttery, flaky pastries yourself at a fraction of the price.
With the right cream cheese danish recipe, you’ll be just 25-30 minutes away from perfect homemade cheese danishes. I’ve perfected how to make a cheese danish that’s crispy, flaky, golden, and creamy all at once. The delicious cheese danish filling creates such an impressive result that my friend hasn’t stopped talking about them since I made them. These homemade cheese danishes are perfect for special occasion breakfasts, alongside cinnamon rolls and French toast casserole for holiday mornings. Let me show you how to create these bakery-quality treats from scratch without the bakery price tag.
Essential Ingredients and Tools
Getting the right ingredients for a cheese danish recipe makes all the difference between an average pastry and one that rivals your favorite bakery. Let me walk you through everything you’ll need to create these flaky, creamy treats.
Puff pastry: store-bought vs homemade
The foundation of any good cheese danish is quality puff pastry. While homemade puff pastry offers unbeatable freshness, store-bought versions provide a fantastic time-saving option. For the best results with store-bought, look for frozen puff pastry sheets rather than refrigerated ones. Always thaw frozen puff pastry in the refrigerator for an hour or two—never at room temperature—or the butter will melt into the dough and ruin that signature flaky texture.
If you’re feeling ambitious, making puff pastry from scratch is surprisingly doable. However, the process typically takes two days to complete, so plan accordingly if choosing this route.
Cream cheese and sweeteners
For the cheese danish filling, you’ll need 8 ounces of cream cheese at room temperature. Room temperature is crucial—cold cream cheese won’t blend properly. Regular cream cheese provides better flavor than low-fat versions.
For sweetening, granulated sugar works best for the filling (typically ⅓-½ cup), while powdered sugar is perfect for the glaze. Optional flavor enhancers include:
- Vanilla extract (¾-1 teaspoon)
- Lemon juice (1 teaspoon)
- Lemon zest (from one lemon)
Egg wash and glaze basics
An egg wash creates that beautiful golden shine on your pastries. Mix one egg with 1-2 tablespoons of water and brush it onto the pastry edges before baking. Be careful not to let the egg wash drip down the sides, as it can prevent the layers from puffing properly.
For the glaze, combine 1 cup powdered sugar with 2-3 tablespoons of milk and ½ teaspoon vanilla extract. For a velvety finish, consider adding a tablespoon of melted butter to your icing.
Recommended kitchen tools
Even a simple cheese danish recipe requires some basic equipment:
- Electric hand mixer or stand mixer for smooth fillings
- Baking sheet lined with parchment paper or silicone mat
- Pastry brush for applying egg wash
- Small cookie scoop for portioning filling evenly
- Pizza cutter or knife for cutting puff pastry
- Wire cooling racks
With these ingredients and tools ready, you’re well-equipped to create bakery-quality cheese danishes right in your own kitchen. Furthermore, most of these items are likely already in your pantry and kitchen drawers, making this recipe even more accessible.
Step-by-Step: How to Make a Cheese Danish
Now let’s dive into the step-by-step process of creating your perfect cheese danish. Following these techniques will ensure bakery-quality results every time.
1. Prepare the cream cheese filling
Beat 8 ounces of room temperature cream cheese until smooth using an electric mixer. Add 1/3 to 1/2 cup granulated sugar and mix until well combined. Stir in 1 teaspoon vanilla extract, 1 teaspoon lemon juice, and 1/2 teaspoon lemon zest for extra flavor. For a richer filling, incorporate an egg yolk and a tablespoon of sour cream. The final texture should be smooth and creamy, similar to a cheesecake batter.
2. Roll and cut the puff pastry
Thaw your puff pastry according to package directions – typically in the refrigerator, never at room temperature. On a lightly floured surface, roll the pastry into a 12×12-inch square about 1/16-inch thick. Using a sharp knife or pizza cutter, divide the dough into equal squares (usually 4×4 inches). If the dough becomes too warm during handling, return it to the refrigerator for 5-10 minutes to firm up.
3. Assemble and shape the danishes
For classic danishes, score a 1/2-inch border around each square with a knife. Use a fork to prick the center area several times – this prevents excessive rising in the middle. Additionally, you can create various shapes:
- For pinwheels: Cut from corners toward center (not all the way through), then fold alternate corners to middle
- For diamonds: Fold corners toward center, leaving space between points
Place 2 tablespoons of cream cheese filling in the center of each danish.
4. Apply egg wash and bake
Prepare egg wash by whisking one egg with 2 teaspoons of water. Brush the exposed pastry edges with this mixture using a pastry brush. Be careful not to let it drip down the sides. Bake at 375-400°F for 15-20 minutes or until golden brown and puffy[132].
5. Cool and drizzle with glaze
Allow danishes to cool for at least 5-10 minutes on a wire rack. Meanwhile, prepare the glaze by whisking 1 cup powdered sugar with 3-5 teaspoons milk and 1/2 teaspoon vanilla extract until smooth. Drizzle generously over the cooled pastries. Serve warm or at room temperature.
Creative Variations to Try
Once you’ve mastered the basic cheese danish recipe, it’s time to experiment with exciting variations. The beauty of homemade cheese danishes lies in their versatility—they’re perfect canvases for creativity!
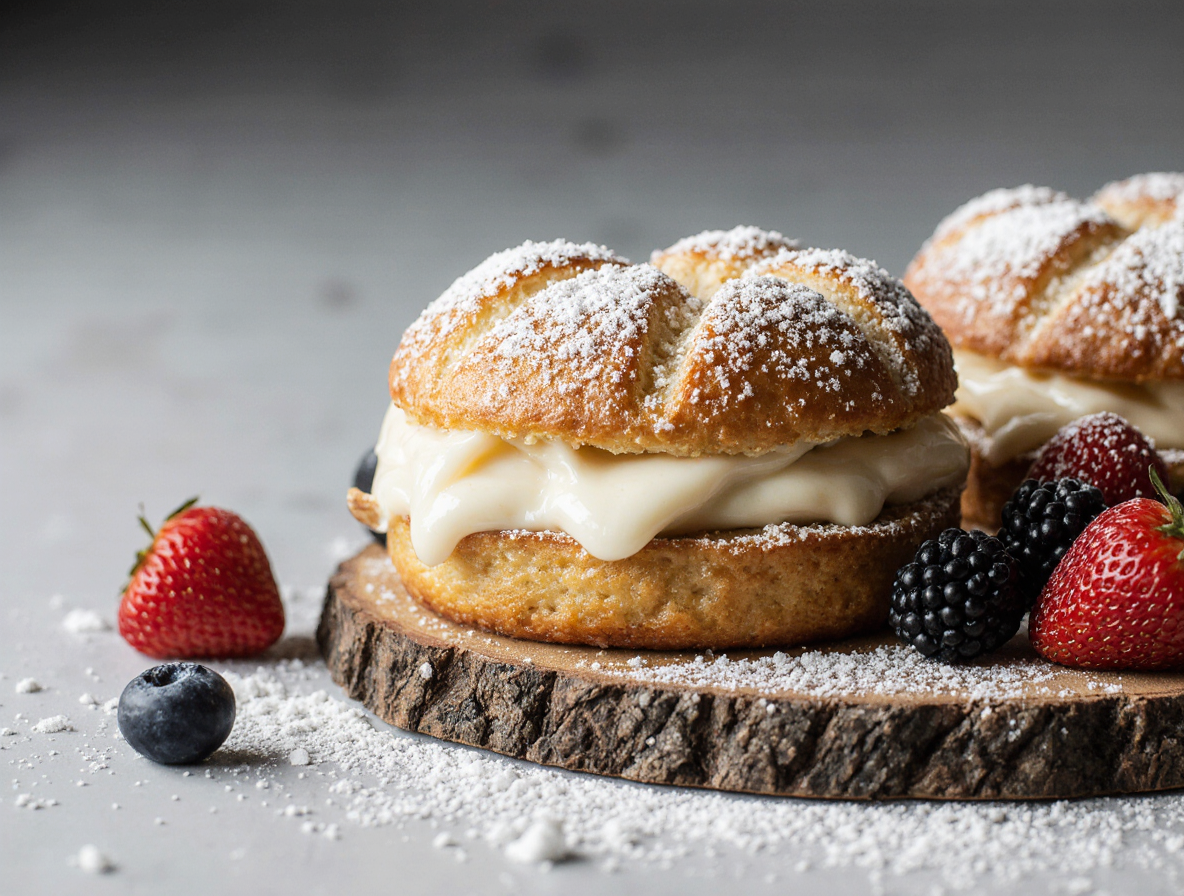
Fruit toppings: berries, jam, or compote
Beyond plain cream cheese filling, fruits add vibrant color and delicious tartness. Berry varieties work exceptionally well—blueberries, raspberries, strawberries, and blackberries all pair beautifully with the creamy base. Notably, some bakers prefer wild blueberries over larger varieties as they provide better texture and flavor. Sour cherries offer another excellent option, providing the perfect tangy contrast to sweet cheese danish filling.
For convenience, quality fruit preserves or jam create an instant flavor boost. Red fruit spreads containing strawberries, cherries, raspberries, and currants bring intense flavor without excessive sweetness. You can also combine fresh fruit with preserves for added texture and visual appeal.
Savory twists: herbs and cheese
For something completely different, transform your sweet breakfast staple into a sophisticated appetizer. Goat cheese makes an excellent substitute for cream cheese in savory versions. Try adding:
- Sun-dried tomato bacon jam with pistachios
- Jalapeños for a spicy “popper” version
- Feta cheese with fresh herbs
- Roasted garlic oil with chives and chili flakes
These savory variations make impressive party appetizers that will surprise your guests with their creativity.
Different shapes: pinwheels, braids, and rounds
The presentation of your cheese danish dramatically affects both appearance and texture. Popular shapes include:
Square danishes offer the simplest option—just score a border around a pastry square and fill the center. For pinwheels, cut diagonal lines from each corner toward the center (not all the way through), then fold alternate corners inward. Braids involve cutting angled strips along both sides of a rectangle and folding them over the filling in alternating fashion.
Mini danishes for parties
Scaled-down versions create perfect two-bite treats ideal for brunches and gatherings. Simply cut your puff pastry into smaller squares or rounds before filling. These miniature danishes not only look adorable but also allow guests to sample multiple flavors without commitment. For best results, serve them shortly after baking to maintain their crispy texture.
Storage, Reheating, and Make-Ahead Tips
Proper storage and reheating techniques are crucial for maintaining the quality of your homemade cheese danishes. With these practical tips, you’ll be able to enjoy your freshly baked treats days or even months after making them.
How to store cheese danishes in the fridge
For maximum freshness, always cool your cheese danishes completely before storing. Place them in an airtight container with wax or parchment paper between layers to prevent sticking. Individually wrapping each danish in plastic wrap or aluminum foil provides extra protection against moisture loss.
When properly refrigerated, cheese danishes remain fresh for 3-4 days, though some sources suggest they can last up to a week. Because of the cream cheese filling, refrigeration is essential for safety—the only exception being if you plan to consume them within 48 hours, though they should still be kept in an airtight container.
Freezing and thawing instructions
Fortunately, cheese danishes freeze remarkably well. For best results, wrap each danish individually in plastic wrap or aluminum foil before placing in a freezer-safe bag or container. Alternatively, flash-freeze them on a parchment-lined tray first, then transfer to storage containers once solid.
Properly frozen cheese danishes can last for up to 2-3 months. For thawing, place frozen danishes in the refrigerator overnight. This gradual thawing prevents them from entering the bacterial “danger zone” between 40-140°F.
Reheating for best texture
To revive the flaky texture of refrigerated or thawed danishes, preheat your oven to 350°F. Place the pastries on a baking sheet, optionally tenting with foil to preserve moisture, and warm for 5-10 minutes.
For frozen danishes, add 15-20 minutes to the baking time. A microwave works in a pinch—heat for 8-10 seconds for single servings or 30-40 seconds for whole danishes—but the oven method yields superior flakiness.
Make-ahead tips for busy mornings
Preparing cheese danishes ahead saves precious morning time. You can assemble the danishes completely, stopping just before baking, then cover the baking sheet with plastic wrap and refrigerate for up to two days.
Essentially, allow the refrigerated pastries to reach room temperature before baking as directed. For longer preparation, freeze unbaked danishes individually wrapped in plastic, then baked from frozen when needed. This method yields the freshest results with minimal textural changes.
Conclusion
Making cheese danishes at home certainly transforms an expensive bakery treat into an affordable luxury you can enjoy anytime. Though baking pastries might seem daunting at first, this recipe proves that with quality ingredients and proper techniques, you can create flaky, golden danishes that rival professional versions.
After all, most of the tools and ingredients needed likely already exist in your kitchen, making this recipe surprisingly accessible. The versatility of cheese danishes also stands out as one of their best qualities. You can stick with the classic cream cheese filling or experiment with countless variations – from sweet fruit toppings to unexpected savory twists.
Additionally, the storage and make-ahead options mean you don’t have to limit yourself to enjoying these pastries only on special occasions. Freezing unbaked or baked danishes allows you to prepare a batch during weekend leisure time and enjoy them throughout busy weekdays.
Best of all, mastering this foolproof recipe gives you a signature baked good to share with friends and family. The next time someone compliments your “bakery-bought” danishes, you’ll feel that special pride knowing you created them yourself at a fraction of the cost. So grab your puff pastry and cream cheese – your journey to homemade cheese danish mastery starts now, and the delicious results will speak for themselves.
FAQs
Q1. What type of cheese is typically used in cheese danishes? Cream cheese is the most common cheese used in cheese danish recipes. It provides a smooth, creamy texture and tangy flavor that pairs well with the flaky pastry.
Q2. Can I make cheese danishes ahead of time? Yes, you can prepare cheese danishes in advance. Assemble them completely, stopping just before baking, then cover and refrigerate for up to two days. Alternatively, you can freeze unbaked danishes individually wrapped for longer storage.
Q3. How do I store leftover cheese danishes? Store cooled cheese danishes in an airtight container in the refrigerator for 3-4 days. Place wax or parchment paper between layers to prevent sticking. For longer storage, you can freeze them for up to 2-3 months.
Q4. What are some popular variations of cheese danishes? Popular variations include adding fruit toppings like berries or compotes, incorporating herbs for savory versions, or creating different shapes such as pinwheels or braids. You can also make mini danishes for parties or brunches.
Q5. How do I reheat cheese danishes to maintain their flaky texture? To revive the flaky texture, preheat your oven to 350°F and warm the danishes for 5-10 minutes. For frozen danishes, add 15-20 minutes to the baking time. While microwaving is quicker, oven reheating yields superior flakiness.