
Herb Salt Delight: A Flavorful Gift Idea
Introduction
Herb Salt Delight is a versatile culinary creation that not only enhances the flavor of a variety of dishes but also serves as a thoughtful, homemade gift for friends and family. This delightful blend of coarse sea salt and fresh herbs infuses a burst of flavor into meats, vegetables, and pasta dishes, making it an essential addition to any kitchen. Whether you’re looking to elevate a simple dish or create a unique seasoning blend, Herb Salt Delight is sure to impress.
This recipe is straightforward, requiring minimal ingredients and effort, making it perfect for both novice cooks and seasoned chefs. The freshness of the herbs coupled with the robust flavor of salt creates a beautifully balanced seasoning that can be used in numerous culinary applications. It’s an ideal gift for occasions such as holidays, housewarmings, or as a special treat for someone who enjoys cooking. The personal touch of a homemade gift can make all the difference in expressing thoughtfulness and care.
The process of crafting your own herb salt not only allows you to customize the flavor profiles to suit your preferences but also ensures that you have complete control over the ingredients. Imagine how rewarding it will be to see the faces light up as you present this unique and flavorsome blend!
Recipe Overview
– Total Time: 1 hour
– Yield/Servings: Makes about 1.5 cups of herb salt
– Difficulty: Not specified in the recipe
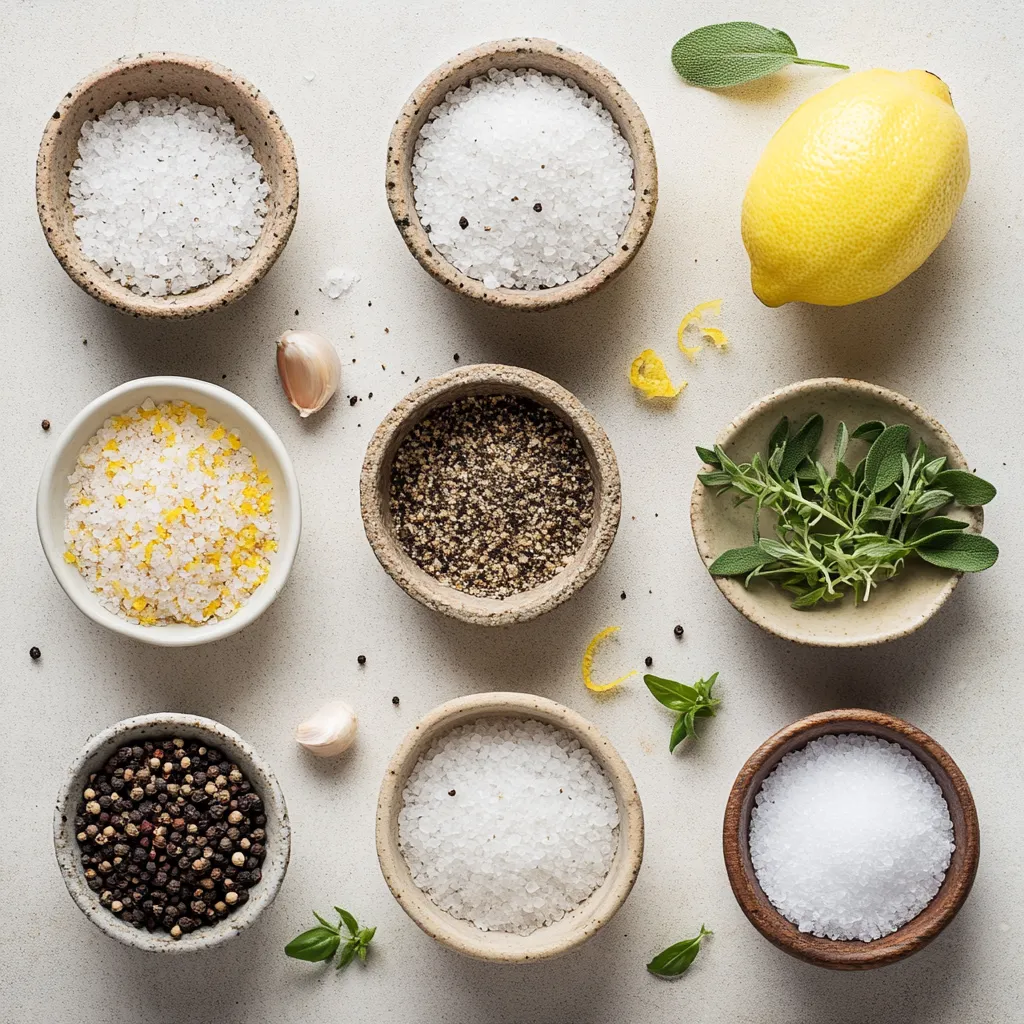
Ingredients
– 1 cup coarse sea salt (or kosher salt)
– 1/2 cup fresh herbs (such as rosemary, thyme, parsley, or basil)
– 1 tablespoon garlic powder (optional)
– 1 tablespoon lemon zest (optional)
– 1 teaspoon freshly ground black pepper (optional)
Instructions
1. Prepare the Fresh Herbs: Begin by rinsing the fresh herbs thoroughly under cold running water to remove any soil or impurities. After rinsing, use a clean kitchen towel or paper towel to gently pat the herbs dry. This step is crucial to prevent excess moisture, which can affect the final product.
2. Chop the Herbs Finely: Using a sharp knife or herb scissors, finely chop the dried herbs. Aim for uniform pieces to ensure that the flavors are well-distributed throughout the salt. The chopping process will also help release the aromatic oils, intensifying the flavor profile.
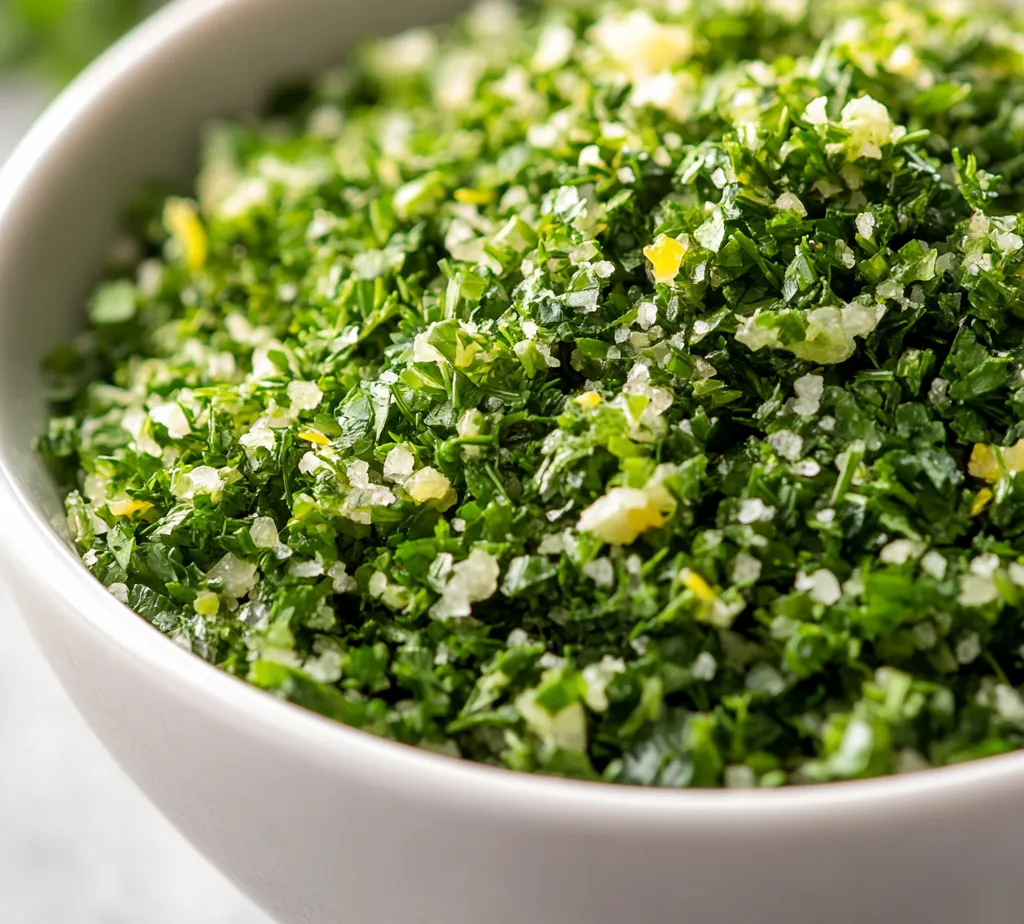
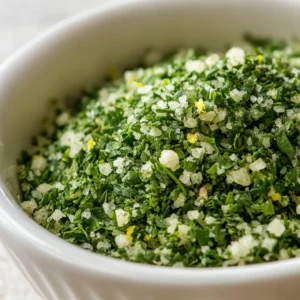
3. Mix the Ingredients: In a spacious mixing bowl, combine the coarse sea salt with the finely chopped herbs. If you choose to enhance your blend with garlic powder, lemon zest, or freshly ground black pepper, add them at this stage. Stir the mixture thoroughly until all the ingredients are evenly incorporated.
4. Dry the Mixture: Line a baking sheet with parchment paper and spread the herb salt mixture evenly across the surface. Preheat your oven to its lowest temperature setting (typically around 170°F or 75°C). Place the baking sheet in the oven and allow the mixture to dry for approximately 30-40 minutes, stirring occasionally. This gentle drying process helps to concentrate the flavors and extends the shelf life of your herb salt.
5. Cool and Store: After the drying time, carefully remove the baking sheet from the oven and let the herb salt cool completely at room temperature. Once cooled, transfer the herb salt into a clean, dry jar or an airtight container to preserve its freshness.
6. Label and Present: For a thoughtful touch, create a personalized label for your herb salt jar, including the ingredients and suggested uses, such as seasoning meats, vegetables, or pasta dishes. For an extra special presentation, tie a decorative ribbon around the jar to make it an inviting gift!
Customizing Herb Salt Blends
Creating your unique herb salt blend is a wonderful way to experiment with different flavors and aromas. While the base recipe emphasizes the use of a few particular herbs, you’re not limited to just rosemary, thyme, parsley, or basil. Feel free to explore other herbs such as dill, cilantro, or tarragon, each offering distinct flavor profiles that can enhance your culinary experience.
In addition to herb variations, consider playing with the optional ingredients. For instance, a touch of lemon zest can brighten the salt blend, giving it a fresh, citrusy note, perfect for summer dishes. Garlic powder adds an earthy richness that complements roasted vegetables and meats. Adjust these optional ingredients according to your taste preferences or those of the gift recipient to ensure that the herb salt is both personal and useful.
Herb Salt Delight also serves as a magnificent base for creating themed blends. For example, a Mediterranean version might include oregano, garlic powder, and lemon zest, while a spicier variation could incorporate red pepper flakes. The possibilities are endless, and part of the joy is in creating a blend that speaks to your culinary style and tastes.
Coarse Sea Salt or Kosher Salt Selection
When preparing Herb Salt Delight, the choice between coarse sea salt and kosher salt can significantly affect the final outcome. Coarse sea salt is often harvested through evaporation from seawater and provides a twinkling crunch and a slightly briny flavor that elevates the overall taste of dishes. Its larger crystals also facilitate a more gradual dissolution, which can enhance the flavor profile over time when used in cooking.
On the other hand, kosher salt, especially from reputable brands, has a flaky texture that is exceptional for seasoning meats and vegetables evenly. It dissolves quickly, making it ideal for incorporating flavors throughout various dishes quickly.
Ultimately, the choice between coarse sea salt and kosher salt may come down to personal preference or the specific culinary application you’re considering. Both salt types will work beautifully, so select the one that resonates most with your kitchen lifestyle.
Preparing the Fresh Herbs
Rinsing fresh herbs is more than just a step to remove visible dirt; it’s essential for ensuring food safety and enhancing the flavor quality of your Herb Salt Delight. Use cold running water to thoroughly rinse the herbs, particularly if they have been purchased from a market or grocery store where soil residue may remain. Swirl them gently in the water; this will help dislodge any tiny particles stuck to the leaves.
Drying the herbs post-rinse is a critical step in the preparation process. Excess moisture can lead to spoilage or results that do not achieve the desired flavor. It’s recommended to use a clean kitchen towel or paper towels, gently patting the herbs to absorb moisture without bruising them.
Tools such as salad spinners can be helpful for drying larger batches of herbs quickly, ensuring they are ready for chopping. The more efficiently you can dry your herbs, the better the final blend will be, preserving the vibrant flavors and aromas that make your herb salt delightful.
Chopping the Herbs
Choosing the right tool for chopping herbs is key to achieving the desired fineness and uniformity in your blend. A sharp chef’s knife allows for clean cuts, which can help prevent bruising and preserve the essential oils and flavors within the herbs. Alternatively, herb scissors are designed specifically for chopping herbs quickly; these multi-bladed tools can save time and yield consistent results.
When chopping, aim for uniformity; this ensures that flavors are evenly distributed throughout your herb salt blend. Irregular pieces could lead to an uneven flavor experience when seasoning your dishes. Additionally, finely chopping the herbs helps to release their aromatic oils, directing the robust flavor right into your salt. As you chop, focus on a smooth, consistent motion, allowing the knife or scissors to do the work, resulting in a finely chopped mix that will elevate your herb salt to new heights.
Cooling and Storing the Herb Salt
Cooling the herb salt mixture: best practices
Once you have dried the herb salt in the oven, it’s crucial to let it cool completely before transferring it to your storage container. This cooling process prevents condensation from forming in the jar, which could lead to clumping or spoilage. Spread the gently dried herb salt on the parchment-lined baking sheet in a thin layer to expedite the cooling process. Allow it to cool for about 20-30 minutes at room temperature, stirring occasionally to ensure even cooling and prevent clumping.
Selecting airtight containers for storage
Choosing the right containers for storing your herb salt is key to maintaining its freshness and flavor. Opt for glass jars with tight-sealing lids, as glass prevents any transfer of odors and ensures that your herb salt remains dry. You can also use plastic containers with airtight seals, but make sure they are free from any residue from previous uses. Small jars can add a decorative touch, making them perfect for gifting.
Tips for maintaining freshness and flavor over time
To maximize the shelf life of your herb salt, store it in a cool, dark place away from direct sunlight. Avoid exposing your container to moisture during serving, which can occur if you’re using wet utensils. Keeping it in a pantry or cupboard will help maintain its potency. When stored properly, homemade herb salt can last for up to six months without losing its flavor.
Labeling and Presentation
Creative labeling ideas for gifting
A personal touch can elevate your herb salt from simple seasoning to thoughtful gifts. Create charming labels for your jars that include the name ‘Herb Salt Delight’ along with the ingredients. You could print these on decorative paper or write them out by hand for a more personal feel. Consider adding a short, creative tagline like “A Sprinkle of Flavor” or “From My Kitchen to Yours” to make it even more inviting.
Suggested labeling content: ingredients and uses
Your labels should feature key information including the ingredients (coarse sea salt, herbs, and any optional additives) as well as suggested uses. Mention that it can be used for seasoning meats, flavoring vegetables, or enhancing pasta dishes. This will guide the recipient on how best to use their gift, adding to their enjoyment.
Decoration tips: ribbons and jars for a rustic aesthetic
In addition to labeling, think about how you can enhance the visual appeal of your jars. Consider tying natural twine or colorful ribbons around the neck of the jar. You can also affix dried herbs, such as sprigs of rosemary or thyme, to the ribbon for an extra touch of authenticity. Small rustic-style jars, like those with cork tops or vintage designs, can further complement the homemade feel of your herb salt.
Suggested Uses for Herb Salt
Seasoning for meats: best pairings and techniques
Herb salt can elevate the flavor of various meats, making it an excellent addition to your culinary repertoire. It works particularly well on chicken, pork, and fish. When marinating meats, rub a tablespoon of herb salt directly onto the surface before cooking to enhance the flavors. For a grilled chicken, mix the herb salt with olive oil to create a paste, providing a beautiful crust once cooked.
Enhancing vegetables: incorporating herb salt in cooking
Vegetables can greatly benefit from a dash of herb salt as well. Sprinkle it over roasted or steamed vegetables before serving for an extra layer of flavor. When sautéing, you can add herb salt into the pan while cooking; it will enhance the natural flavors and aromas of the vegetables. It pairs beautifully with green beans, zucchini, and root vegetables, enhancing their taste while keeping dishes healthy.
Flavoring pasta dishes: methods for applying herb salt
Pasta dishes can be wonderfully invigorated with herb salt. When cooking pasta, consider adding a teaspoon of herb salt to the boiling water for a subtle flavor enhancement. After cooking, toss your pasta with a drizzle of olive oil and a sprinkle of herb salt for a simple yet delicious dish. It works especially well when combined with olive oil, garlic, and fresh vegetables or cheeses, making your meals both flavorful and satisfying.
Variations of Herb Salt
Sweet vs. savory adaptations
While the traditional herb salt recipe is savory, you could also explore sweet variations. Think about incorporating floral flavors through dried lavender or citrus zest, offering a unique twist for use in desserts or breakfast dishes. Sweet herb salts can work beautifully with roasted fruits or even in baking, so the versatility is endless.
Seasonal herb combinations to try
Herb salt can benefit from seasonal variations, allowing you to tailor your mixes throughout the year. In spring, you might use fresh chives, dill, and parsley, while summer could call for basil, oregano, and lemon zest. During fall and winter, consider heartier herbs like sage, rosemary, and thyme, which complement roasted meats and root vegetables wonderfully.
Customization options for dietary preferences
For those following specific dietary patterns, herb salt can be modified. If sodium intake is a concern, consider using less salt and adding additional herbs to maintain flavor. Those on a vegan or vegetarian diet can enjoy the recipe as is, and gluten-free individuals can also use it without worry, as the ingredients do not contain gluten.
Nutritional Information
Basic nutritional breakdown of herb salt
Although exact nutritional values can vary based on the specific herbs used, a serving size of herb salt (approximately one teaspoon) primarily consists of sodium from the sea salt or kosher salt and offers minimal calories. The fresh herbs contribute vitamins, antioxidants, and essential oils that amplify the health benefits of each serving.
Health benefits of using fresh herbs
Incorporating fresh herbs into your diet can positively impact your overall health. Herbs like parsley and thyme are known for their anti-inflammatory properties, while rosemary can aid in digestion. Fresh herbs are an excellent way to infuse flavor without calorie and sodium additions typical of many seasoning blends.
Comparison with store-bought seasoning options
Homemade herb salt typically offers more freshness and flavor than store-bought options, which often contain preservatives and anti-caking agents. By making your own, you ensure that you are not only using quality ingredients but also allowing for greater customization based on your taste preferences.
Summary of Preparation Process
Recap of prep time and total time
Creating your Herb Salt Delight takes just 15 minutes of preparation time, followed by a gentle drying process for a total of about one hour. This manageable timeline makes it an excellent choice for both culinary gift-giving and personal use.
Serving suggestions: portioning the herb salt
When serving herb salt, small pinches are usually sufficient to impart flavor. A teaspoon or two is generally adequate for seasoning a serving of meat or vegetables. Consider giving recipients ideas on how to use it through tasteful recipe suggestions or pairing ideas.
Personal touches to make gifting more special
Including personal notes regarding your inspiration for the herb salt or sharing stories related to the chosen herbs can make the gift more meaningful. Including recipe suggestions that feature the herb salt will encourage recipients to experiment and appreciate their gift even more.
Conclusion
Herb Salt Delight offers a wonderful blend of fresh herbs and salt that brings a burst of flavor to any dish. The careful preparation and drying process ensures a perfect texture and taste, making it an ideal culinary gift. With a total preparation time of just one hour, this delightful mix is not only quick to make but will also leave a lasting impression on anyone who receives it.
Herb Salt Delight: A Flavorful Gift Idea
Ingredients
- 1 cup coarse sea salt
- ½ cup fresh herbs
- 1 tablespoon garlic powder
- 1 tablespoon lemon zest
- 1 teaspoon freshly ground black pepper
Instructions
- Rinse the fresh herbs thoroughly under cold running water and pat dry.
- Finely chop the dried herbs using a sharp knife or herb scissors.
- In a mixing bowl, combine the coarse sea salt with the finely chopped herbs.
- Add garlic powder, lemon zest, or black pepper if desired, and stir well.
- Spread the herb salt mixture on a lined baking sheet.
- Preheat the oven to its lowest temperature and dry the mixture for 30-40 minutes.
- Stir occasionally to ensure even drying.
- Remove from the oven and let cool completely at room temperature.
- Transfer the cooled herb salt into a clean, dry jar or airtight container.
- Create a personalized label and consider adding a decorative ribbon for presentation.