How to Make Chicken Bacon Ranch Quesadillas in Just 20 Minutes (No-Fail Recipe)

Are you craving chicken bacon ranch quesadillas but think you don’t have enough time? I’ve got exciting news – these crispy, cheesy delights can be on your table in just 15 minutes!
Whether you’re preparing lunch, dinner, or an after-school snack, this chicken bacon quesadilla recipe delivers maximum flavor with minimum effort. The combination of savory chicken, crispy bacon, and tangy ranch creates an irresistible meal that’s not only ridiculously tasty but also a breeze to whip up. Furthermore, as a parent, I understand the frustration of spending hours cooking only to have family members refuse to take a bite – but these quesadillas consistently win over even the pickiest eaters.
In this guide, I’ll show you how to make chicken bacon ranch quesadillas using simple shortcuts like rotisserie chicken and precooked bacon. Additionally, I’ll share both stovetop and oven methods, along with my best tips for achieving that perfect golden, crispy exterior with gooey, melted cheese inside. Let’s get cooking!
Gathering Your Ingredients
The perfect chicken bacon ranch quesadillas begin with selecting quality ingredients. Let’s break down what you’ll need to create this 20-minute masterpiece.
Choosing the right tortillas and cheese
First, select your tortillas wisely. While traditionally Mexican quesadillas use corn tortillas, here in the US, flour tortillas are more common for this recipe. Large flour tortillas (9-10 inch or “burrito size”) work best for chicken bacon ranch quesadillas, giving you plenty of room for fillings. However, you can certainly use smaller sizes for portion control or even low-carb tortillas for a healthier option.
When it comes to cheese, freshly grated varieties melt significantly better than pre-shredded options. Indeed, the meltability factor is crucial for that perfect quesadilla stretch. Sharp cheddar and Monterey Jack create a delicious flavor combo, though any good melting cheese works well. For an authentic Mexican touch, consider Oaxaca cheese, which delivers that beautiful stretchy quality. Other excellent choices include Chihuahua cheese, Queso Asadero, or a Mexican blend.
Best chicken options: rotisserie, grilled, or leftover
The beauty of chicken bacon ranch quesadillas lies in their flexibility regarding protein. Rotisserie chicken stands out as the ultimate time-saver, requiring minimal prep while delivering maximum flavor. Simply shred or cube about 2 cups for this recipe.
Alternatively, leftover grilled chicken works exceptionally well, bringing a smoky element to your quesadillas. Boneless skinless chicken thighs can be another excellent choice, offering more moisture and flavor than breast meat. In fact, many prefer thighs because they stay tender even when reheated.
Regardless of which chicken option you choose, ensure it’s well-shredded or chopped into bite-sized pieces to distribute evenly throughout your quesadilla.
Why bacon and ranch are the perfect combo
Bacon and ranch create a flavor pairing that’s simply irresistible. Crispy bacon bits provide that distinctive smoky taste and satisfying crunch that contrasts beautifully with the creamy elements. For convenience, pre-cooked bacon bits work well, though freshly cooked and crumbled bacon delivers superior flavor and texture.
As for the ranch component, you have options. Many recipes call for both dry ranch seasoning and prepared ranch dressing. The dry seasoning infuses the filling with that characteristic tangy herb flavor, while the dressing adds creaminess and helps bind the ingredients together.
This combination of savory chicken, smoky bacon, and tangy ranch creates that crave-worthy flavor profile that makes these quesadillas so popular. Moreover, once you’ve gathered these simple ingredients, you’re just minutes away from a meal that tastes like it took much longer to prepare.
Prepping the Filling in Minutes
Preparing the filling for chicken bacon ranch quesadillas takes just minutes with the right approach. Once your ingredients are gathered, let’s dive into creating that perfect, flavorful mixture.
Mixing chicken, bacon, and ranch
The core of these quesadillas comes from properly combining the main ingredients. Start by placing your chopped chicken in a medium bowl – room temperature chicken distributes better than cold chicken straight from the refrigerator. Next, add your crispy bacon bits. For convenience, pre-cooked bacon works well, although freshly cooked and crumbled bacon delivers superior flavor.
Subsequently, you have two options for incorporating ranch flavor. Using ranch seasoning mix brings a strong ranch flavor without adding extra moisture. Alternatively, drizzle ranch dressing over the chicken mixture. For an easy application, consider using a squeeze bottle which makes distributing the ranch effortless.
Adding creaminess with mayo or cream cheese
To elevate your chicken bacon ranch quesadillas, incorporate a binding ingredient that adds richness. Cream cheese creates an irresistibly creamy texture while helping hold everything together. Essentially, you can combine the chicken, bacon, cheddar, cream cheese, mayo, and ranch seasoning in a bowl and stir until well-combined.
For extra creaminess, consider these options:
- Mayonnaise (about 2-3 tablespoons)
- Sour cream (provides tanginess)
- A combination of both
These ingredients not only enhance flavor but also create that stable, moist filling that won’t fall apart when cooking.
Tips for seasoning and texture
For perfectly seasoned filling, consider these additions: cumin, onion powder, garlic powder, and paprika. Although the ranch provides flavor, these spices take your quesadillas to the next level.
Texture is crucial for the perfect quesadilla. Ensure your filling has a “binding component” that creates stability. This helps keep everything together when flipping. Meanwhile, distribute ingredients evenly so you get perfect bits of goodness in every bite.
For moisture balance, be careful with water-heavy ingredients. Too many fresh vegetables can make quesadillas soggy. Instead, focus on ingredients with low water content to maintain that desired crispy exterior with gooey interior.
Primarily, make sure to properly dice all ingredients to similar sizes for even distribution and easier eating once cooked.
Cooking the Quesadillas to Perfection
Now comes the exciting part – transforming your prepped ingredients into perfectly crispy chicken bacon ranch quesadillas! Let’s explore the best cooking methods to achieve that restaurant-quality result.
Stovetop vs. oven method
The stovetop method gives you ultimate control over your chicken bacon ranch quesadillas:
- Use a large skillet over medium heat – this prevents burning while allowing cheese to melt properly
- Start with a cold pan for extra melting time without scorching the tortilla
- Cover with a lid briefly to trap heat and melt cheese thoroughly
For the oven method, especially when feeding a crowd:
- Preheat to 425°F (220°C)
- Drizzle tortillas with olive oil on both sides
- Bake for 8 minutes, flip, then 5 more minutes, followed by a final 2-minute flip for perfect crispiness
How to get a golden, crispy tortilla
First, avoid using too much oil – just a thin layer or swipe of butter provides the perfect crispiness. Primarily, use only about ½ teaspoon of butter or oil in your pan – excess fat leads to soggy rather than crispy results.
Temperature control is crucial – medium heat allows the tortilla to crisp evenly without burning. Give the tortilla time to develop golden-brown spots before flipping.
Melting the cheese just right
Layer your cheese both below and above your chicken-bacon-ranch mixture. This “cheese sandwich” approach helps bind everything together as it melts.
The best melting happens with low, consistent heat. For stovetop quesadillas, cover the pan briefly with a lid to trap heat, ensuring the cheese melts beautifully while warming the filling.
Flipping without the mess
Master the half-tortilla technique – place fillings on only half the tortilla, then fold over to create a pocket. This semicircle shape has less surface area to flip, reducing spillage risk.
For perfect flips, use a wide spatula that fully supports the quesadilla. If struggling with larger quesadillas, try the two-plate method – place a plate atop the quesadilla, flip the pan, then slide it back into the pan to cook the other side.
Serving, Storing, and Customizing
Your delicious chicken bacon ranch quesadillas deserve proper presentation and can be easily stored for later enjoyment! Let’s explore the finishing touches that elevate this quick meal.
Topping ideas: pico, jalapeños, sour cream
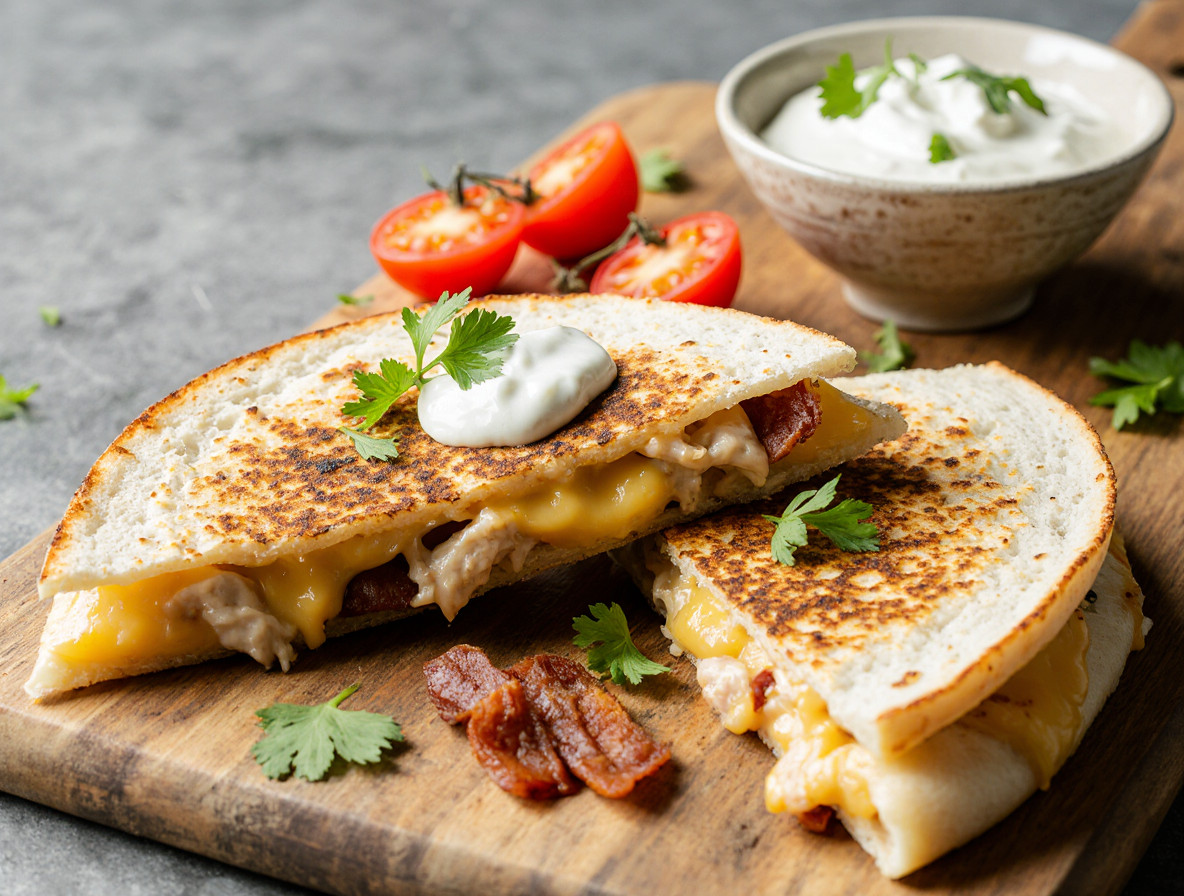
Once your quesadillas are golden and crispy, slice them into wedges and serve immediately with your favorite toppings. Beyond basic dips, consider these crowd-pleasing accompaniments:
- Fresh pico de gallo for brightness
- Pickled jalapeños for extra heat
- Sour cream or additional ranch for cooling creaminess
- Guacamole for rich avocado goodness
- Green onions sprinkled on top for color and flavor
How to store and reheat leftovers
Store leftover chicken bacon ranch quesadillas in an airtight container in the refrigerator for 3-4 days. Prior to storing, ensure they’re completely cool to prevent sogginess.
For reheating, avoid microwaving which makes tortillas soggy. Ultimately, the best methods include:
- Oven: 350°F for 10 minutes until hot throughout
- Stovetop: Medium-low heat for 2-3 minutes per side until crispy again
- Air fryer: 350°F for 5 minutes per side
Fun variations: spicy, mini, or sheet pan style
Customize your chicken bacon ranch quesadillas with these exciting variations:
- Spicy version: Use pepper jack cheese and add crushed red peppers
- Mini quesadillas: Use street-taco-size tortillas for appetizers
- Sheet pan style: Lay tortillas overlapping on a baking sheet, add fillings, fold edges over, and bake at 425°F for 20 minutes
- Veggie additions: Bell peppers or red onions for extra flavor and nutrition
Conclusion
Chicken bacon ranch quesadillas truly represent the perfect weeknight solution when you need something delicious without spending hours in the kitchen. After making this recipe countless times for my family, I can confidently say these quesadillas deliver incredible flavor while requiring minimal effort.
Therefore, don’t hesitate to customize these quesadillas based on your preferences. Whether you prefer spicy versions with jalapeños or want to experiment with different cheeses, the basic technique remains the same. Most importantly, remember that properly melted cheese acts as the glue holding everything together, so give it enough time to melt completely.
Additionally, these quesadillas work wonderfully for meal prep. Simply assemble several at once, then store and reheat them using the methods described above. My family actually finds them just as delicious the next day when reheated properly in the oven or air fryer.
Above all, cooking should bring joy rather than stress. This recipe proves that delicious, satisfying meals don’t require complicated techniques or expensive ingredients. The combination of savory chicken, crispy bacon, and tangy ranch creates a flavor profile that satisfies both adults and children alike.
Next time you face the eternal question “what’s for dinner?” remember this 20-minute solution waiting in your recipe arsenal. Your family will thank you, and you’ll thank yourself for choosing such a quick, foolproof option that consistently delivers amazing results!
FAQs
Q1. How long does it take to make chicken bacon ranch quesadillas? These quesadillas can be prepared in just 20 minutes, making them a perfect quick meal option for busy weeknights or when you’re short on time.
Q2. What type of chicken works best for these quesadillas? Rotisserie chicken is the ultimate time-saver, but you can also use grilled chicken or leftover chicken. The key is to ensure it’s well-shredded or chopped into bite-sized pieces for even distribution.
Q3. Can I make these quesadillas ahead of time? Yes, you can prepare the filling in advance and assemble the quesadillas when ready to cook. Leftover quesadillas can be stored in an airtight container in the refrigerator for 3-4 days.
Q4. What’s the best way to reheat leftover quesadillas? To maintain crispiness, avoid microwaving. Instead, reheat in an oven at 350°F for about 10 minutes, on a stovetop over medium-low heat for 2-3 minutes per side, or in an air fryer at 350°F for 5 minutes per side.
Q5. How can I customize these quesadillas? You can create variations by using different cheeses, adding spices for heat, incorporating vegetables like bell peppers or onions, or even making mini versions using smaller tortillas for appetizers.