How to Make Perfect S’more Ice Cream Sandwiches (No Campfire Needed!)
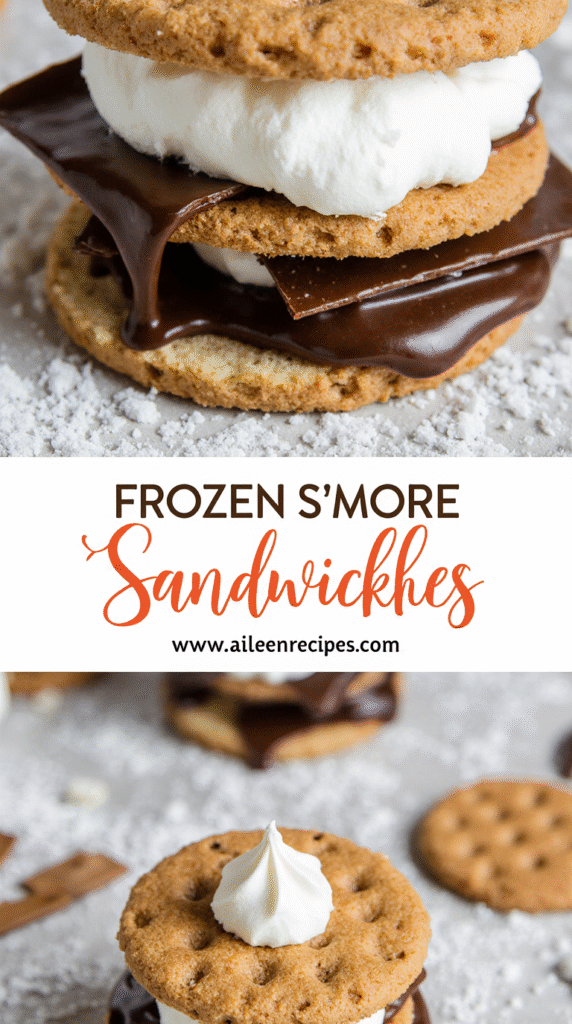
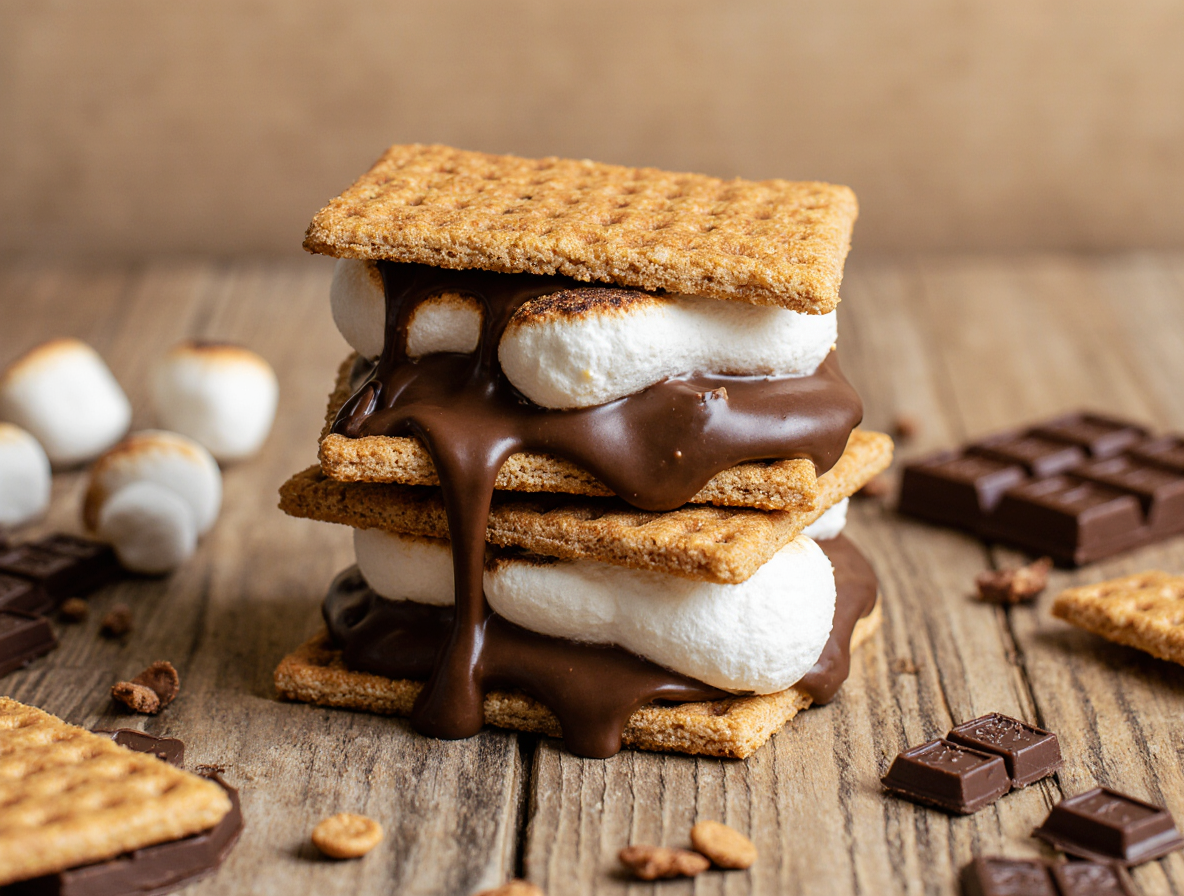
S’more ice cream sandwiches combine all the nostalgic elements we love about traditional s’mores into a refreshing frozen treat that’s perfect for summer days. These delicious desserts feature layers of fluffy marshmallow and creamy chocolate pudding sandwiched between slightly softened graham crackers, creating an experience similar to an ice cream sandwich but with all the classic s’mores flavors.
Frozen s’mores are surprisingly easy to make, requiring only about 20 minutes of preparation time, though you’ll certainly need patience as they freeze for six hours before serving. The combination of whipped fudgy chocolate and creamy marshmallow layers creates a sweet, decadent treat that definitely screams summertime. Plus, this dessert offers a delightful fusion of an ice cream sandwich and a s’more, with no actual campfire needed!
In this guide, I’ll walk you through creating perfect s’mores ice cream sandwiches from scratch, including essential ingredients, step-by-step assembly, troubleshooting tips, and creative variations that will satisfy any sweet tooth.
Essential Ingredients for S’more Ice Cream Sandwiches
Creating perfect s’more ice cream sandwiches starts with gathering the right ingredients. While the concept might seem straightforward, each component plays a crucial role in achieving that authentic campfire-inspired flavor in frozen form.
Graham Crackers: The Perfect Base
Graham crackers serve as the foundation for any authentic s’more ice cream sandwich. While store-bought graham crackers like Honey Maid work perfectly well, homemade versions elevate your frozen treats to another level. Homemade graham crackers typically contain butter, molasses, honey, flour, and a touch of cinnamon and ginger. If making your own, I recommend cutting the dough into roughly 2×2 inch squares and sprinkling with cinnamon sugar before baking. For stability, placing graham crackers in the freezer a few hours before assembly prevents cracking when the sandwiches are pressed together.
Ice Cream Options and Flavors
Vanilla ice cream remains the classic choice for s’more ice cream sandwiches, complementing the other flavors without overpowering them. Furthermore, vanilla creates a neutral canvas that allows the marshmallow and chocolate elements to shine. Additionally, some recipes incorporate graham cracker-flavored ice cream for an extra layer of s’more authenticity. For more adventurous combinations, chocolate or coffee ice cream provides rich alternatives. You can even create custom flavors by mixing toasted marshmallow pieces directly into softened vanilla ice cream for consistent flavor throughout.
Chocolate Selection and Preparation
For authentic s’more flavor, Hershey’s milk chocolate is often considered the gold standard. Moreover, you can incorporate chocolate in several ways: as melted fudge sauce swirled into ice cream, as ganache made from heavy cream and chopped chocolate, or as a dipping coating for the finished sandwich. When melting chocolate, use a double boiler or microwave in 15-second intervals, stirring between each to prevent burning. For extra indulgence, some recipes include chocolate chips sprinkled between layers.
Marshmallow Components: Fluff vs. Toasted
You have two excellent options for the marshmallow element: traditional toasted marshmallows or marshmallow fluff. Toasted marshmallows provide that distinctive “roasted/burnt” flavor that pairs surprisingly well with cold ice cream. To toast them, use a kitchen torch, broiler, or even a gas stovetop. Alternatively, marshmallow fluff offers smoother texture and easier incorporation. Store-bought fluff works well, especially when toasted with a kitchen torch for that classic s’mores char. For the ultimate experience, try homemade toasted marshmallow fluff made with egg whites, cream of tartar, corn syrup, and sugar.
Step-by-Step Assembly Process
Assembling the perfect s’more ice cream sandwich requires patience and precision, but the results are well worth the effort. Let me walk you through each step of creating these frozen treats that combine nostalgic campfire flavors with refreshing ice cream.
Preparing the Graham Crackers
Initially, place whole packages of graham crackers in the freezer several hours before assembly. Frozen graham crackers are much less likely to crack when pressed together. Break the crackers along their perforations to create squares of equal size. For a standard recipe, you’ll typically arrange half the squares on a parchment-lined baking sheet, reserving the remaining squares for the tops of your sandwiches. Alternatively, line a square baking pan with parchment paper, allowing extra paper to hang over the sides for easier removal later.
Creating the Perfect Ice Cream Layer
Remove your ice cream from the freezer and allow it to soften for approximately 5 minutes. For individual sandwiches, use a small ice cream scoop to portion directly onto each bottom graham cracker. For batch preparation, spread softened ice cream evenly in a parchment-lined square pan (8×8 or 9×13 inch, depending on your recipe) to create a uniform layer. This “slab” method ensures perfect ice cream-to-cookie ratio from edge to edge. For multi-layered versions, freeze each layer for about 20 minutes before adding the next.
Adding the Chocolate Element
Spread chocolate fudge sauce directly onto graham crackers before adding ice cream. Alternatively, create ganache by combining chocolate chips and cream in a microwave-safe dish, heating for 30 seconds, stirring, then heating for an additional 15 seconds until smooth. For chocolate-dipped edges, ensure sandwiches are completely frozen before dipping into melted chocolate.
Incorporating Marshmallow Goodness
Toast marshmallows under a broiler, with a kitchen torch, or over a gas burner until golden brown and gooey. Place toasted marshmallows directly onto graham crackers or fold them into softened ice cream to create toasted marshmallow swirls throughout. Work quickly during this step to prevent excessive melting.
Pressing and Freezing Techniques
Press the top graham cracker gently but firmly onto the assembled layers. Excessive pressure will cause breakage or filling overflow. Freeze assembled sandwiches for a minimum of 30 minutes before serving, though 4-6 hours is ideal for optimal firmness. For storage, wrap individual sandwiches in wax paper or parchment secured with a rubber band. Properly stored s’more ice cream sandwiches will keep for up to 2 weeks in the freezer.
Tips for Perfect Frozen S’mores Every Time
Getting your frozen s’mores just right requires attention to detail and a few expert techniques. After making countless batches of these treats, I’ve discovered several tricks that make all the difference between mediocre and magnificent results.
Preventing Soggy Graham Crackers
The most common challenge with s’more ice cream sandwiches is maintaining cracker crispness. To prevent sogginess, slather marshmallow creme or chocolate on both sides of the graham cracker to create a protective barrier against moisture from the ice cream. First thing to remember is that graham crackers naturally soften when frozen, so timing matters – make sandwiches right before eating if you prefer crunchier crackers.
For those who enjoy a slightly softer cookie experience, assemble your sandwiches at least a few days in advance – the longer they sit in the freezer, the better they get as the cookies gradually absorb some moisture. A controversial but effective technique is pre-freezing your graham crackers before assembly, which reduces breakage and helps them maintain structure.
Achieving the Ideal Texture
Freeze your assembled s’more ice cream sandwiches for a minimum of 3 hours prior to serving, though 6 hours is ideal for achieving that perfect sturdy, compact texture. Of course, working in small batches prevents ice cream from melting during assembly – prepare 6-10 sandwiches at a time for best results.
To ensure clean cuts when making batch-style sandwiches, use a sharp knife warmed under hot water between slices. For the chocolate coating, adding a teaspoon of oil to melted chocolate prevents it from cracking when frozen. Prior to serving, let sandwiches sit at room temperature for just 1-2 minutes to slightly soften the graham crackers, making them easier to bite.
Make-Ahead and Storage Solutions
Tightly wrap each sandwich individually in plastic wrap or parchment paper immediately after assembly. This step is crucial – it holds the sandwich together and prevents freezer burn. Place wrapped sandwiches in an airtight container, using parchment paper between layers if stacking.
Properly stored, these treats will keep in the freezer for up to two weeks, though some sources suggest they maintain quality for up to three months. In fact, after about five days, the graham crackers achieve that perfect softened texture many people prefer. Store them in the back of the freezer near the fan for faster freezing and better preservation.
Creative Variations and Flavor Combinations
Beyond the classic version, s’more ice cream sandwiches offer endless opportunities for creative variations that can satisfy any taste preference. Let’s explore some exciting twists on this frozen treat!
Chocolate Lovers’ S’mores Ice Cream Sandwich
For dedicated chocolate enthusiasts, try using chocolate ice cream as your base instead of vanilla. Alternatively, create a rich ganache by combining chocolate chips with heavy cream, heating for 30 seconds, stirring, then heating for an additional 15 seconds until smooth. This ganache works beautifully as a coating for fully frozen sandwiches. For enhanced flavor depth, consider mixing semi-sweet and dark chocolate chips rather than using just one type.
Peanut Butter Cup Frozen S’mores
Peanut butter transforms traditional s’mores into something truly extraordinary. Spread a thin layer of peanut butter directly onto graham crackers before adding other ingredients. Remarkably, this combination features “cool whipped cream, creamy peanut butter, and rich dark chocolate” for an “out of this world delicious” experience. Not a fan of peanuts? Simply substitute almond butter or sunflower seed butter for a nut-free option.
Fruity Twist Options
Introduce fruits for a refreshing dimension to your frozen s’mores. Consider combining “two ripe bananas with 1 tablespoon peanut butter” to create a healthy two-ingredient banana ice cream base. Upon completion of freezing, this provides a lighter alternative that complements the traditional s’mores components wonderfully.
No-Churn Ice Cream Alternatives
Without an ice cream maker, you can still create fantastic s’mores treats. Start with a graham cracker-infused base by combining heavy whipping cream (whipped to stiff peaks) with sweetened condensed milk and crushed graham crackers. Subsequently, fold in toasted mini marshmallows and fudge sauce. This mixture freezes beautifully for 5-6 hours until scoopable.
Mini S’mores Ice Cream Bites
For bite-sized treats, try using Golden Graham cereal pieces instead of traditional graham crackers. Typically, these mini versions involve “stacking the Golden Grahams around the marshmallow and chocolate chip” followed by a brief 3-5 minute bake. These petite treats make perfect grab-and-go desserts that deliver all the s’mores flavor in just one bite.
Conclusion
S’more ice cream sandwiches truly represent the perfect fusion of nostalgic campfire treats and refreshing summer desserts. Throughout this guide, we’ve explored every aspect of creating these delightful frozen treats without needing an actual campfire.
From selecting quality ingredients to mastering the assembly process, you now possess all the knowledge needed to create perfect s’more ice cream sandwiches at home. The combination of graham crackers, creamy ice cream, rich chocolate, and toasted marshmallow creates a magical dessert experience that appeals to both children and adults alike.
Remember that patience certainly pays off when making these treats. The initial 20-minute preparation followed by several hours of freezing results in a dessert worth waiting for. Additionally, don’t hesitate to experiment with the creative variations we discussed – whether adding peanut butter, trying different ice cream flavors, or creating bite-sized versions using Golden Grahams.
Most importantly, these frozen s’mores offer tremendous flexibility. You can prepare them days ahead for parties, customize them to suit dietary preferences, or simply make a batch to enjoy throughout the week. Their two-week freezer life makes them a convenient treat to have on hand for unexpected guests or sudden sweet cravings.
Last but not least, while traditional campfire s’mores will always have their special place in our hearts, these frozen versions provide a delicious alternative that captures all the essential flavors we love. Therefore, next time you’re craving s’mores but don’t have access to a campfire – or simply want a refreshing twist on a classic – these ice cream sandwiches will undoubtedly satisfy your sweet tooth while keeping you cool during warm summer days.
FAQs
Q1. How can I prevent my graham crackers from getting soggy in s’more ice cream sandwiches? To prevent soggy graham crackers, spread a thin layer of marshmallow creme or chocolate on both sides of the cracker before assembly. This creates a barrier against moisture from the ice cream. Additionally, freezing the graham crackers before assembly can help maintain their structure.
Q2. What’s the best way to achieve the perfect texture for s’more ice cream sandwiches? For ideal texture, freeze your assembled s’more ice cream sandwiches for at least 3 hours, though 6 hours is optimal. Work in small batches to prevent ice cream melting during assembly. Before serving, let the sandwiches sit at room temperature for 1-2 minutes to slightly soften the graham crackers for easier biting.
Q3. Can I make s’more ice cream sandwiches without an ice cream maker? Absolutely! You can create a no-churn ice cream base by combining whipped heavy cream with sweetened condensed milk and crushed graham crackers. Fold in toasted mini marshmallows and fudge sauce, then freeze for 5-6 hours until scoopable.
Q4. How long can I store s’more ice cream sandwiches in the freezer? When properly wrapped and stored in an airtight container, s’more ice cream sandwiches can last up to two weeks in the freezer. Some sources even suggest they maintain quality for up to three months. For best results, store them in the back of the freezer near the fan.
Q5. What are some creative variations I can try with s’more ice cream sandwiches? There are many delicious variations to explore. Try using chocolate ice cream for a more intense chocolate flavor, or add a layer of peanut butter for a nutty twist. You can also incorporate fruits like banana for a refreshing touch, or create mini s’mores bites using Golden Graham cereal pieces instead of traditional graham crackers.