How to Make Restaurant-Style Honey Garlic Shrimp in 20 Minutes
Honey garlic shrimp cooks faster than it takes most restaurants to even process your takeout order! This amazingly flavorful dish takes just 5-10 minutes to cook on the stove, with a total prep-to-plate time of only 20 minutes.
In fact, this easy honey garlic shrimp recipe comes together quicker than it takes to cook a pot of rice. Unlike typical recipes that mask the natural flavors, our version uses half the honey, allowing the sweetness of the shrimp to truly shine through. We’ll show you exactly how to select the right size shrimp for perfect caramelization and the simple technique to prevent dry, rubbery results. Not only will we walk through each step of creating this 20-minute honey garlic shrimp, but we’ll also share our secret for creating that thick, restaurant-style sauce that perfectly coats each bite.
Choose the Right Ingredients for Big Flavor
The secret to restaurant-quality honey garlic shrimp starts with selecting the right ingredients. Each component plays a crucial role in creating that perfect balance of sweet, savory, and aromatic flavors that makes this dish so irresistible.
Picking the best shrimp size and type
For honey garlic shrimp, size truly matters. I recommend using jumbo or extra-large shrimp, specifically those labeled as “16-20” or “21-25” per pound. These larger sizes allow for proper caramelization without overcooking. Smaller shrimp cook too quickly, leaving insufficient time for developing those delicious caramelized flavors.
Fresh shrimp works wonderfully, however, frozen shrimp is equally suitable and often more convenient. When using frozen, ensure they’re completely thawed under cold water before cooking to maintain proper texture. Look for shrimp that are already peeled and deveined to save precious prep time. You can leave the tails on for presentation or remove them for easier eating – both approaches work beautifully.
Honey, garlic, and soy sauce essentials
The marinade forms the foundation of this dish’s signature flavor profile. Honey provides that sticky-sweet texture and natural sweetness that coats the shrimp perfectly. For garlic, always opt for fresh minced rather than powdered – it delivers substantially more robust flavor. Plan for about 1-3 cloves depending on your preference for garlic intensity.
Soy sauce adds that essential savory depth. While regular soy sauce works well, tamari offers a richer flavor profile and makes the dish gluten-free. Alternatively, coconut aminos provide a soy-free option without sacrificing taste.
Optional add-ins: ginger, chili flakes, green onions
While the base recipe creates a delicious dish, several additions can elevate your honey garlic shrimp to truly professional levels. Fresh ginger balances the seafood flavors while adding warmth and complexity – about ½ teaspoon grated is sufficient. For those who enjoy heat, a sprinkle of red pepper flakes (about ⅛ teaspoon) provides just enough kick without overwhelming the other flavors.
Green onions serve multiple purposes – they add freshness, color contrast, and a mild onion flavor that complements the sweetness of the honey. Slice them into 2-inch pieces, adding the white parts earlier in cooking and the green parts at the end for optimal texture.
Furthermore, a splash of sesame oil adds nutty depth, while a hint of fish sauce can introduce umami complexity for those seeking maximum flavor development.
Make the Marinade and Prep the Shrimp
Creating the perfect marinade is where the magic begins for restaurant-quality honey garlic shrimp. This critical step infuses the shrimp with intense flavor and sets the stage for that caramelized finish everyone craves.
How to mix the honey garlic sauce
The foundation of your honey garlic sauce starts with whisking together a few simple ingredients. In a medium bowl, combine honey, soy sauce, minced garlic, and ginger (if using) until smooth and well-integrated. For additional depth, consider adding a splash of fish sauce to enhance the umami notes. Ideally, reserve half of this mixture for cooking and use the other half for marinating.
For those who prefer a sauce with heat, incorporate a small amount of crushed red pepper flakes—just enough to provide subtle warmth without overwhelming the other flavors. Mix thoroughly until all ingredients are completely blended to create that sticky-sweet, savory profile that makes this dish irresistible.
Marinating time and tips
Once your marinade is ready, place cleaned shrimp in a sealable container or zip-top bag and pour the reserved portion over them. Gently toss the shrimp for about 2 minutes to ensure each piece is evenly coated. Cover and refrigerate.
The ideal marinating window ranges from 15-60 minutes. This timeframe allows flavors to penetrate without affecting texture. Importantly, avoid marinating beyond 1 hour as the salt in soy sauce begins to cure the shrimp, altering its texture. If you’re short on time, even 15-20 minutes will yield flavorful results.
During marination, occasionally toss the shrimp to maintain even flavor distribution. Prior to cooking, pat the shrimp dry with paper towels to remove excess marinade.
Velveting shrimp with cornstarch (optional)
Velveting is a traditional Chinese technique that creates remarkably tender, succulent shrimp. This optional step forms a protective coating that locks in moisture and prevents rubbery texture.
To velvet your shrimp, coat them in a mixture of cornstarch and soy sauce after patting them dry. This mixture not only infuses flavor but creates that protective barrier during cooking. For enhanced results, some chefs include egg white in the velveting mixture, which further contributes to that silky restaurant texture.
The cornstarch mixture additionally helps thicken your final sauce. If you prefer an even thicker sauce, mix 1 teaspoon of cornstarch with 1 teaspoon of warm water and add this to your reserved cooking sauce.
Cook the Shrimp Like a Pro
The cooking phase is where honey garlic shrimp transforms from ordinary to extraordinary. Unlike many seafood dishes that require gentle heat, this recipe demands a different approach for that restaurant-quality finish.
Using high heat for caramelization
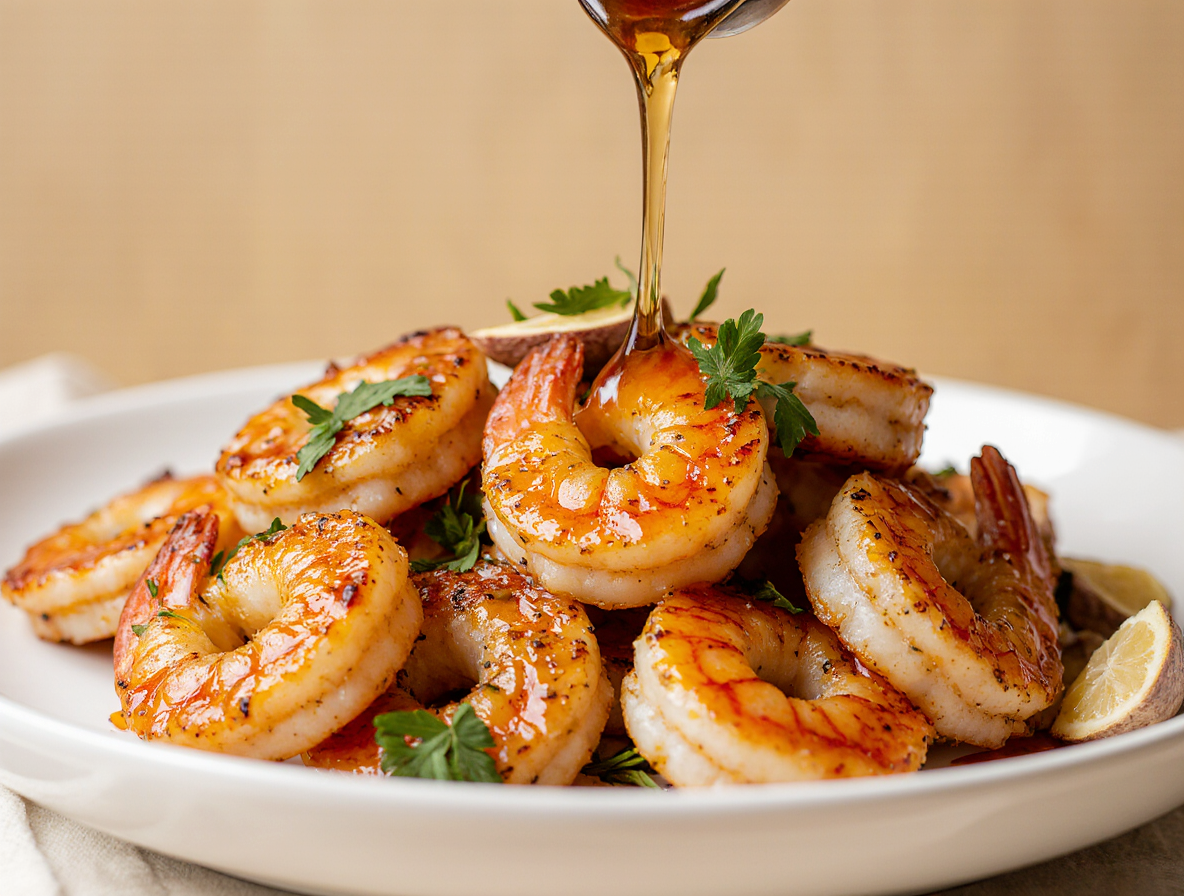
The key to exceptional honey garlic shrimp lies in proper caramelization. Heat a large non-stick skillet or well-seasoned cast-iron pan over medium-high to high heat until you see wisps of smoke. This intense heat creates those beautiful caramelized bits of honey and garlic that professional chefs prize. First, add a touch of oil, then place your shrimp in a single layer without overcrowding—this ensures searing instead of steaming.
When to add the sauce
Timing is everything with sauce addition. Cook the shrimp for 1-2 minutes on the first side until pink, then flip them over. At this point—when shrimp are about one-third cooked through—pour in your reserved marinade. This technique allows the sauce to reduce into a thick glaze while simultaneously finishing the cooking process. The sugar in honey will caramelize, creating that signature sticky coating.
Avoiding overcooked or rubbery shrimp
Perfectly cooked shrimp form a gentle “C” shape, whereas overcooked shrimp curl into tight “O” shapes. Consequently, monitor them closely as they cook through—typically just another minute or two after adding sauce. Remove from heat as soon as they lose their translucency.
For larger shrimp, consider taking the pan off heat and letting residual warmth finish the cooking process. This approach prevents that disappointing rubbery texture that comes from even a minute too long on the stove.
Serve and Customize Your Dish
After perfecting your honey garlic shrimp, plating transforms it from a homemade meal to a restaurant-worthy creation. The presentation makes all the difference in elevating this quick dish.
Best sides: rice, noodles, or veggies
Honey garlic shrimp pairs wonderfully with various bases. Rice serves as the traditional foundation – white, brown, or jasmine rice all work beautifully to soak up the flavorful sauce. For a low-carb alternative, try cauliflower rice.
Alternatively, noodles create a heartier meal. Consider lo mein, rice noodles, or sesame noodles that absorb the sticky sauce. For a complete meal, combine with stir-fried vegetables.
Broccoli remains the classic vegetable pairing, either steamed or roasted. Other excellent choices include sautéed spinach, asparagus, snap peas, or bell peppers.
Garnish ideas for restaurant-style look
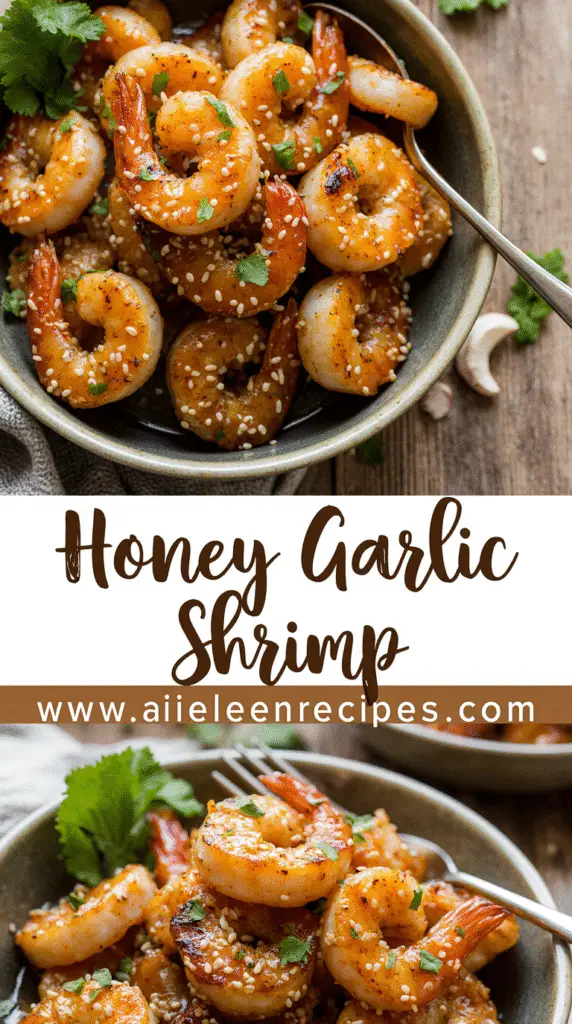
For that professional appearance, sprinkle sliced green onions generously over your dish. Toasted sesame seeds add visual appeal plus subtle nutty flavor. Lime wedges on the side provide both decoration and brightness.
How to thicken the sauce if needed
If your sauce seems thin, create a cornstarch slurry by mixing 1 teaspoon cornstarch with 1 teaspoon cold water. Pour this mixture into the pan, stirring continuously until the sauce thickens. Alternatively, all-purpose flour, potato starch, tapioca starch, or arrowroot powder can thicken your sauce.
Conclusion
Making restaurant-style honey garlic shrimp at home truly transforms an ordinary weeknight into something special. This dish stands out because of its simplicity paired with extraordinary flavor. You can now create this takeout favorite faster than delivery would arrive, all while controlling exactly what goes into your meal.
After all, the beauty of this recipe lies not just in its speed but also in its flexibility. Large shrimp caramelized to perfection, coated with that sticky-sweet sauce, makes for an impressive dish with minimal effort. Additionally, you can easily adjust the flavors to suit your preference – more garlic for intensity, a touch of heat from chili flakes, or extra ginger for warmth.
Most importantly, the technique matters just as much as the ingredients. High heat creates that essential caramelization while brief cooking time prevents rubbery texture. Therefore, watching for that perfect “C” shape rather than an overcooked “O” will reward you with restaurant-quality results every time.
Undoubtedly, this honey garlic shrimp pairs beautifully with so many sides – from classic rice to noodles or fresh vegetables. We love how versatile it becomes, working equally well for quick family dinners or impressive entertaining with minimal fuss.
Next time you crave takeout, remember this 20-minute wonder waiting in your kitchen arsenal. Fresh ingredients, simple techniques, and just minutes of cooking yield results that might make you skip ordering in altogether. Your homemade honey garlic shrimp will likely become a regular feature on your dinner table – delicious, quick, and surprisingly simple to master.
FAQs
Q1. How can I make my honey garlic shrimp taste like restaurant-quality? To achieve restaurant-quality taste, use high heat for proper caramelization, add the sauce at the right time, and avoid overcooking. Use jumbo or extra-large shrimp, fresh garlic, and a balanced marinade of honey, soy sauce, and optional ingredients like ginger or chili flakes.
Q2. What’s the ideal cooking time for honey garlic shrimp? Honey garlic shrimp typically cooks very quickly. Sear the shrimp for 1-2 minutes on the first side, then flip and cook for another 1-2 minutes after adding the sauce. The total cooking time should be around 3-4 minutes, depending on the size of the shrimp.
Q3. Can you explain the basic process of making honey garlic shrimp? Start by marinating the shrimp in a mixture of honey, soy sauce, garlic, and optional ingredients for 15-60 minutes. Cook the shrimp in a hot pan, add the reserved marinade when the shrimp are about one-third cooked, and let the sauce reduce to a glaze while finishing the cooking process.
Q4. What are some good side dishes to serve with honey garlic shrimp? Honey garlic shrimp pairs well with various sides. Rice (white, brown, or jasmine) is a classic choice. You can also serve it with noodles like lo mein or rice noodles. For a healthier option, consider steamed or roasted vegetables such as broccoli, spinach, or asparagus.
Q5. How can I prevent my shrimp from becoming rubbery? To avoid rubbery shrimp, watch them closely as they cook. They’re done when they form a gentle “C” shape. Remove them from heat as soon as they lose their translucency, which typically takes just a few minutes. For larger shrimp, consider taking the pan off the heat and letting residual warmth finish the cooking process.