How to Make the Perfect Tamago Sando: Japanese Egg Sandwich Secrets Revealed
Tamago sando, the iconic Japanese egg sandwich, completely changed my perception of egg salad sandwiches. During my exploration of Japanese convenience store (konbini) cuisine, I discovered these incredibly affordable treats selling for just $2-4 each. Despite their humble price tag, these sandwiches pack an extraordinary flavor experience between two slices of fluffy milk bread.
What makes the japanese sando so special? The answer lies in its deceptive simplicity. With just four basic ingredients, this egg sando recipe creates a rich, buttery filling that perfectly complements the soft bread. Furthermore, the technique of separating egg whites and yolks is one of the secrets to achieving that signature creamy texture. If you’ve been wondering how to make tamago sando at home, I’ll be sharing all the essential techniques that make this japanese egg sando an irresistible grab-and-go favorite throughout Japan.
What is Tamago Sando?
The first time I bit into a tamago sando at a Japanese train station, I understood why this humble sandwich has captivated food lovers worldwide. In Japanese, “tamago” means egg and “sando” is short for sandwich (サンドイッチ or san-do-itchi in Japanese). This deceptively simple creation has deep roots in Japanese food culture while maintaining its status as an everyday comfort food.
Origin and meaning of the name
Bread was initially introduced to Japan by Dutch and Portuguese traders in the 16th century. However, Western-style sandwiches didn’t gain significant popularity until the Meiji Era in the late 19th century, when Japan began embracing more Western influences. Over time, Japanese chefs adapted these sandwiches, infusing them with local culinary techniques and flavors.
As Japan developed its own sandwich culture, two distinct styles of tamago sando emerged. The first and most common is the egg salad-style version with mashed boiled eggs mixed with Kewpie mayo. The second is the tamagoyaki sando, featuring a sweet-savory Japanese rolled omelet between bread slices. Both versions showcase Japan’s talent for adapting foreign concepts while adding unique cultural touches.
Why it’s popular in Japan and abroad
The popularity of tamago sando in Japan can be attributed to several factors. First is accessibility – with approximately 56,000 konbini (convenience stores) across Japan, high-quality egg sandwiches are available 24/7. These convenience store versions are remarkably affordable, typically priced under $4 USD, making them perfect for busy commuters and students.
Additionally, tamago sando represents a perfect balance of flavors and textures. It’s “soft, creamy, and slightly sweet”, creating a universally appealing flavor profile that pairs wonderfully with tea, coffee, or soup. This versatility makes it suitable for any time of day.
The sandwich also carries nostalgic value for many Japanese people. One survey revealed that egg is the most popular sandwich filling in Japan, with one in four respondents naming it their favorite. For many, tamago sando evokes memories of “school lunches, picnics, or train station bento boxes”.
Internationally, tamago sando’s popularity surged when the late Anthony Bourdain described it as having “Inexplicable Deliciousness”. The sandwich’s photogenic appearance has also made it a social media star, appearing on trendy café menus worldwide.
What makes tamago sando truly special, though, is how it embodies Japanese culinary philosophy – where quality ingredients, meticulous preparation, and simplicity create something extraordinary from the most basic components.
Essential Ingredients for the Perfect Japanese Egg Sando
Creating the perfect tamago sando begins with selecting four key ingredients that define its distinctive character. Each component plays a crucial role in achieving that signature Japanese egg sandwich experience that has captivated food lovers around the world.
Shokupan: the soft Japanese milk bread
The foundation of any authentic tamago sando is shokupan, the incredibly soft Japanese milk bread. This isn’t ordinary white bread! Shokupan features a “subtly sweet, milky, and incredibly soft” texture with a “nice bounce” that perfectly complements the creamy filling. The crust around this Pullman-style loaf is typically removed completely, leaving only the pillowy interior.
Finding proper shokupan makes a significant difference. Look for it at Asian grocery stores, Japanese markets, or specialty bakeries. If unavailable, brioche or high-quality white bread with a “very fine, spongy texture” can substitute in a pinch.
Kewpie mayo: the umami-rich spread
Kewpie mayonnaise stands as “the essential ingredient” that distinguishes a true japanese egg sando from ordinary egg salad sandwiches. Unlike American mayonnaise, Kewpie is “made with only the yolks”, giving it a “richer flavor and creamier texture”. Its distinctive tanginess comes from rice vinegar rather than distilled vinegar, plus a hint of MSG for umami.
Fortunately, Kewpie is now widely available at Asian markets, many supermarkets, and even Target. This ingredient truly makes the difference between a good sandwich and an exceptional one.
Eggs: choosing the right type and freshness
Naturally, eggs form the star of the tamago sando recipe. Since they’re lightly seasoned, “it’s important to use high quality eggs” with vibrant yolks. Free-range or organic eggs typically offer “a darker and harder shell, a big, vibrant yolk, and a richer taste”.
Interestingly, contrary to most cooking advice, older (but still fresh) eggs work better for tamago sando because they’re “easier to peel” after boiling.
Optional add-ins: milk, sugar, butter, chives
Several subtle additions elevate a basic egg sando to convenience store perfection:
- A splash of milk or cream adds “extra creaminess” to the filling
- A pinch of sugar “balances out the umami flavors” and mimics the 7-Eleven version
- Room temperature butter spread on the bread creates a “waterproof barrier” that prevents sogginess
- Diced green onions or chives can add “more color and flavor” for a personal touch
These thoughtful additions highlight why the seemingly simple tamago sando delivers such an exceptional taste experience.
Step-by-Step Tamago Sando Recipe
Now that we’ve gathered our ingredients, let’s dive into the preparation process for an authentic tamago sando. The beauty of this recipe lies not just in the ingredients but in the careful execution of each step.
Boiling and peeling the eggs
I begin by bringing a pot of water to a gentle boil over medium-high heat. Next, I carefully lower the eggs into the water using a slotted spoon. For the perfect consistency, I boil them for exactly 10-12 minutes. Afterward, I immediately transfer them to an ice bath for at least 5 minutes to stop the cooking process and make peeling easier.
A crucial tip: older eggs (while still fresh) peel much more easily than very fresh ones. To peel, I gently tap the eggs all over to create microcracks, then peel under a light stream of cold water.
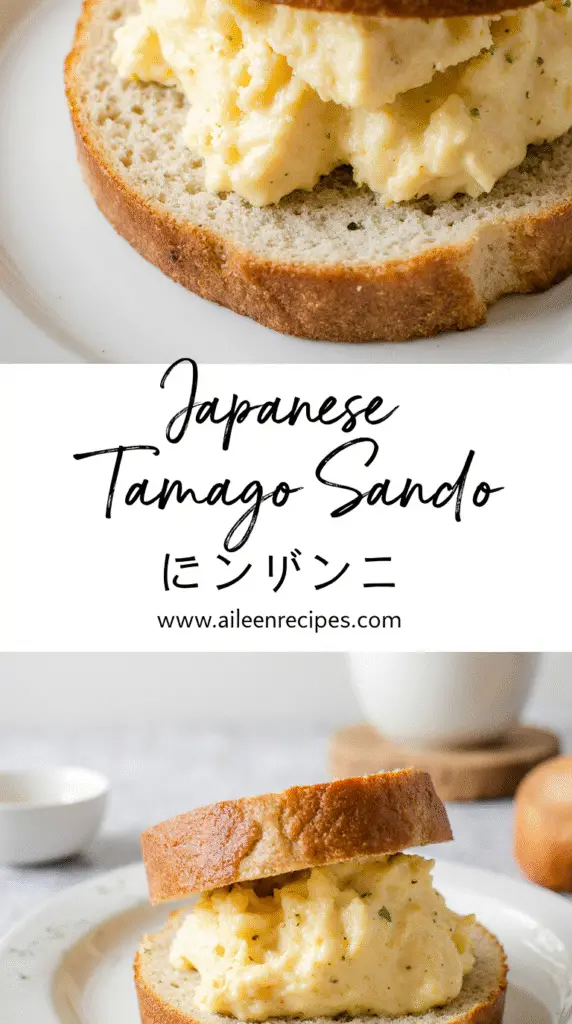
Making the egg salad filling
Once peeled, I have two options: the traditional method of mashing all eggs together, or the gourmet approach where I separate whites from yolks. For the latter method, I mash the yolks with mayonnaise, salt, sugar, and pepper until smooth, then fold in the chopped whites.
For classic preparation, I simply place all eggs in a bowl, add Kewpie mayo (2 Tbsp), sugar (¼ tsp), salt (¼ tsp), pepper (⅛ tsp), and milk (2 tsp). I mash everything together until well combined but still chunky—not completely smooth.
Assembling the sandwich
Firstly, I spread a thin layer of room temperature butter on each bread slice. The butter creates a moisture barrier preventing soggy bread. Then I evenly distribute the egg mixture on one slice, pressing gently before topping with the other slice.
Cutting and serving tips
Finally, for authentic presentation, I trim the crusts off the sandwich. To achieve clean cuts without squeezing out filling, I chill the assembled sandwich for 10-15 minutes and use a sharp serrated knife, wiping the blade between cuts. I cut diagonally to create two perfect triangles.
Tips and Secrets for a Flawless Tamago Sando
After mastering the basic tamago sando recipe, I’ve discovered several professional tricks that elevate this humble sandwich to new heights. These insider techniques make the difference between a good homemade version and an exceptional japanese egg sando worthy of Tokyo’s finest convenience stores.
Use older eggs for easier peeling
Contrary to most cooking advice, older eggs actually work better for tamago sando. I’ve found that eggs that have been in my refrigerator for 4-5 days peel much more cleanly. For even easier peeling, add a tablespoon of vinegar to your boiling water. This simple acid trick helps the shells separate more readily from the whites, giving you those picture-perfect boiled eggs essential for a beautiful sandwich.
Chill the filling before assembly
One game-changing technique involves refrigerating your egg mixture for 10-15 minutes before spreading it on bread. Consequently, the filling firms up slightly, making assembly and cutting significantly easier. Moreover, this brief chill allows the flavors to meld together, creating that signature convenience store taste. For an even more authentic experience, try wrapping your fully assembled tamago sando in plastic wrap and chilling it for 30 minutes before serving.
Butter the bread to prevent sogginess
Essentially, butter acts as a waterproof barrier between your moist filling and delicate bread. I always spread a thin layer on each slice, which not only prevents sogginess but adds a subtle richness. This step might seem minor, yet professional chefs consider it non-negotiable for proper tamago sando construction.
Separate yolks and whites for extra creaminess
For truly professional results, treat yolks and whites differently. First, mash the yolks with mayo, salt, and seasonings until smooth. Afterwards, fold in the chopped whites. This technique creates that signature silky-smooth texture with pleasant chunks throughout. Some chefs even add a raw egg yolk to achieve an extra custardy consistency.
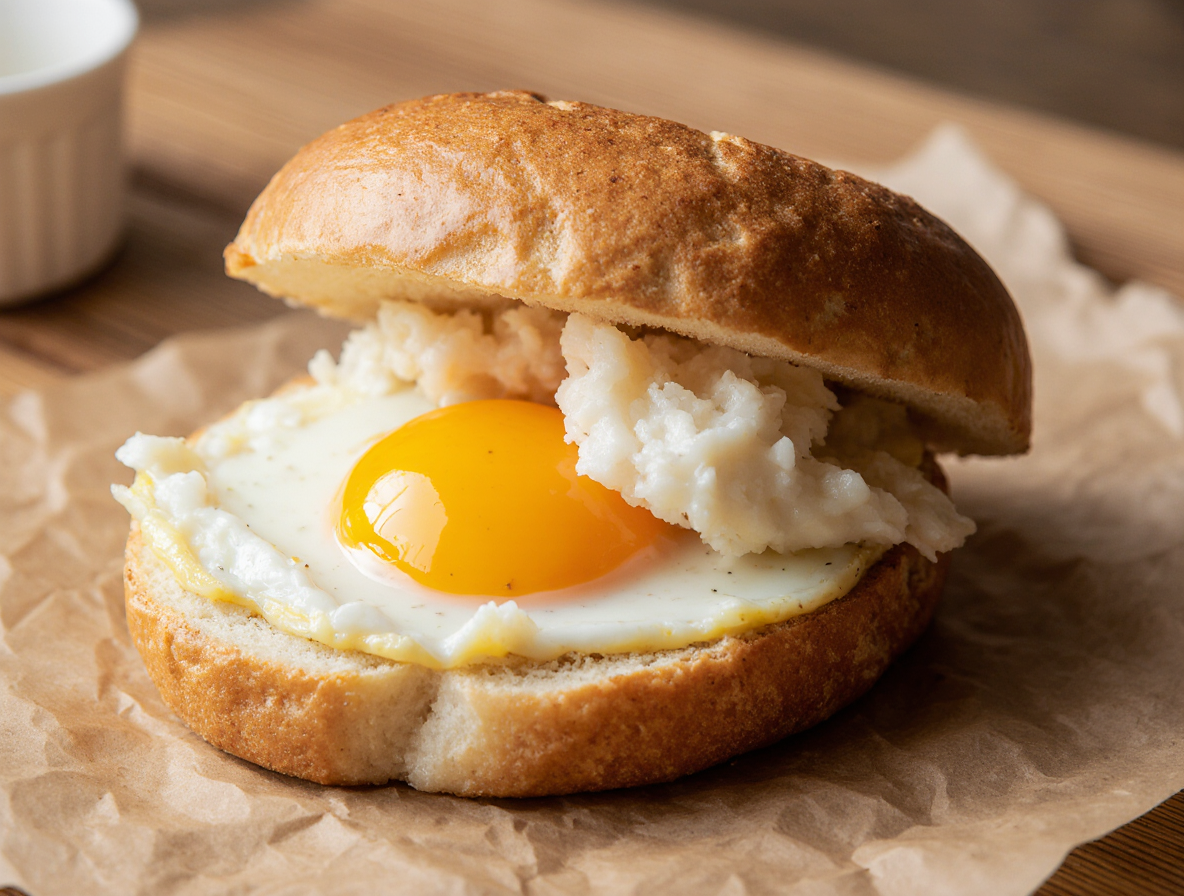
Use soft-boiled eggs for a gourmet twist
Notably, a 7-minute soft-boiled egg brings a delightful jammy texture to your sandwich. For an impressive presentation, try adding halved soft-boiled eggs (cooked 6-6.5 minutes) alongside your regular filling. When cut, these create a stunning visual effect with their slightly runny centers flowing into the creamy filling.
Conclusion
Tamago sando represents Japanese culinary philosophy at its finest – transforming simple ingredients into something extraordinary through careful technique and attention to detail. My journey with this beloved sandwich began as curiosity and quickly turned into appreciation for its deceptive simplicity.
The perfect tamago sando depends equally on quality ingredients and proper technique. Soft shokupan, creamy Kewpie mayonnaise, and fresh eggs form the foundation, while methods like separating yolks and whites or creating that butter barrier elevate the sandwich from good to exceptional. These seemingly small details actually make all the difference.
You might wonder if such a simple sandwich deserves this level of attention. After making and tasting an authentic tamago sando, you’ll understand why it has captivated food lovers worldwide. The first bite reveals layers of flavor and texture that belie its humble appearance.
Whether you follow the traditional preparation or experiment with gourmet touches like jammy soft-boiled eggs, tamago sando rewards your efforts with comfort and satisfaction. This Japanese classic proves that food doesn’t need to be complicated to be remarkable.
The next time you’re looking for a quick yet satisfying meal, remember this unassuming egg sandwich. With just a handful of ingredients and the techniques shared here, you can bring a taste of Japanese convenience store magic into your own kitchen. Undoubtedly, your first homemade tamago sando will mark the beginning of a delicious new tradition.
FAQs
Q1. How long should I boil the eggs for a perfect tamago sando? For an ideal consistency, boil the eggs for 10-12 minutes. Immediately transfer them to an ice bath afterward to stop the cooking process and make peeling easier.
Q2. What’s the secret to making the best egg salad filling? The key is to use Kewpie mayonnaise, which gives a richer flavor and creamier texture. For extra creaminess, try separating the yolks and whites, mashing the yolks with mayo and seasonings, then folding in the chopped whites.
Q3. How many eggs are typically used in a tamago sando? While the number can vary, most recipes call for 2-3 eggs per sandwich. This amount provides enough filling for a generous sandwich without overpowering the bread.
Q4. What type of bread is best for tamago sando? The ideal bread for tamago sando is shokupan, a soft Japanese milk bread. If unavailable, high-quality white bread or brioche with a fine, spongy texture can be used as a substitute.
Q5. How can I prevent my tamago sando from becoming soggy? To prevent sogginess, spread a thin layer of room temperature butter on each bread slice before adding the filling. This creates a moisture barrier. Additionally, chilling the assembled sandwich for 10-15 minutes before cutting can help maintain its structure.