Red Velvet Pancakes
**Introduction**
Red velvet is more than a cake; it’s an experience. That iconic crimson hue, the whisper of cocoa, and the unmistakable tang of buttermilk combine to create something truly magical. Now, imagine all that decadent flavor transformed into a stack of warm, fluffy, morning-perfect pancakes. These Red Velvet Pancakes are a celebration on a plate—luxuriously tender, visually stunning, and perfectly balanced between subtle chocolate notes and a bright, creamy finish. They are neither overly sweet nor purely dessert-like, but a sophisticated twist on a breakfast classic that feels both indulgent and comforting. Perfect for turning an ordinary morning into a memorable occasion or for adding a touch of whimsical charm to a weekend brunch spread, these pancakes promise to delight the eyes and the palate from the very first bite.
**Perfect for:**
Valentine’s Day or anniversary breakfast in bed.
A show-stopping centerpiece for a holiday brunch (Christmas, Mother’s Day, Easter).
A fun and festive birthday morning surprise.
A “brinner” (breakfast-for-dinner) night that feels extra special.
Impressively delicious weekend treat for the family.
**Why You’ll Love This Red Velvet Pancakes Recipe**
**Unmistakable Flavor & Texture:** This recipe achieves the authentic red velvet profile—a delicate cocoa background complemented by the tang of buttermilk and vinegar, all wrapped in a melt-in-your-mouth, velvety crumb. It’s a complex flavor dance that far surpasses any boxed mix.
**Consistently Perfect Results:** With precise instructions for managing the leavening agents and a specific mixing method, this recipe guarantees pancakes that are consistently light, airy, and rise beautifully every time, avoiding the common pitfalls of dense or flat pancakes.
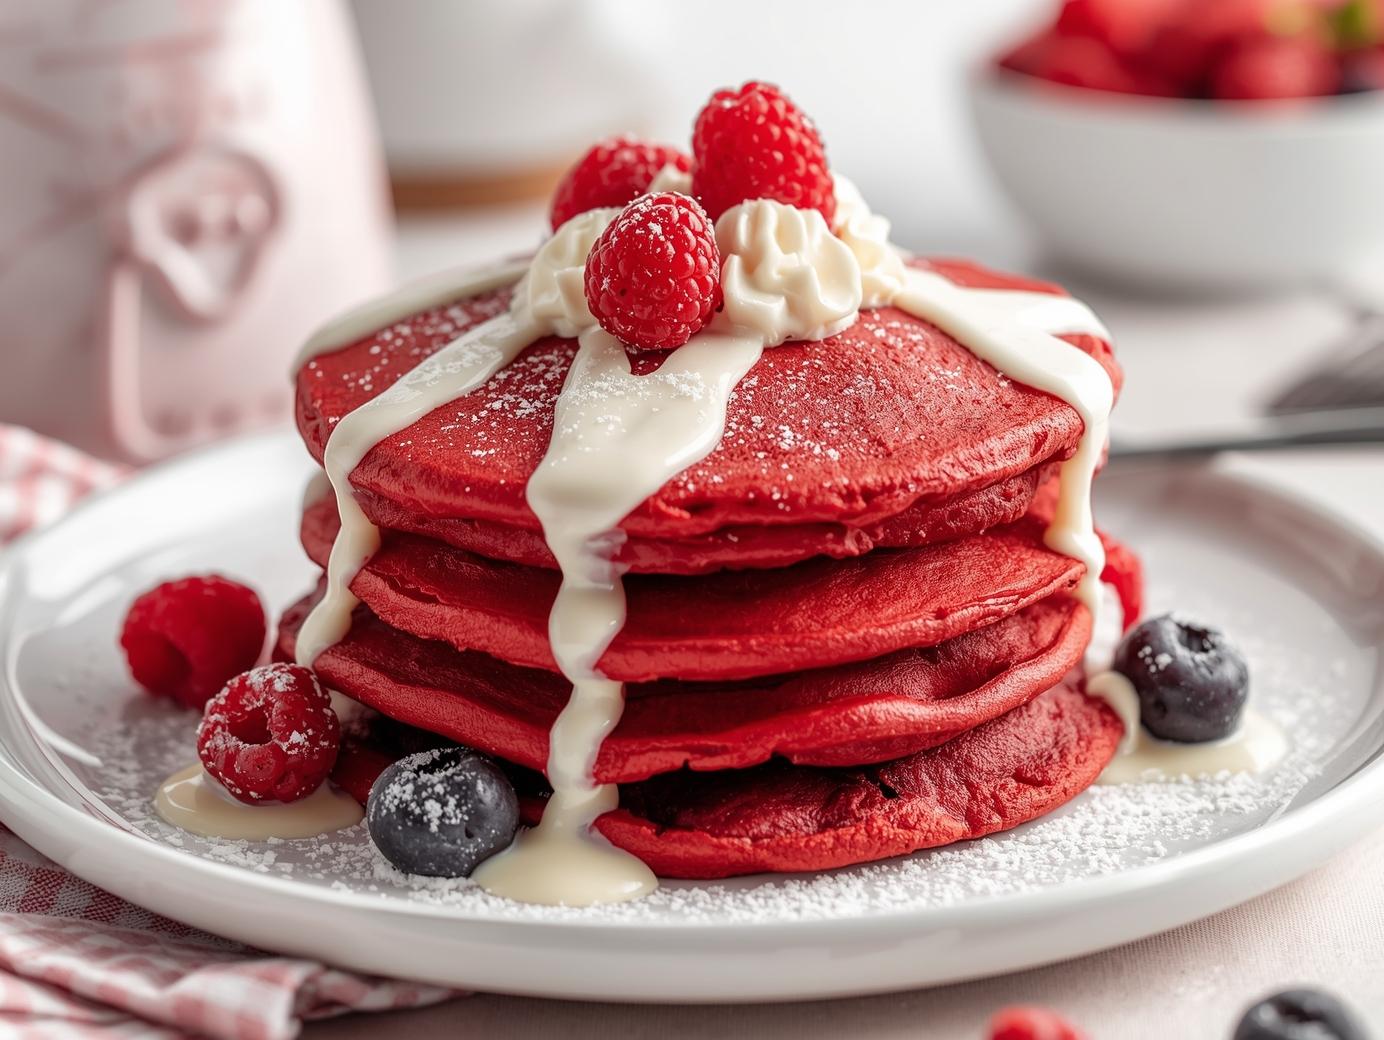
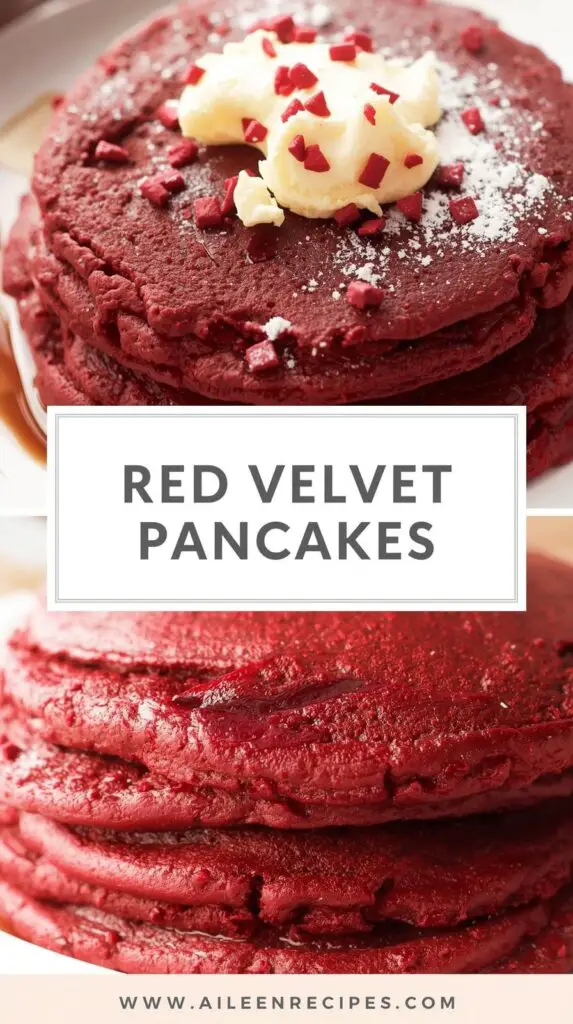
**Stunning Visual Impact:** The vibrant red batter transforms on the griddle into gorgeous, deep crimson pancakes that are a feast for the eyes before the first forkful. They are guaranteed to elicit smiles and admiration.
**Customizable Toppings:** While the classic cream cheese glaze is highly recommended, these pancakes serve as the perfect canvas for your creativity, pairing wonderfully with everything from fresh berries to chocolate chips, allowing you to tailor each serving.
**Preparation and Cooking Time**
Total Time: 25 minutes
Preparation Time: 15 minutes
Cooking Time: 10 minutes
Servings: 4 servings (about 8-10 medium pancakes)
Calories per serving: Approximately 320-350 calories (without glaze)
**Nutritional Information (Per Serving – Estimate, without glaze):**
**Calories:** 320-350 kcal
**Protein:** 7g
**Carbohydrates:** 45g
**Fat:** 12g
**Fiber:** 1g
**Sugar:** 15g
**Nutritional Disclaimer**
aileenrecipes is not a dietician or nutritionist, and any nutritional information shared is only an estimate. We recommend running the ingredients through an online nutritional calculator if you need to verify any information.
**Ingredients**
*For the Pancakes:*
* 1 ¼ cups all-purpose flour
* 2 tablespoons unsweetened cocoa powder (not Dutch-processed)
* ¼ cup granulated sugar
* 1 teaspoon baking powder
* ½ teaspoon baking soda
* ½ teaspoon fine sea salt
* 1 large egg, at room temperature
* 1 cup buttermilk, at room temperature
* ¼ cup sour cream or full-fat Greek yogurt, at room temperature
* 2 tablespoons unsalted butter, melted and cooled slightly
* 1 tablespoon red liquid food coloring (or 1 ½ tsp gel food coloring)
* 1 teaspoon pure vanilla extract
* ½ teaspoon distilled white vinegar
*For the Cream Cheese Glaze (Optional but recommended):*
* 4 ounces full-fat cream cheese, softened
* 1 cup powdered sugar, sifted
* ¼ cup milk or buttermilk
* ½ teaspoon pure vanilla extract
* Pinch of salt
**Step-by-Step Instructions**
1. **Prepare the Dry Ingredients:** In a large mixing bowl, whisk together the flour, cocoa powder, sugar, baking powder, baking soda, and salt. Ensure they are thoroughly combined and any lumps from the cocoa are broken up.
2. **Combine the Wet Ingredients:** In a separate medium bowl, whisk the egg until uniform. Add the buttermilk, sour cream, melted butter, food coloring, vanilla extract, and vinegar. Whisk vigorously until the mixture is completely smooth and uniformly colored.
3. **Mix the Batter:** Create a well in the center of the dry ingredients. Pour the wet mixture into the well. Using a spatula, gently fold the ingredients together. Mix *only until just combined* and no large pockets of dry flour remain. The batter will be thick and slightly lumpy; this is crucial for tender pancakes. Do not overmix.
4. **Rest the Batter:** Let the batter sit undisturbed for 5-10 minutes. This allows the leavening agents to activate and the flour to hydrate, resulting in a fluffier texture.
5. **Cook the Pancakes:** Heat a non-stick griddle or large skillet over medium heat. Lightly grease with butter or neutral oil. Once hot (a few drops of water should sizzle), pour about ⅓ cup of batter for each pancake. Cook until bubbles form on the surface and the edges look set, about 2-3 minutes.
6. **Flip and Finish:** Carefully flip the pancakes and cook for another 1-2 minutes on the second side, until cooked through and puffy. Transfer to a warm plate or oven set to the lowest temperature while you cook the remaining batter.
7. **Make the Glaze (If using):** While the batter rests or pancakes cook, beat the softened cream cheese with an electric mixer until smooth. Gradually add the powdered sugar, milk, vanilla, and salt. Beat until a smooth, drizzle-able glaze forms. Add more milk a teaspoon at a time if too thick.
**How to Serve Red Velvet Pancakes**
* Classically elegant with a generous drizzle of cream cheese glaze and a dusting of extra powdered sugar.
* For a textural contrast, top with a handful of toasted pecans or walnuts and a side of fresh raspberries or strawberries.
* As a decadent dessert pancake, add a sprinkle of mini chocolate chips into the batter and serve with a scoop of vanilla bean ice cream.
* Family-style on a large platter, allowing everyone to customize with their choice of glaze, maple syrup, whipped cream, or fresh fruit.
**Additional Tips for Red Velvet Pancakes**
* **Temperature is Key:** Using room temperature buttermilk, egg, and sour cream ensures they blend smoothly and promote an even rise. Cold ingredients can re-solidify the melted butter and create a denser batter.
* **Control the Color:** For the deepest, most vibrant red color, liquid food coloring works perfectly. Gel coloring is more concentrated, so use less. The color will darken slightly as the pancakes cook.
* **Don’t Press:** Resist the urge to press down on the pancakes with the spatula after flipping, as this will squeeze out the air and make them dense.
* **Test for Doneness:** The second side cooks much faster than the first. Peek to ensure it’s a deep reddish-brown, not black, as the cocoa and color can make it difficult to judge.
**Recipe Variations of Red Velvet Pancakes**
* **White Chocolate Chip:** Fold ½ cup of white chocolate chips into the batter after mixing. The sweet white chocolate pairs beautifully with the tangy notes.
* **Gluten-Free Version:** Substitute the all-purpose flour with a 1:1 gluten-free baking blend. Ensure your baking powder is gluten-free.
* **Beet-Powered Natural Color:** For a natural alternative, replace the food coloring with 3 tablespoons of pureed, strained cooked beets. The color will be more muted and earthy, and the flavor will have a subtle earthiness.
**Freezing and Storage for Red Velvet Pancakes**
**Storage:** Cooked pancakes can be stored in an airtight container in the refrigerator for up to 3 days. Reheat in a toaster, oven, or microwave until warm.
**Freezing:** Place cooled pancakes in a single layer on a baking sheet to flash freeze for 1 hour. Then transfer to a freezer-safe bag for up to 2 months. Reheat directly from frozen in a toaster or a 350°F (175°C) oven until heated through.
**FAQ Section about Red Velvet Pancakes**
**Can I make the batter ahead of time?**
It is not recommended. The leavening agents begin working as soon as the wet and dry ingredients meet. Letting batter sit for extended periods will result in flat, dense pancakes.
**Why is vinegar needed in the recipe?**
The vinegar reacts with the baking soda to create an extra lift, making the pancakes fluffier. It also enhances the tanginess that is characteristic of true red velvet flavor.
**My pancakes aren’t bright red. What happened?**
The cocoa powder provides a brown base, so a full tablespoon of liquid coloring is often needed to achieve a vibrant red. The type and brand of coloring can also affect the final result.
**Can I use bottled buttermilk substitute?**
For best flavor and texture, real buttermilk is preferred. In a pinch, you can make a substitute by adding 1 tablespoon of vinegar or lemon juice to 1 cup of milk and letting it sit for 5 minutes.
**Conclusion of Red Velvet Pancakes Recipe**
Red Velvet Pancakes are more than just a breakfast dish; they are a simple yet spectacular way to create a moment of joy. This recipe demystifies the process, delivering that beloved bakery-favorite flavor straight from your own kitchen with a foolproof method. Whether serving them for a heartfelt celebration or simply to brighten a Saturday morning, these strikingly beautiful, impossibly soft pancakes are guaranteed to become a requested tradition. The combination of delicate cocoa, rich tang, and luxurious texture, especially when crowned with a smooth cream cheese glaze, is an irresistible invitation to gather, share, and savor. Whip up a batch and watch the magic happen.