The Secret to Extra Crispy Oven Baked Chicken Tenders (No Deep Fryer Needed)

Truly golden, crunchy oven baked chicken tenders are possible without deep frying—and I’ve discovered the secret. The key technique most recipes miss? Toasting the panko breadcrumbs in the oven first. This simple step transforms ordinary baked chicken into extraordinarily crispy tenders that rival any restaurant version.
For years, I struggled with soggy breaded chicken from the oven. However, these crispy chicken tenders in oven turn out perfectly golden and delicious every time, with zero stove splatter. In fact, using Japanese panko breadcrumbs instead of regular varieties makes a significant difference, as their larger size naturally creates more crispiness. Additionally, this method is incredibly efficient—you’ll have crispy oven baked chicken tenders ready in under 20 minutes at 450 degrees F.
Throughout this guide, I’ll share exactly how to make crispy chicken tenders in the oven using proven techniques. From properly coating the chicken to achieve that perfect crunch, to serving suggestions that complement your truly crispy oven baked chicken tenders. Finally, you’ll learn why this healthier alternative doesn’t sacrifice any of the texture or flavor you love about fried versions.
The science behind crispy oven baked chicken tenders
The path to truly crispy oven baked chicken tenders starts with understanding some fundamental food science. Creating that golden, crunchy exterior without deep frying isn’t just possible—it’s achievable through specific techniques that mimic the frying process while using significantly less oil.
Why baking can be just as crispy as frying
Conventional wisdom suggests that only deep frying can deliver that satisfying crunch we crave. Yet baking can produce equally crispy results when done correctly. The secret lies in pre-toasting the breadcrumbs before coating the chicken. This technique ensures the breadcrumbs turn truly golden and crunchy even with the shorter bake time of 20 minutes that chicken tenders require. Pre-toasting essentially gives the breadcrumbs a head start on the browning process, allowing them to achieve that deep golden color and crunch without overcooking the chicken beneath.
Furthermore, coating breadcrumbs with a small amount of oil before baking is crucial. Though considerably less than deep frying, this oil helps the breadcrumbs achieve proper crispiness while in the oven. Think of it as creating a mini-frying environment around each breadcrumb, allowing for that signature crunch without submerging the entire tender in oil.
The role of moisture and airflow in crispiness
Moisture is the arch-enemy of crispiness. When developing truly crispy oven baked chicken tenders, controlling moisture becomes essential. Fundamentally, excess moisture creates steam during cooking, which causes breading to become soggy rather than crispy.
To combat this issue, proper airflow around the chicken is vital. Baking chicken tenders on a wire rack elevated above a baking sheet allows hot air to circulate completely around the meat. This setup serves two critical purposes:
- It keeps the tenders away from any dripping juices that would create sogginess
- It enables even crisping on all sides without flipping
For those without a wire rack, a broiler pan makes an excellent substitute. If neither is available, you can still achieve good results by placing tenders directly on a baking sheet and flipping them halfway through cooking.
How panko breadcrumbs create crunch
Panko breadcrumbs are distinctly different from their standard counterparts, primarily in their structure and cooking performance. These Japanese-style breadcrumbs feature larger, more irregular pieces that create superior crunch compared to fine, uniform standard breadcrumbs.
What makes panko particularly effective for crispy oven baked chicken tenders:
- Lighter, flakier texture that creates more air pockets
- Larger crumb size that forms a more substantial crunch
- Lower oil absorption, maintaining crispiness rather than becoming greasy
Consequently, panko produces that distinctive light, airy crunch that more closely resembles restaurant-quality fried chicken. While regular breadcrumbs work in a pinch, they create a denser coating that doesn’t achieve the same level of crispiness, especially when baking rather than frying.
Essential ingredients and tools for success
Creating perfect oven baked chicken tenders begins with selecting the right ingredients and equipment. These foundational elements make the difference between mediocre results and restaurant-quality crispy chicken tenders in your own oven.
Choosing the right cut: tenders vs. breast strips
Chicken tenderloins are the small, thin strips of meat located directly under the breast against the rib bones. Notably, they’re slightly more tender than other parts of the chicken, hence their name. Although tenderloins are ideal for quick-cooking methods like baking crispy chicken tenders, they do contain a tendon that should be removed for maximum tenderness.
Alternatively, you can use chicken breast cut into strips (about 2/3″ or 1.5cm thick). A standard chicken breast yields approximately 5-6 tender-sized strips. Primarily, the difference lies in size—breasts are larger and thicker, whereas tenderloins are more petite and delicate. For most recipes, these cuts can be used interchangeably.
Why panko is better than regular breadcrumbs
Panko breadcrumbs are unquestionably superior for creating truly crispy oven baked chicken tenders. These Japanese-style breadcrumbs have larger, flakier pieces compared to standard breadcrumbs.
What sets panko apart is its ability to absorb less oil, resulting in a lighter, crunchier coating. Moreover, panko breadcrumbs maintain their crisp texture even when baked because their larger size creates more air pockets. Although available in most supermarkets (usually in the Asian section), they’re worth seeking out for that perfect crunch.
The parmesan trick for extra flavor and texture
Adding parmesan cheese to your breadcrumb mixture serves a dual purpose. First, it introduces a savory, salty flavor dimension. Second, it acts as a binding agent that helps the breadcrumbs adhere better to the chicken. About 2 tablespoons of grated parmesan mixed into your breadcrumbs can transform ordinary tenders into extraordinary ones.
Must-have tools: wire rack, baking tray, tongs
A wire rack placed over a baking sheet is absolutely essential for achieving crispy chicken tenders in the oven. This setup allows hot air to circulate underneath the chicken, ensuring even cooking and crispiness on all sides. Without a rack, the bottom of your tenders might become soggy from sitting in their own juices.
Alongside the rack and baking sheet, good quality tongs are invaluable for handling the breaded chicken without disturbing the coating. Utilize these tools properly, and your oven baked chicken tenders will rival any deep-fried version.
Step-by-step: how to make crispy chicken tenders in the oven
The magic of truly crispy oven baked chicken tenders happens in five crucial steps. Following this method precisely will transform ordinary chicken into golden, crunchy delights without deep frying.
1. Toast the breadcrumbs first
Toasting panko breadcrumbs before coating your chicken is the game-changing secret to superior crispiness. Preheat your oven to 400°F-425°F, spread panko in a single layer on a baking sheet, and spray or drizzle lightly with oil. Bake for approximately 3-5 minutes until the breadcrumbs turn light golden. Watch them carefully as they can go from perfectly toasted to burnt quickly. This pre-toasting step is crucial since breadcrumbs won’t continue browning much once on the chicken.
2. Prepare the flour, egg, and breadcrumb stations
Set up three separate shallow dishes in this order:
- First bowl: All-purpose flour mixed with seasonings
- Second bowl: Beaten eggs (optionally mixed with a tablespoon of water or milk)
- Third bowl: Pre-toasted panko breadcrumbs combined with grated parmesan and seasonings
This three-station setup creates the perfect foundation for your breading process.
3. Coat the chicken properly at each step
Initially, pat chicken tenders dry with paper towels. Dredge each tender in flour, shaking off excess. Next, dip into egg mixture, allowing extra to drip off. Lastly, press firmly into breadcrumb mixture, ensuring even coating. For best results, let the breaded tenders rest for 5-10 minutes before baking—this helps the coating adhere better.
4. Bake on a wire rack for even crisping
Place a wire rack over a foil-lined baking sheet and lightly spray with cooking oil. Arrange tenders on the rack with space between each piece to prevent sogginess. Bake at 450°F for 15-20 minutes until golden brown and internal temperature reaches 165°F. The wire rack allows hot air to circulate around the entire tender, creating even crispiness without flipping.
5. Let them rest before serving
After removing from the oven, allow tenders to rest on a cooling rack for a few minutes. This final step permits excess steam to escape, further crisping the exterior. Subsequently, your truly crispy oven baked chicken tenders are ready to serve with your favorite dipping sauces.
Serving, storing, and reheating tips
After perfecting your crispy oven baked chicken tenders, serving them with the right accompaniments elevates the entire meal. First and foremost, let’s explore what makes these golden beauties shine on your plate.
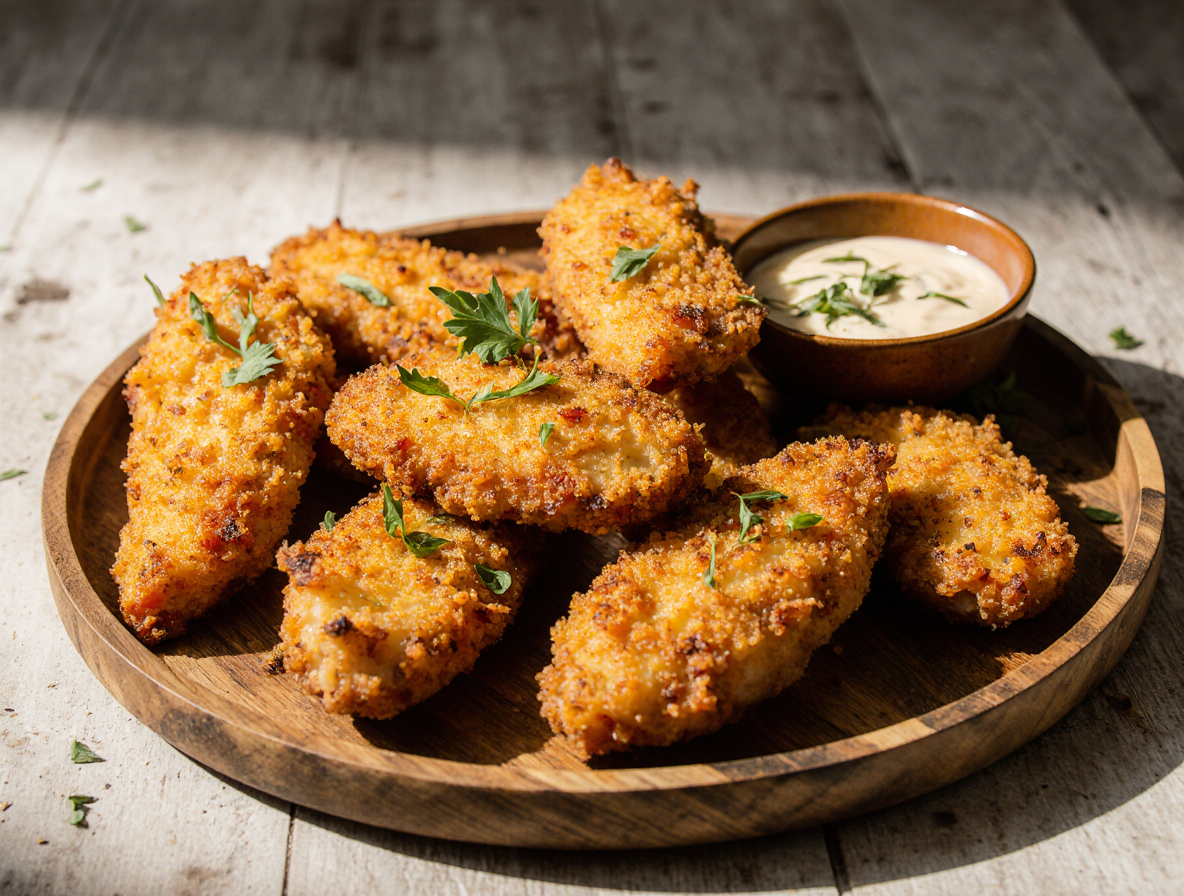
Best dipping sauces to pair with tenders
The perfect dip adds dimension to truly crispy oven baked chicken tenders. According to popularity rankings, the classic trio reigns supreme: ketchup (tomato and vinegar combo), BBQ sauce (regional variations abound), and ranch dressing (buttermilk, herbs, and spices). For homemade options, consider:
- 2-Ingredient Sauces: Mix equal parts yellow mustard and honey for a quick honey mustard, or combine ketchup with brown sugar for sweet BBQ sauce
- Specialty Dips: Garlic aioli offers a creamy, garlicky dimension while Alabama White Sauce provides tangy richness perfect for crispy chicken
Store homemade sauces in airtight containers refrigerated for up to a week.
Side dishes that complement crispy tenders
In addition to selecting the right sauce, pairing your crispy chicken tenders in oven with complementary sides creates a balanced meal. Popular options include:
Vegetables like broccoli, carrots, green beans or spinach provide nutritional balance and can be steamed quickly from frozen bags. Starchy sides such as mac and cheese, potatoes (mashed, roasted, or as wedges), or pasta salad offer satisfying accompaniment. For lighter options, fruit makes an appealing side, especially for children.
How to store leftovers without losing crunch
To maintain that perfect crispiness, store leftover tenders in airtight containers in the refrigerator. Despite this careful storage, moisture remains the enemy of crunch, so avoid covering hot chicken with foil or plastic wrap until completely cooled.
Reheating methods that keep them crispy
The microwave is convenient but results in soggy chicken. For truly crispy oven baked chicken tenders even when reheated:
Oven method: Preheat to 350°F, place tenders on a wire rack over a baking sheet, and heat for 10 minutes, flipping halfway through.
Air fryer method: Preheat to 375°F and cook for 8 minutes, flipping halfway. This produces the crispiest results of all reheating methods.
Toaster oven: Preheat to 350°F and heat for about 10 minutes total, flipping halfway.
Conclusion
Ultimately, the path to perfectly crispy chicken tenders doesn’t require a deep fryer after all. Through this simple yet revolutionary technique of pre-toasting the panko breadcrumbs, you can achieve that golden, crunchy exterior right in your oven. This method certainly takes ordinary baked chicken to extraordinary levels without the mess or excess oil of traditional frying.
Additionally, using the right tools makes all the difference. A wire rack allows proper air circulation, creating that coveted all-around crispiness we crave. Japanese panko breadcrumbs, rather than regular varieties, provide that signature light, airy crunch thanks to their larger size and structure.
Perhaps most importantly, this healthier approach doesn’t sacrifice any of the texture or flavor you love. The finished chicken tenders rival any restaurant version while giving you complete control over ingredients and seasonings. Therefore, you can enjoy this family favorite with significantly less oil and none of the stovetop splatter.
The next time you’re craving crispy chicken tenders, skip the drive-thru and deep fryer. Instead, remember this foolproof oven method. Your family will undoubtedly be impressed with the golden, crunchy results, and you’ll appreciate how quickly these come together with minimal cleanup. Once you master this technique, you might never go back to traditional fried chicken tenders again!
FAQs
Q1. How can I make chicken tenders crispy in the oven without deep frying? The secret is to pre-toast the panko breadcrumbs before coating the chicken. This, combined with baking on a wire rack, ensures a crispy exterior without the need for deep frying.
Q2. What’s the best type of breadcrumbs to use for crispy oven-baked chicken tenders? Japanese panko breadcrumbs are ideal. Their larger, flakier texture creates more air pockets, resulting in a lighter, crunchier coating that absorbs less oil than regular breadcrumbs.
Q3. How long should I bake chicken tenders in the oven? Bake chicken tenders at 450°F for 15-20 minutes, or until they’re golden brown and reach an internal temperature of 165°F.
Q4. What’s the best way to reheat leftover chicken tenders while keeping them crispy? For the crispiest results, reheat chicken tenders in an air fryer at 375°F for about 8 minutes, flipping halfway through. Alternatively, you can use an oven or toaster oven at 350°F for about 10 minutes.
Q5. What are some good dipping sauces for crispy chicken tenders? Popular options include classic ketchup, BBQ sauce, and ranch dressing. For homemade alternatives, try mixing equal parts yellow mustard and honey for a quick honey mustard, or combine ketchup with brown sugar for a sweet BBQ sauce.