
Homemade Red Velvet Waffles
Introduction
Red velvet waffles offer a truly unique twist on your traditional breakfast dish, merging the classic chocolate flavor of red velvet cake with the comforting, fluffy texture of a waffle. Their vibrant color and rich taste make them not only a feast for the palate but also a feast for the eyes. This delightful breakfast or brunch option is sure to impress your family and guests, and it’s particularly perfect for special occasions or a leisurely weekend morning.
The alluring combination of cocoa powder and red food coloring sets these waffles apart, making them an extravagant choice that appeals to both the young and the young at heart. Topped with a rich cream cheese frosting, they become a sweet culinary masterpiece that everyone will love. You may also choose to elevate the presentation by adding berries or nuts, giving them an extra touch of elegance. Whether enjoyed as a standalone treat or paired with fresh fruits, homemade red velvet waffles are sure to be a hit.
Recipe Overview
– Total Time: 30 minutes
– Yield/Servings: Makes 4 waffles
– Difficulty: Not specified in the recipe
Overview of Red Velvet Waffles
Red velvet waffles are derived from the iconic red velvet cake, known for its striking crimson hue and subtle chocolate undertones. This recipe combines the playful spirit of breakfast with the elegance of dessert, creating a dish that perfectly balances sweetness and flavor. Because of their unique ingredients and colorful presentation, these waffles are an exciting addition to any brunch menu, allowing hosts to treat their guests to something truly special.
Unique Characteristics of This Recipe
A standout feature of red velvet waffles is their rich texture and deep flavor profile, thanks in part to the cocoa powder and buttermilk. The addition of baking powder and baking soda works together seamlessly to ensure that the waffles come out light and fluffy, contrasting beautifully with the dense frosting topping them. The red food coloring not only enhances the visual appeal but also connects these waffles to their cake origins, resulting in a dish that’s celebratory and fun.
Perfect Occasions for Serving
These delectable red velvet waffles are appropriate for a variety of occasions. They make an especially charming breakfast or brunch dish for Valentine’s Day or a birthday celebration. Additionally, they could be served at holiday gatherings or simply enjoyed as a treat for no particular reason at all. Their eye-catching color and festive appearance also make them a great choice for brunch parties or family get-togethers, sure to delight guests of all ages.
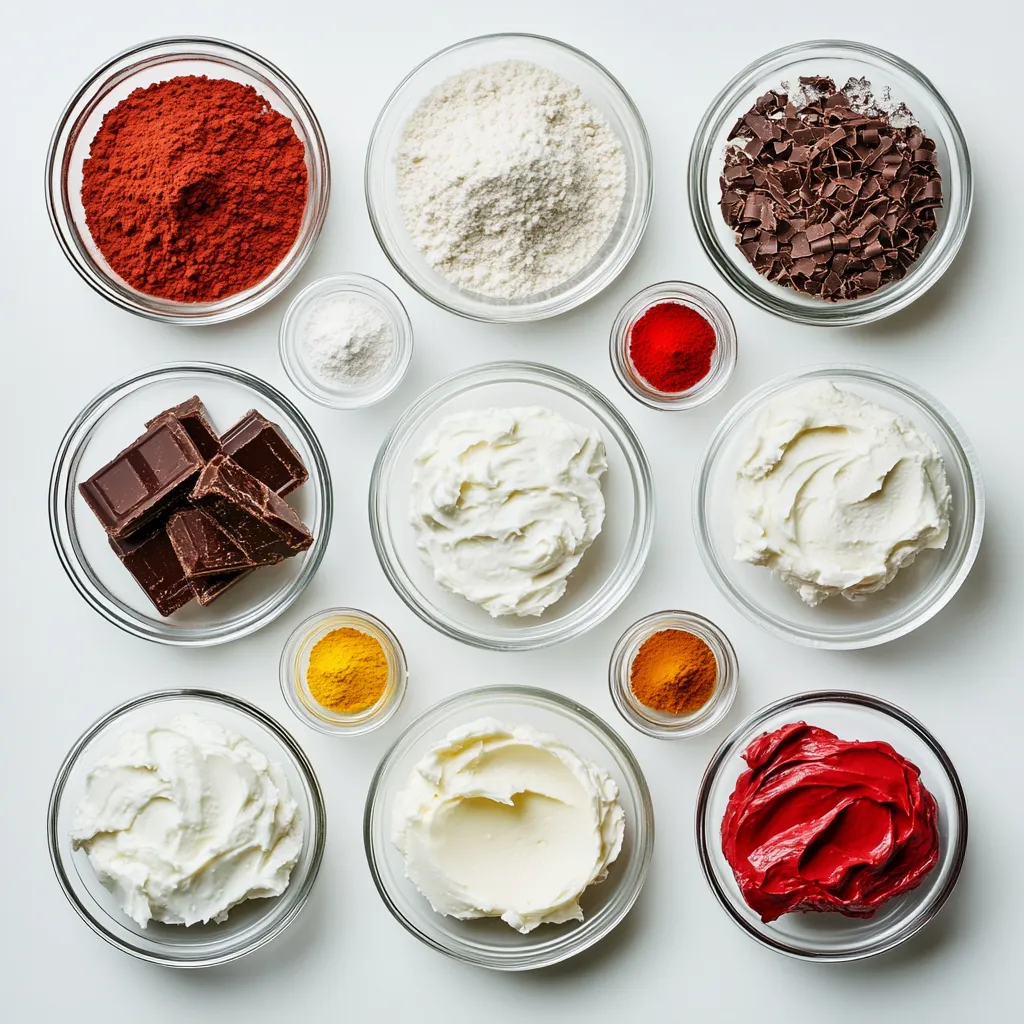
Ingredients
– 1 ½ cups all-purpose flour
– 2 tablespoons unsweetened cocoa powder
– 1 tablespoon baking powder
– ½ teaspoon baking soda
– ½ teaspoon salt
– 2 large eggs
– 1 cup buttermilk (room temperature)
– ½ cup vegetable oil
– 1 teaspoon pure vanilla extract
– 1 tablespoon red food coloring
– Powdered sugar (for dusting)
– Cream cheese frosting (for topping)
Essential Dry Ingredients
The dry ingredients used in this recipe form the foundation for the waffles. All-purpose flour serves as the main ingredient, providing the necessary structure. Cocoa powder introduces the earthy chocolate flavor that is integral to the dish, while the baking powder and baking soda act as leavening agents to create the light and airy texture. Salt enhances the flavor balance, ensuring that the sweetness is well complemented.
Essential Wet Ingredients
In contrast, the wet ingredients contribute moisture and flavor. Eggs add richness and help bind the mixture, while buttermilk brings about a tender crumb and balances the sweetness with a touch of acidity. Vegetable oil keeps the waffles moist and prevents them from becoming dry during cooking. Pure vanilla extract introduces a warm, aromatic essence, while the red food coloring is what ties the entire recipe together, giving the waffles their signature hue.
Optional Toppings and Garnishes
While the recipe specifies powdered sugar and cream cheese frosting for topping, other optional garnishes can enhance the presentation and flavor. Fresh berries such as strawberries or blueberries can add a burst of freshness, while crushed nuts provide a delightful crunch. These additions not only enhance the visual appeal but also allow for customization, ensuring that each serving remains unique and suited to individual preferences.
Preparing Your Cooking Space
Gathering Equipment and Utensils
Before commencing with the waffle-making process, it’s essential to gather all necessary equipment and utensils to streamline the preparation. You will need a reliable waffle iron, an electric whisk or hand whisk, mixing bowls (one medium and one large), measuring cups and spoons, and a spatula for depositing the batter into the waffle iron. Having everything within reach will make the cooking process more efficient and enjoyable.
Setting Up Your Waffle Iron
Following the manufacturer’s instructions, preheating your waffle iron is crucial for achieving perfectly cooked waffles. A preheated waffle iron ensures that the batter sizzles upon contact, leading to a crispy exterior while maintaining a delightful fluffiness inside. The cooking time may vary based on the appliance, so keeping an eye on the indicator light or checking the waffles periodically is advisable to avoid undercooking or burning.
Importance of Using Room Temperature Ingredients
Using room temperature ingredients, specifically buttermilk and eggs, can elevate your waffles significantly. When ingredients are at room temperature, they combine more easily, leading to a smoother batter that will rise better while cooking. Cold ingredients can cause the fat in the batter to solidify, resulting in a less uniform texture. Hence, it’s essential to take these ingredients out of the refrigerator ahead of time to allow them to warm sufficiently.
Mixing the Dry Ingredients
Selecting the Right Flour
For the base of your red velvet waffles, all-purpose flour is preferred due to its balanced protein content, which creates a versatile batter suitable for batter-based recipes. It provides structure while allowing for a delicate texture, contributing to the lightness of the waffles. Ensure that the flour is freshly measured and free of lumps for optimal results.
The Role of Cocoa Powder in Flavor
Cocoa powder is a vital component of this recipe, imparting the subtle chocolate flavor that pairs beautifully with the sweet and tangy notes of the cream cheese frosting. The key is to use high-quality unsweetened cocoa powder, as it will provide the rich chocolate essence without additional sugar, allowing for better control over the overall sweetness of the dish. The cocoa powder also contributes to the characteristic color and aroma of the waffles.
Combining Leavening Agents and Salt
Baking powder and baking soda work in tandem to provide the necessary lift that makes your waffles rise to perfection. Baking powder is a complete leavening agent, meaning it contains both an acid and a base that react when combined with wet ingredients, creating carbon dioxide bubbles that help the batter rise. Conversely, baking soda requires an acid—provided here by buttermilk—to activate its leavening properties. Together, along with the pinch of salt to enhance flavor, they will ensure your waffles are not only fluffy but also delicious.
Preparing the Wet Ingredients
Beating the Eggs for Optimal Texture
To achieve nicely aerated batter, beating the eggs until they are frothy is paramount. This process incorporates air into the eggs and prepares them to act as a leavening agent in the batter. The air bubbles formed will expand when cooked, contributing to a fluffy texture. Use a whisk until the eggs are pale and frothy—this visual cue indicates that you have incorporated enough air into the mixture.
Understanding the Role of Buttermilk
Buttermilk contributes more than just moisture; its acidity interacts with the baking soda in your batter, producing carbon dioxide gas which helps the waffles to rise beautifully during cooking. It also balances the sweetness and adds a slight tang in contrast to the sweetness of the frosting, creating a well-rounded flavor profile.
Adding Flavor with Vanilla Extract and Food Coloring
Pure vanilla extract enhances the dish’s aromatic quality, while the red food coloring is key to achieving the signature hue of red velvet. The amount of food coloring can be adjusted to achieve your desired intensity of color. While subtle in taste, the deep red hue of the waffles makes them visually striking, providing a sense of indulgence and celebration whenever they are served.
Combining Wet and Dry Mixtures
Techniques for Gently Mixing Batter
When mixing the wet and dry ingredients, the method you employ is essential to the final texture of your waffles. It’s crucial to combine them without overmixing; while you want to ensure that the batter is homogeneous, overmixing can lead to gluten development, resulting in tough waffles. Instead, gently fold until just combined—it’s acceptable to have a few small lumps in the batter. This technique will help maintain the light and airy quality that characterizes a perfect waffle, allowing for a delightful bite every time.
Importance of Avoiding Overmixing
When crafting the batter for red velvet waffles, it is essential to avoid overmixing. Overmixing can lead to gluten development in the flour, resulting in waffles that are tough and chewy instead of soft and airy. The key to achieving the perfect texture lies in mixing just until the ingredients are combined. It is perfectly acceptable for the batter to retain a few small lumps, as this indicates that you haven’t overworked the mixture.
Recognizing the Right Batter Consistency
The ideal batter for red velvet waffles should be thick but pourable. It should have a smooth yet slightly textured appearance, similar to that of a pancake batter. If the mixture appears too thick, a tablespoon or two of additional buttermilk can help achieve the desired consistency without compromising the flavor or texture of the waffles.
Cooking the Waffles
Preheating the Waffle Iron Properly
Preheating your waffle iron is a crucial step in achieving perfectly cooked waffles. Each waffle iron has its unique heating element, so it’s vital to follow the manufacturer’s guidelines. A properly preheated waffle iron ensures a crisp exterior while retaining a soft interior. Allow it to heat until you can feel a consistent warmth radiating from the plates.
Greasing Techniques to Prevent Sticking
Even non-stick waffle irons can benefit from a light grease to minimize sticking. Use a paper towel to apply a thin layer of vegetable oil or spray cooking oil to both the top and bottom plates of the waffle iron. It’s important to avoid over-greasing, as this can lead to greasy waffles that aren’t as enjoyable.
Cooking Time and Visual Indicators of Doneness
The cooking time for red velvet waffles typically ranges from 4 to 5 minutes, though this can vary slightly based on your waffle iron. A visual cue that they are done includes a crisp, golden-brown color. Additionally, steam will usually begin to dissipate from the sides of the waffle iron as moisture evaporates, indicating readiness. Trusting these visual and auditory signals will help in avoiding undercooked or burnt waffles.
Serving Suggestions
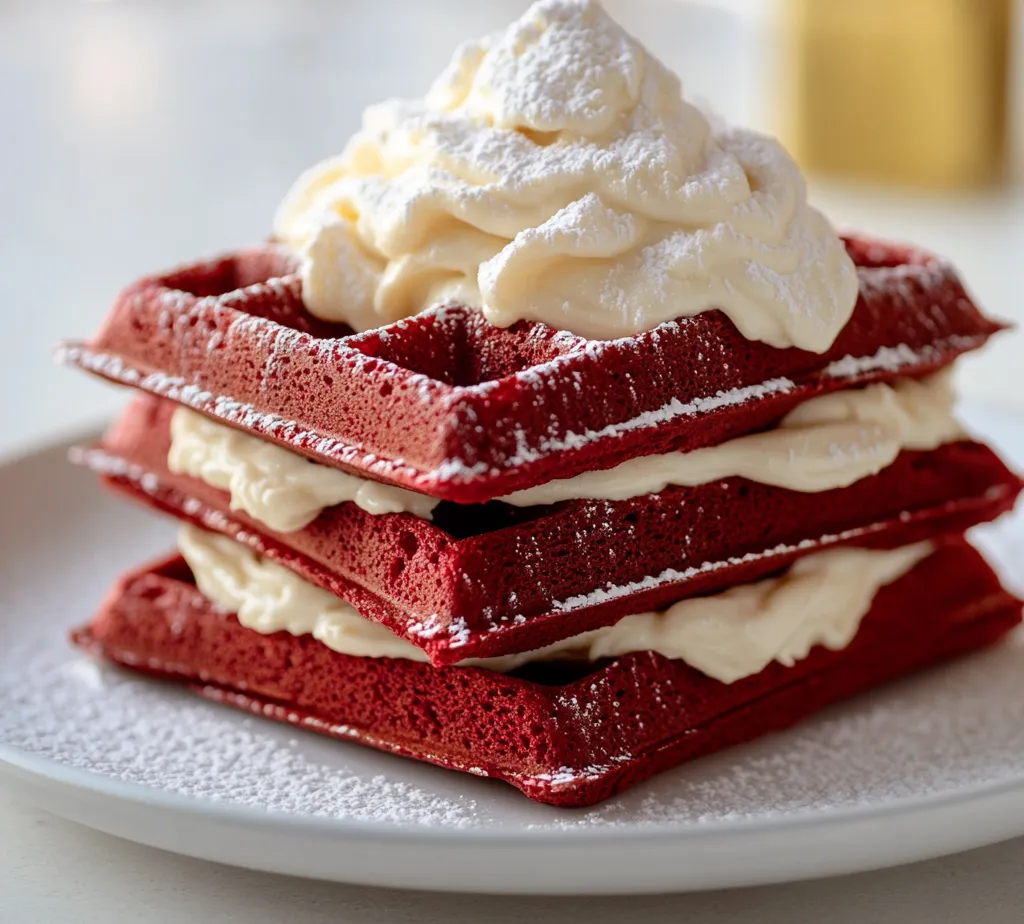
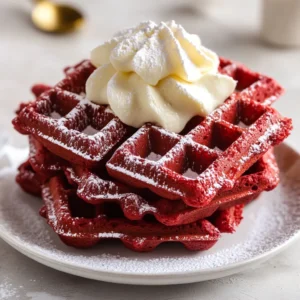
Plating the Red Velvet Waffles
For an appealing presentation, stack the warm red velvet waffles on a plate, either two or three high. Consider using a larger, decorative plate for an aesthetic touch. The vibrant red color contrasts beautifully with the white powdered sugar and cream cheese frosting.
Dusting with Powdered Sugar
Using a fine sieve, dust the cooked waffles lightly with powdered sugar just before serving. This not only adds a touch of sweetness but also enhances the visual appeal with a striking contrast against the dark red of the waffles.
Drizzling Cream Cheese Frosting
For the ultimate indulgent experience, generously drizzle cream cheese frosting over the waffles. You may use a squeeze bottle or a spoon to create attractive patterns. To enhance flavor, consider warming the frosting slightly before drizzling, allowing it to flow more easily over the waffles.
Flavor Enhancements
Incorporating Fresh Berries
To elevate the flavors of your red velvet waffles, consider incorporating fresh berries like strawberries or raspberries. The acidity from the berries balances the sweetness of the waffles, providing a refreshing contrast and adding a pop of color to your dish.
Nestling Crushed Nuts as a Garnish
Chopped nuts, such as pecans or walnuts, can add a delightful crunch to your waffles. Sprinkle them on top right before serving, allowing the nutty flavor to enhance the overall experience without overwhelming the dish.
Exploring Additional Toppings
Feel free to customize toppings on your red velvet waffles. Whipped cream, chocolate sauce, or even a scoop of vanilla ice cream could be delicious alternatives. These additions introduce new textures and flavors and allow for personal creativity in presenting your dish.
Storing Leftover Waffles
Proper Cooling and Storage Techniques
If you find yourself with leftover waffles, proper storage is essential to maintain their texture. Allow the waffles to cool completely on a baking rack to prevent them from becoming soggy. Once cooled, they can be placed in an airtight container or zipped bag, separating each waffle with parchment paper to prevent sticking.
Reheating Tips for Maintaining Texture
To reheat your waffles, the best method is using an oven or toaster oven, which helps keep the waffles crisp. Preheat the oven to 350°F (175°C) and warm the waffles for about 5–10 minutes. Alternatively, a toaster can also work well, helping to retain that crispy exterior while warming the inside.
Creative Ways to Use Leftover Waffles
Leftover red velvet waffles do not have to go to waste. Crumble them into pieces to use as a topping for yogurt or ice cream, or layer them in a parfait with toppings of your choice. They can also be used to create a waffle sundae, adding a fun twist to your dessert.
Nutritional Information
Breaking Down Ingredients for Health
Each ingredient in the red velvet waffle recipe contributes to the overall nutritional profile. For example, all-purpose flour serves as a primary carbohydrate source, while buttermilk adds moisture and a subtle tang. Eggs contribute protein and structure, while cocoa powder provides antioxidants.
Balance and Moderation in Enjoyment
While red velvet waffles can be a delightful treat, it’s essential to enjoy them in moderation. Understanding portion sizes and balance in your overall diet can help maintain a healthy lifestyle while indulging occasionally in these decadent delights.
Adjustments for Health-Conscious Versions
Those looking for a healthier version can consider using whole wheat flour for added fiber, substituting unsweetened applesauce for some of the oil, or using a low-fat cream cheese frosting. However, keep in mind that these changes may alter the flavor and texture of the final product.
Conclusion
The homemade red velvet waffles present a delightful blend of rich taste and appealing texture, combining a soft, fluffy interior with a satisfyingly crisp exterior. Their preparation is relatively quick, making them an excellent choice for a special breakfast or brunch. With the finishing touches of powdered sugar and a drizzle of cream cheese frosting, each bite provides a sweet and sophisticated indulgence perfect for any occasion.
Homemade Red Velvet Waffles
Ingredients
- 1 ½ cups all-purpose flour
- 2 tablespoons unsweetened cocoa powder
- 1 tablespoon baking powder
- ½ teaspoon baking soda
- ½ teaspoon salt
- 2 large eggs
- 1 cup buttermilk
- ½ cup vegetable oil
- 1 teaspoon pure vanilla extract
- 1 tablespoon red food coloring
- powdered sugar for dusting
- cream cheese frosting for topping
Instructions
- Preheat your waffle iron according to the manufacturer's guidelines.
- In a medium bowl, whisk together flour, cocoa powder, baking powder, baking soda, and salt.
- In a large bowl, beat the eggs until frothy, then add buttermilk, vegetable oil, vanilla extract, and red food coloring; stir until smooth.
- Gradually mix the dry ingredients into the wet ingredients until just combined; small lumps are okay.
- Grease the waffle iron lightly with cooking spray or oil.
- Pour ½ to ¾ cup of batter into the preheated waffle iron.
- Close the waffle iron and cook for 4-5 minutes until golden brown and crispy.
- Remove the waffles and keep warm in a low-temperature oven while cooking the remaining batter.
- Serve the waffles dusted with powdered sugar and drizzled with cream cheese frosting.