Crispy Cast Iron Skillet Pizza Recipe
Introduction
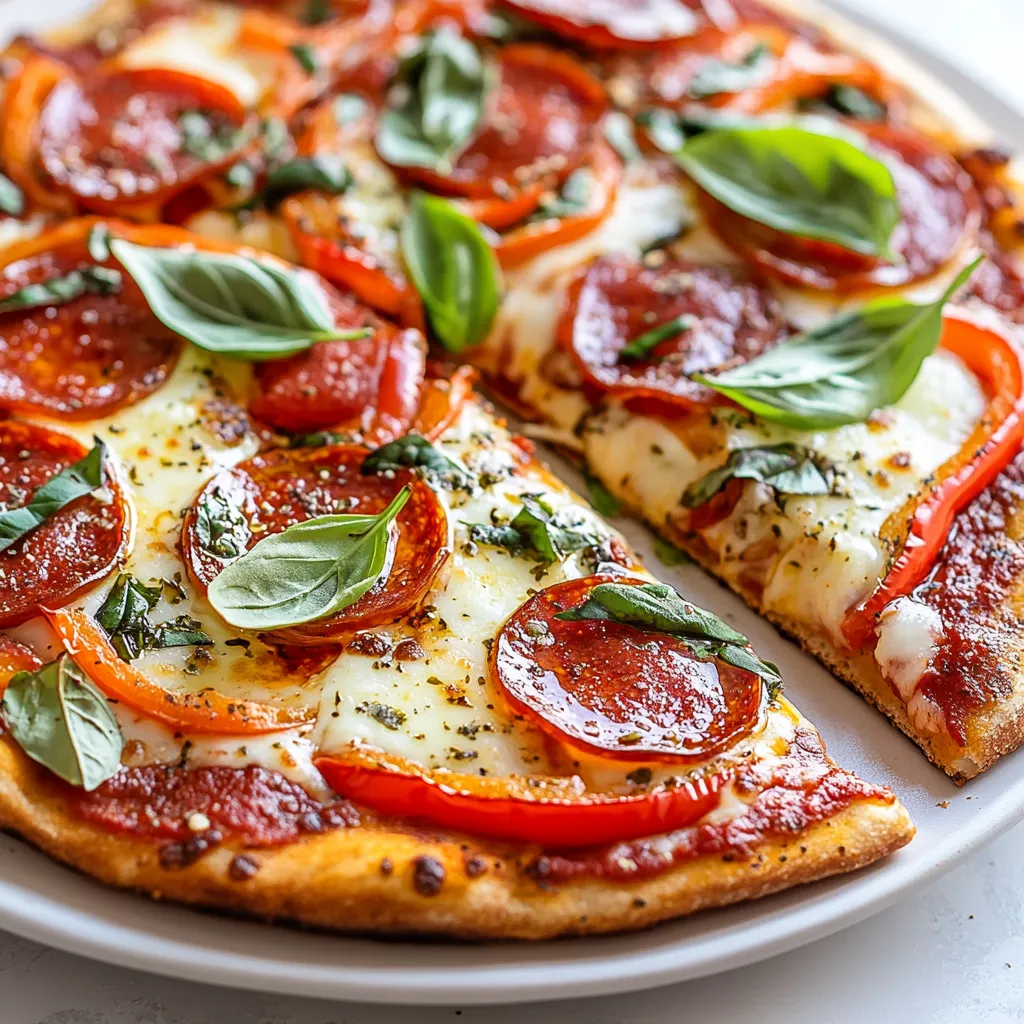
Cast iron skillet pizzas have surged in popularity over the years, combining the classic charm of homemade pizza with the rustic delight of a well-seasoned skillet. This cooking method is not only simple but also elevates the pizza-making experience by achieving a beautifully crispy crust, thanks to the heat retention properties of cast iron. Homemade pizza often surpasses store-bought options, allowing for total creativity in toppings and flavors while ensuring fresh ingredients and a satisfying experience.
The appeal of making pizza at home lies in the ability to craft a dish tailored to individual preferences. With endless combinations of toppings, sauces, and cheeses, each pizza becomes a personal masterpiece. The ideal pizza balances a crispy outer layer with a chewy interior, creating a mouthwatering texture that is hard to resist. When made from scratch, every bite can showcase the fresh flavors of quality ingredients, enhancing the overall pizza-eating experience.
Recipe Overview
– Total Time: 1 hour 30 minutes
– Prep Time: 1 hour
– Yield/Servings: 4
– Difficulty: Not specified in the recipe
– Cooking Method: Unique method utilizing a cast iron skillet for a crispy finish.
This recipe emphasizes the delectable combination of flavors and textures provided by using a hot cast iron skillet. Variations can be endless, allowing for flavors ranging from classic pepperoni to more adventurous toppings like bell peppers, mushrooms, or olives. Crispy cast iron skillet pizza is perfect for a casual family dinner, a gathering with friends, or even a cozy night in.
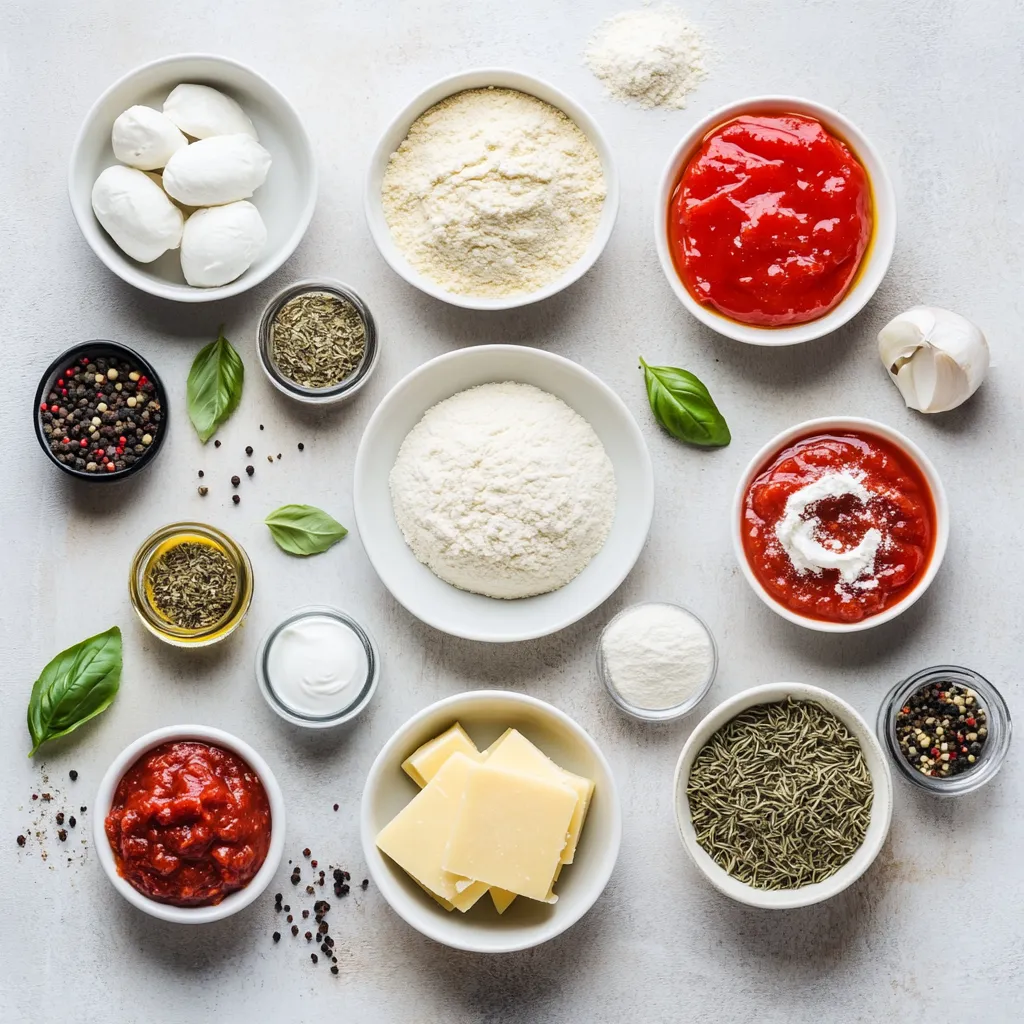
Ingredients
– 2 cups all-purpose flour
– 1 packet (2 ¼ tsp) instant yeast
– 1 tsp sugar
– 1 tsp salt
– ¾ cup warm water (approximately 110°F)
– 1 tbsp olive oil (plus additional for greasing)
– 1 cup pizza sauce
– 2 cups shredded mozzarella cheese
– 1 cup assorted toppings (e.g., pepperoni, bell peppers, mushrooms, olives)
– 1 tsp dried oregano
– Fresh basil leaves for garnish
When it comes to achieving the best results, the quality of the ingredients matters significantly. High-quality all-purpose flour delivers the desired texture, while fresh ingredients will deeply enhance the flavor profile of your pizza. The assortment of toppings offers a personalized touch, allowing each cook the freedom to experiment or satisfy specific cravings.
Instructions
1. Prepare the Dough: In a large mixing bowl, combine the all-purpose flour, instant yeast, sugar, and salt. Gradually pour in the warm water and add 1 tablespoon of olive oil. Stir the mixture until a shaggy dough forms.
2. Knead the Dough: Transfer the dough onto a floured surface. Knead for about 5-7 minutes until it becomes smooth and elastic. Place the kneaded dough in a lightly greased bowl, cover it with a kitchen towel, and let it rise in a warm spot for approximately 1 hour, or until it has doubled in size.
3. Preheat the Skillet: While the dough is rising, preheat your oven to 475°F (245°C). Place an empty cast iron skillet in the oven to heat up, ensuring it becomes thoroughly hot.
4. Shape the Pizza: After the dough has risen, gently punch it down to release any air. Move it to a floured surface and roll it out into a circular shape that is slightly larger than the diameter of your skillet.
5. Prepare the Skillet: Carefully take the hot skillet out of the oven. Drizzle some olive oil into the skillet, then use a spatula or brush to evenly coat the bottom and sides. Place the rolled-out dough into the skillet, pressing it down gently to fit the shape of the skillet.
6. Add Sauce and Toppings: Evenly spread the pizza sauce over the dough, leaving a small border around the edges. Generously sprinkle the shredded mozzarella cheese on top, followed by your selected toppings. Finish off with a sprinkle of dried oregano for added flavor.
7. Bake the Pizza: Return the skillet to the oven and bake for about 12-15 minutes, or until the cheese is bubbly and the crust achieves a beautiful golden brown color.
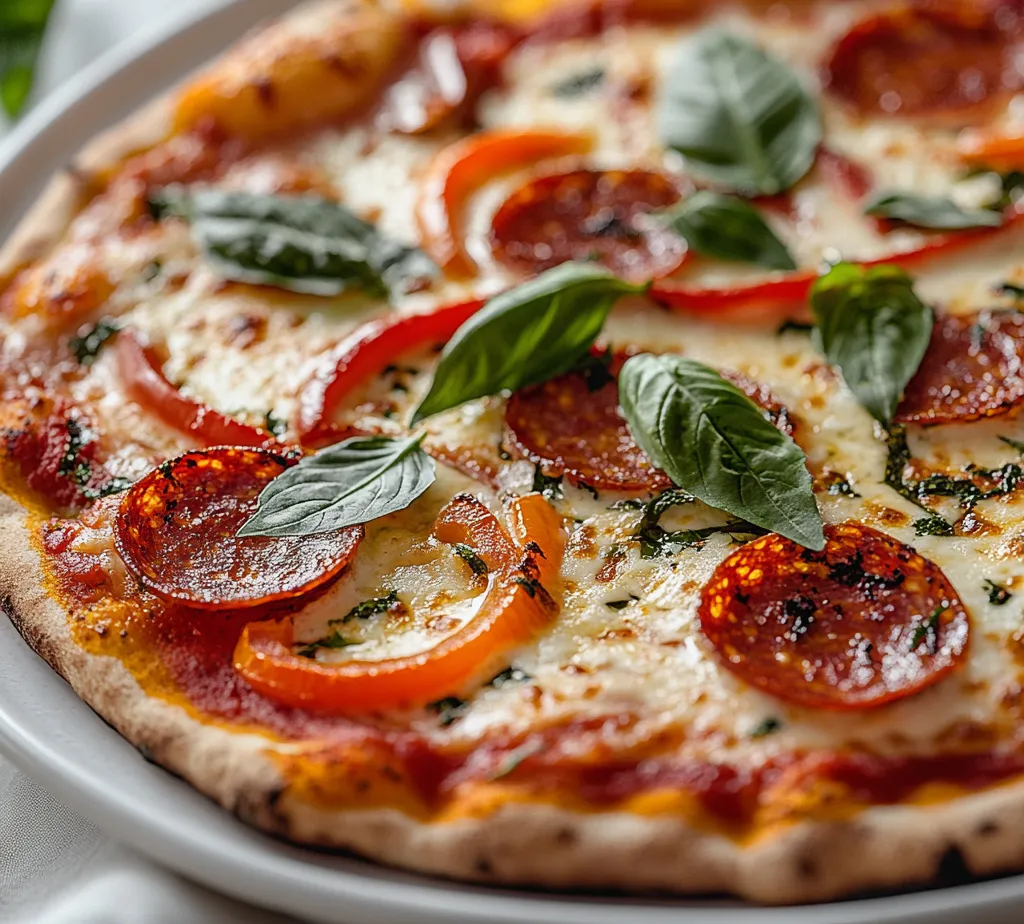
8. Cool and Serve: Once baked, carefully remove the skillet from the oven. Allow the pizza to cool for a few minutes before slicing. Garnish with fresh basil leaves for a burst of flavor and color.
Preparing the Dough
When it comes to making the perfect pizza crust, selecting the right flour is crucial. All-purpose flour, as specified in this recipe, typically provides the ideal balance of protein to produce a flavorful and structurally sound crust. Flour selection can significantly influence the final texture, so always consider the quality for the best results.
Instant yeast plays a key role in the dough’s rise, providing quick ferments that reduce overall wait time. Yeast contributes to flavor development in the crust, so the proper activation is essential. The sugar helps enhance the fermentation process while giving the pizza dough a slightly sweet note that contrasts beautifully with savory toppings. Salt not only offers flavor enhancement but also strengthens the dough, ensuring that the final product holds together well.
Kneading Techniques
Kneading the dough is more than a physical activity; it’s a scientific process that develops gluten. Gluten is a network of proteins that gives the dough its structure and chewy texture, crucial for a satisfying pizza. As you knead for about 5-7 minutes, you’re working to create this network by folding and pressing the dough, allowing it to become smooth and elastic.
Monitoring the elasticity of the dough is important. It should spring back slightly when pressed with your finger, indicating that gluten has developed properly. If the dough appears sticky, you may need to incorporate small amounts of flour during kneading, but be cautious not to add too much, as this might result in a tough crust.
Rising the Dough
Creating an ideal environment for the dough to rise significantly impacts its development. A warm spot allows the yeast to activate, producing carbon dioxide that causes the dough to expand. Look for places such as the top of a warm oven (turned off) or a sunlit countertop.
Signs that the dough has risen sufficiently include a noticeable increase in size, typically doubling after an hour, and a light, airy feel when gently poked. When it’s time to punch down the dough, this process is essential because it releases the built-up gas, redistributing the yeast and ensuring even fermentation. A gentle touch will help maintain the airy texture.
Preparing the Skillet
Preheating the cast iron skillet is a fundamental step that enhances the initial cooking process, providing a crisp base as the dough hits the hot surface. When the skillet is hot, it creates a quick sear on the bottom of the pizza, which is what helps to form that coveted crispy crust.
In greasing the skillet, a drizzle of olive oil not only helps prevent sticking but also adds flavor. Using a spatula or a brush to evenly coat the bottom and sides ensures that every bite remains flavorful and retains the desired texture without sticking to the pan. Preparing the skillet properly sets the stage for a memorable pizza experience.
Advantages of Using a Cast Iron Skillet for Even Heat Distribution
One of the standout benefits of using a cast iron skillet for pizza is its ability to retain and distribute heat evenly. This characteristic ensures that the crust cooks uniformly, avoiding hot spots that can lead to uneven baking. The heavy-duty nature of cast iron allows it to reach high temperatures, which are essential for achieving that crispy exterior while keeping the inside tender. Additionally, the skillet’s preheated surface helps to create a slight char on the bottom, enhancing the pizza’s flavor and texture. When utilizing a cast iron skillet, the result is often a professional-quality crust that rivals that of pizzerias.
Shaping the Pizza
Methods for Rolling Out Pizza Dough Evenly
When rolling out the pizza dough, it’s essential to achieve even thickness. This can be accomplished by lightly flouring both your work surface and the rolling pin. Start from the center and roll outwards, rotating the dough as you go to maintain a circular shape and even thickness. For those who prefer a rustic approach, stretching the dough by hand is another excellent method. Gently pulling and rotating the dough can create a beautiful and artisanal look.
Tips for Achieving the Perfect Shape for Skillet Size
To ensure the dough fits the skillet perfectly, roll the dough into a circle that is slightly larger than the skillet’s diameter. If you are using a 12-inch skillet, aim for a circle about 14 inches wide. This extra room allows the dough to stretch as it rises in the oven. If you find the dough resistance unyielding, let it rest briefly—about 5 to 10 minutes—to relax the gluten before attempting to shape it again.
How to Handle the Dough Without Deflating Air Pockets
It’s crucial to handle the dough gently to preserve its air pockets developed during the initial rise. Instead of pressing down hard, lightly stretch or roll the dough, ensuring that air is not forced out. If you accidentally deflate some of the air pockets, do not panic. A bit of careful kneading can help restore some of that airiness by redistributing the yeast and helping it to continue rising in the heat of the skillet.
Assembling the Pizza
Importance of Layering Sauce, Cheese, and Toppings Correctly
To achieve a harmonious balance of flavors, the layering of sauce, cheese, and toppings is vital. Begin with the sauce spread in an even layer across the dough, leaving a bit of crust visible. This method prevents the crust from becoming soggy. Next, sprinkle a generous amount of shredded mozzarella cheese, which acts as a barrier that helps to keep the sauces and toppings intact during baking. After the cheese, add your selected toppings, ensuring an even distribution to avoid overwhelming any single area.
Techniques for Evenly Distributing Toppings for Balanced Flavor
To obtain a balanced flavor in each bite, consider using a methodical approach when distributing toppings. Start with the heavier items, like meats, and distribute them sparsely across the pizza. Follow these with lightweight vegetables, which can be spread out to prevent them from pooling moisture in one spot. A light sprinkle of dried spices, such as oregano or crushed red pepper, can be added on top to enhance flavor without overpowering.
Recommendations for Commonly Used Pizza Toppings
Popular toppings can range from classic pepperoni and cheese to gourmet options such as roasted vegetables and specialty cheeses. For a more vibrant pizza, consider incorporating fresh ingredients like arugula or avocado, which can be added after baking for a fresh element. For those who enjoy a bit of heat, jalapeños or spicy sausage can make for exciting additions.
Baking the Pizza
Optimal Temperature Settings for Baking
Baking a cast iron skillet pizza at a high temperature, around 475°F (245°C), is crucial. This heat ensures that the crust bakes quickly, achieving that desired crispy texture while allowing the cheese to melt perfectly without becoming rubbery.
How to Monitor Bake Time and Doneness
During the baking process, keep an eye on both the cheese and the crust. The cheese should be bubbly and begin to lightly brown, while the crust should have a golden hue. Depending on your oven, bake time may vary slightly, so checking around the 10-minute mark can help ensure that you achieve the ideal doneness without risking overcooking.
Tips for Achieving a Bubbly Cheese Layer and Golden Crust
To enhance the bubbling of the cheese layer, consider using freshly shredded mozzarella instead of pre-shredded varieties, which often contain anti-caking agents affecting meltability. Additionally, placing the oven rack in the lower third of the oven can help achieve a more well-done crust while providing necessary proximity to the heating elements.
Cooling and Serving
Appropriate Cooling Time for Slicing Pizza
After baking, allow the pizza to cool for about 5 minutes before slicing. This resting period helps the cheese set slightly, making cutting easier and keeping toppings from sliding off.
Suggestions for Presentation: Garnishing and Plating
To elevate the presentation, serve your pizza on a wooden board or a colorful platter. A drizzle of high-quality olive oil or balsamic reduction can add a gourmet touch. Fresh basil leaves can also enhance visual appeal and flavor.
Importance of Letting Pizza Rest to Enhance Flavor
Letting the pizza rest not only helps to set the cheese texture but also allows flavors to meld together. As the pizza cools slightly, aromatic compounds develop, making each slice more flavorful.
Flavor Enhancements
Unique Ways to Customize Your Pizza with Herbs and Spices
Experiment with flavor by integrating a variety of herbs such as thyme, rosemary, or garlic powder directly into the flour during the dough preparation. Alternatively, adding a sprinkle of freshly chopped herbs post-baking can brighten the dish.
Experimenting with Cheese Variations for Additional Depth
Incorporating different cheese types can add new flavors to your pizza. Blend mozzarella with provolone for a sharp kick, or add crumbled feta for a tangy twist.
Ideas for Dipping Sauces to Serve Alongside Pizza
Complementing your pizza with dipping sauces can enhance the overall experience. Consider serving marinara, garlic butter, or a spicy ranch dressing for a delicious twist.
Common Mistakes to Avoid
Overkneading Dough: Effects on Final Texture
Overkneading can develop gluten excessively, leading to a tough texture rather than a light and crispy crust. Ensure that you knead just enough to achieve a smooth and elastic dough.
Skipping the Preheating Step and Its Consequences
Not preheating the skillet can lead to a soggy crust, as the dough won’t get that initial shock of heat needed for optimal rise. Always ensure the skillet is hot before adding your dough.
Misjudging Bake Time Leading to Undercooked or Burnt Crust
It’s essential to keep track of the baking time closely. A minute too long can result in a dark crust, while underbaking might leave the crust doughy. Keep a close eye during the final minutes.
Conclusion
Crispy cast iron skillet pizza presents a delightful balance of texture and taste, complemented by an array of customizable toppings. The straightforward preparation and baking process yield spectacular results that make any mealtime special. The skilled execution of techniques discussed will ensure a successful pizza-making experience every time, promising satisfaction in both flavor and presentation.

Crispy Cast Iron Skillet Pizza Recipe
Ingredients
- 2 cups all-purpose flour
- 1 packet instant yeast 2 ¼ tsp
- 1 tsp sugar
- 1 tsp salt
- ¾ cup warm water
- 1 tbsp olive oil
- 1 cup pizza sauce
- 2 cups shredded mozzarella cheese
- 1 cup assorted toppings
- 1 tsp dried oregano
- to taste fresh basil leaves
Instructions
- In a large mixing bowl, combine flour, yeast, sugar, and salt.
- Gradually add warm water and olive oil, stirring until a shaggy dough forms.
- Knead the dough on a floured surface for 5-7 minutes until smooth and elastic.
- Place the dough in a greased bowl, cover, and let it rise for 1 hour.
- Preheat the oven to 475°F (245°C) with a cast iron skillet inside.
- Punch down the risen dough, roll it out into a circular shape.
- Remove the hot skillet, coat with olive oil, and place the dough inside.
- Spread pizza sauce over the dough, add cheese and toppings, and sprinkle oregano.
- Bake for 12-15 minutes until the cheese is bubbly and the crust is golden.
- Cool for a few minutes, slice, and garnish with fresh basil before serving.