Heavenly Homemade Dinner Rolls Recipe – The Ultimate Rolls
Introduction
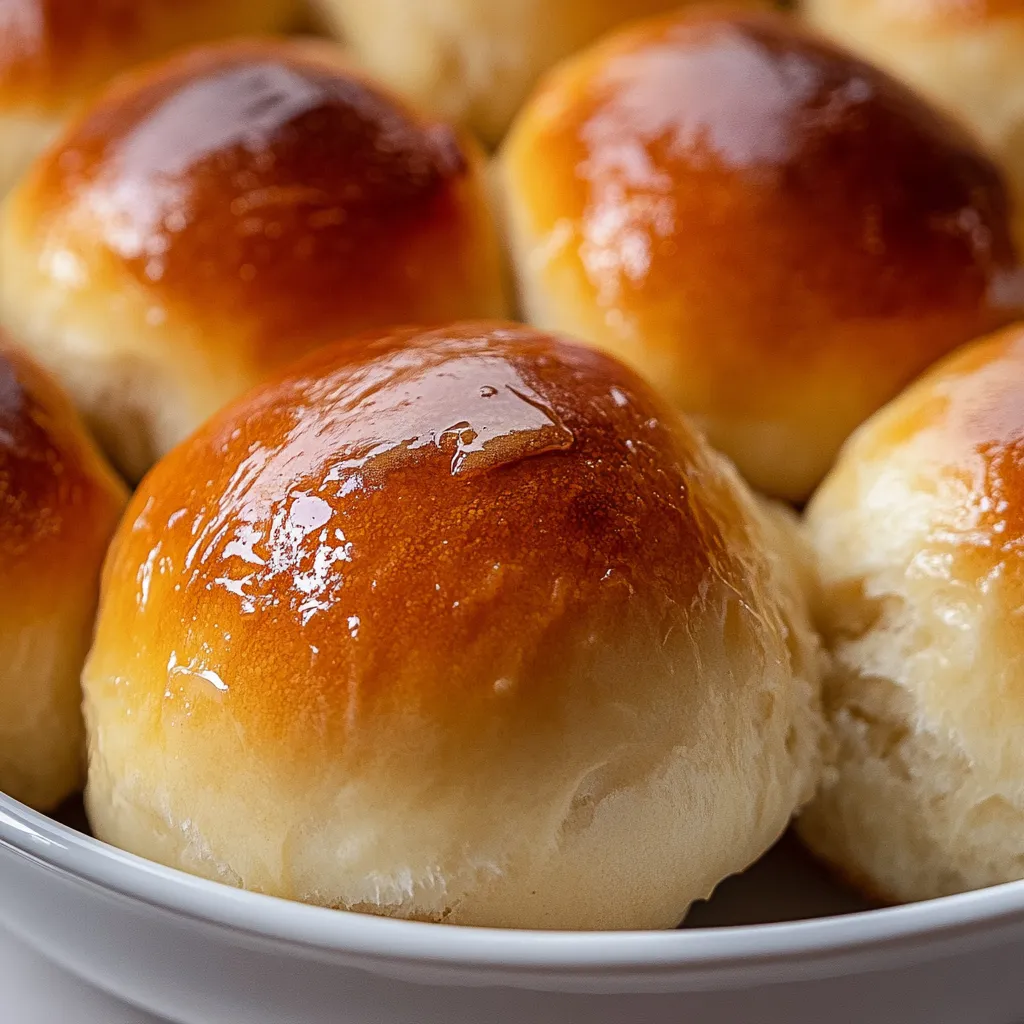
Homemade dinner rolls have a timeless allure that captivates both young and old alike, embodying comfort, hospitality, and warmth. There’s something truly special about the aroma of freshly baked rolls wafting through the house, inviting family and friends to gather around the table. These heavenly rolls are fluffy, soft, and possess a slight sweetness that complements any meal, making them the perfect accompaniment to your favorite dishes.
Whether you’re hosting a holiday feast, a cozy family dinner, or simply want to enjoy some warm, comforting bread, this dinner rolls recipe is designed to deliver a simple yet rewarding baking experience. With just a handful of common ingredients, you can create rolls that are not only delicious but also visually appealing. As you knead the dough and watch it rise, the anticipation of those warm, fluffy rolls will fill your kitchen with joy and excitement.
Perfectly versatile, these dinner rolls can be served with butter, drizzled with honey, or used to mop up sauces and gravies. They are also an excellent choice for sliders or as a base for tasty appetizers, making them a delightful addition to any meal.
Recipe Overview
– Total Time: 2 hours 15 minutes
– Servings: 12 rolls
– Difficulty: Not specified in the recipe
These rolls shine for their balance of texture and flavor. The combination of all-purpose flour and butter creates a soft crumb, while the eggs enrich the dough, resulting in a slightly sweet and tender roll that’s simply irresistible. Infusing a hint of honey can add a delicate sweetness that elevates the rolls beyond the ordinary. Whether enjoyed as a side dish during holidays or as a warm snack on a chilly evening, they adapt seamlessly to various culinary traditions and occasions.
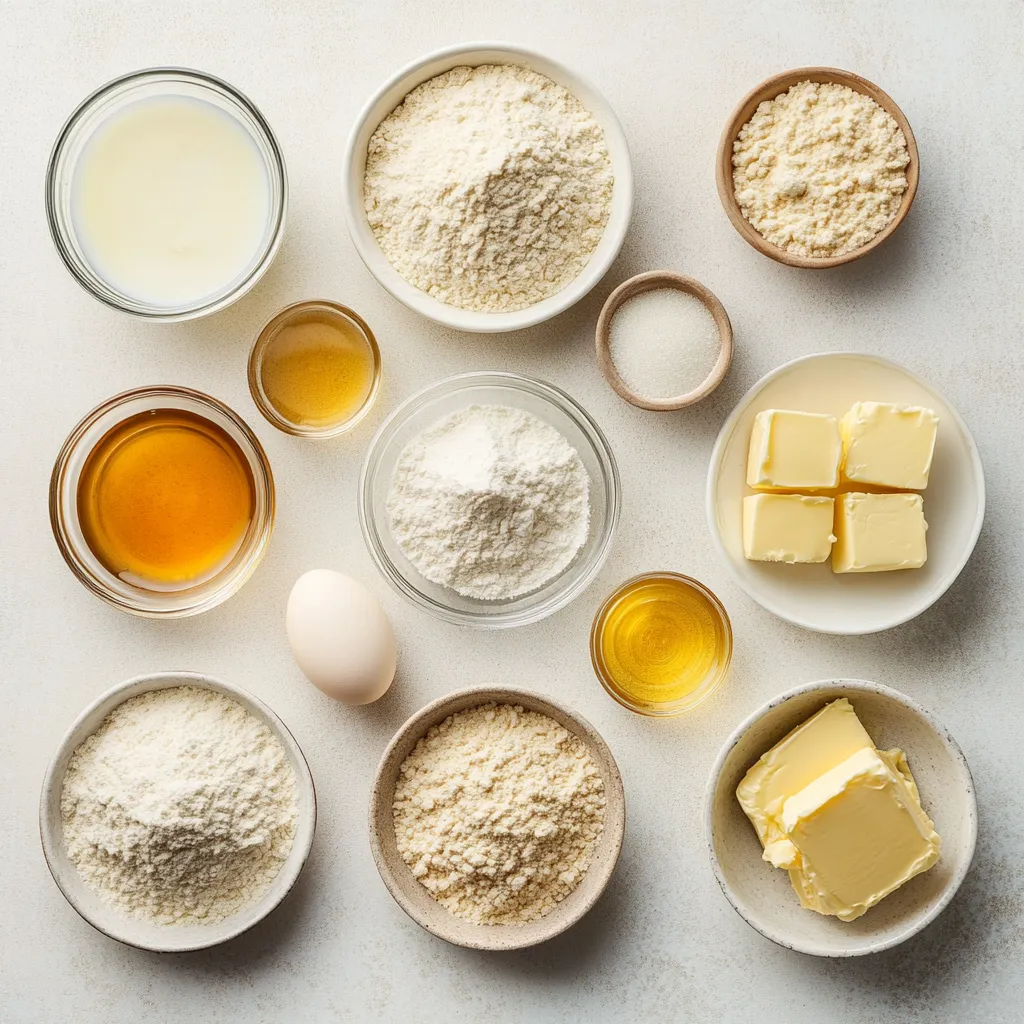
Ingredients
– 4 cups all-purpose flour
– 1 packet (2 1/4 teaspoons) active dry yeast
– 1/4 cup granulated sugar
– 1 teaspoon salt
– 1 cup whole milk, warmed to about 110°F (43°C)
– 1/4 cup unsalted butter, melted
– 2 large eggs
– 1 tablespoon honey (optional, for a touch of sweetness)
– Additional melted butter for brushing (approximately 2 tablespoons)
When making these rolls, using high-quality ingredients ensures the best flavor and texture. All-purpose flour serves as the foundation of the dough, while the active dry yeast is crucial for leavening, providing the rolls with their characteristic lightness. Granulated sugar not only enhances the taste but also feeds the yeast, supporting its activation process. Whole milk adds richness and moisture to the dough, while unsalted butter provides a delightful flavor. The eggs contribute to the structure and firmness of the rolls, with honey adding a touch of sweetness that can beautifully round out the overall taste.
Accurate measurements are vital in baking. For instance, using too much flour can lead to dense rolls, whereas too little could result in overly sticky dough. Careful attention to detailing ingredients will yield the best outcome.
Instructions
1. Activate the Yeast: In a small bowl, combine the warmed milk, granulated sugar, and active dry yeast. Stir gently and let it sit for about 5-10 minutes, or until the mixture becomes frothy and bubbly.
2. Prepare the Dry Ingredients: In a large mixing bowl, whisk together the all-purpose flour and salt until evenly distributed.
3. Mix the Wet Ingredients: In a separate bowl, whisk together the melted butter, eggs, and honey (if using) until the mixture is smooth and well combined.
4. Create the Dough: Pour the frothy yeast mixture and the wet ingredients into the bowl with the dry ingredients. Stir with a wooden spoon until a sticky dough begins to form.
5. Knead the Dough: Transfer the sticky dough onto a floured surface. Knead the dough for about 8-10 minutes, or until it becomes smooth and elastic. If the dough is excessively sticky, sprinkle in a little more flour as needed.
6. First Rise: Place the kneaded dough in a greased bowl, cover it with a clean kitchen towel, and allow it to rise in a warm environment for 1 to 1.5 hours, or until it has doubled in size.
7. Shape the Rolls: Once risen, punch down the dough gently to release any trapped air. Divide the dough into 12 equal portions. Shape each piece into a smooth ball and arrange them in a greased 9×13 inch baking dish or a round cake pan.
8. Second Rise: Cover the shaped rolls with a towel and let them rise again for 30-45 minutes, until they are puffed and have increased in size.
9. Preheat the Oven: While the rolls are rising, preheat your oven to 350°F (175°C).
10. Bake the Rolls: Once the rolls have completed their second rise, place them in the preheated oven and bake for 20-25 minutes, or until they are golden brown on top.
11. Brush with Butter: After removing the rolls from the oven, immediately brush the tops with melted butter for an added richness and a beautiful sheen.
12. Cool and Serve: Let the rolls cool slightly before serving. Enjoy them warm, spread with butter, drizzled with honey, or paired with your favorite condiment!
Activating Yeast
Yeast is a living organism crucial in baking, as it ferments the sugars in the dough, producing carbon dioxide gas that causes the dough to rise. Properly activating yeast is vital for the success of this recipe. Begin by combining warm milk, granulated sugar, and active dry yeast in a small bowl. The warmth of the milk (ideally around 110°F or 43°C) is essential, as temperatures too high can kill the yeast while too cold won’t activate it adequately. Stir the mixture gently and let it sit for about 5-10 minutes. The telltale sign that your yeast is activated is the formation of a frothy, bubbly layer on the surface.
It’s also important to use fresh yeast for optimal results. Always check the expiration date on the package and store yeast in a cool, dry place to maintain its freshness until you are ready to use it.
Preparing the Dry Ingredients
After activating your yeast, focus on preparing the dry ingredients as a crucial step for the overall success of the dinner rolls. In a large mixing bowl, whisk together the all-purpose flour and salt until evenly distributed. Proper blending of these ingredients ensures that the salt, which enhances flavor, is uniformly incorporated, preventing any pockets of salt from forming in the dough.
Accurate flour measurement is critical; measuring by weight for precision or using the scoop-and-level method can help avoid excess flour, which could lead to dense, heavy rolls. Investing in high-quality flour will significantly improve the final texture of the rolls, contributing to their lightness and fluffiness.
Mixing the Wet Ingredients
In a separate bowl, combine the melted butter, eggs, and optional honey. Each of these ingredients plays a vital role in forming the dough. Butter adds richness and flavor, while eggs serve as binding agents that contribute to the structure. If you choose to include honey, it not only infuses a gentle sweetness but can also help achieve a golden crust during baking. Whisk everything together until the mixture is smooth and well combined, ensuring that each ingredient is properly integrated before adding it to the dry mix. This combination will create a cohesive dough that rises beautifully, resulting in tender, fluffy rolls.
Creating the Dough
With the dry and wet ingredients prepared, the next step involves creating the dough. Gradually pour the frothy yeast mixture and the whisked wet ingredients into the large bowl containing the dry ingredients. Using a wooden spoon, stir until a sticky dough begins to form. It’s important to combine all the ingredients thoroughly, ensuring that there are no dry pockets of flour remaining.
You’ll know you’ve mixed enough when the dough starts to cling together but remains slightly sticky – this will yield soft, pillowy rolls after baking. Common mistakes at this stage include overmixing, which can lead to tough rolls, or undermixing, resulting in uneven texture. Watch for the dough to become homogenous without overworking it to keep it light.
Kneading the Dough
Kneading is a fundamental step in bread-making that promotes gluten development, which gives the rolls their desirable chew. Start by transferring your sticky dough onto a floured surface. Knead the dough with your hands for about 8-10 minutes, pushing it away with your palms, folding it over, and repeating this motion. You should notice the dough becoming smoother and more elastic.
If you find the dough sticking excessively to your hands or the surface, it’s acceptable to sprinkle in a little extra flour. However, be cautious not to add too much, as this could alter the final texture of your rolls. A well-kneaded dough should feel slightly tacky but not sticky, yielding rolls that are fluffy when baked.

Tips for creating a warm environment for optimal rising
Creating the ideal environment for yeast to work its magic is crucial for the success of your dinner rolls. Yeast thrives in warm, draft-free spaces, ideally between 75°F (24°C) and 85°F (29°C). Here are some effective methods to maintain a warm environment during the rising process:
– Place the covered bowl with the dough in a turned-off oven with the light on. The gentle heat from the bulb can create a warm space perfect for rising.
– Alternatively, you can fill a baking dish with hot water and place it on a lower rack of the oven, then place the dough bowl on the top rack. The warm, moist air from the water will help to elevate the temperature around the dough.
– If it’s a sunny day, you can set the dough bowl on a countertop near a window where sunlight streams in, heating up the space naturally.
– For those with a microwave, a quick method is to put a cup of boiling water in the microwave and then place the dough in there, closing the door to trap the heat and humidity.
Signs that the dough has risen correctly
To determine whether your dough has risen successfully, look for certain indicators:
– The dough should have approximately doubled in size, a sign that the yeast has been active.
– You can gently press your finger into the dough; if the indentation remains and does not spring back, this is a good indication that the dough is ready to be shaped.
– Additionally, the surface of the dough should appear slightly puffy. You might notice small bubbles under the surface, indicating that the yeast has produced carbon dioxide during the fermentation process.
Shaping the Rolls
Techniques for dividing and shaping the dough into rolls
The method of dividing and shaping your dough is pivotal for achieving uniform rolls that bake evenly. Start by lightly flouring your work surface to prevent sticking. Using a bench scraper or a sharp knife, cut the dough into equal portions, typically 12 for this recipe. To form each roll:
– Take a piece of dough and flatten it slightly with your fingers.
– Bring the edges into the center, pinching them together to form a tight ball.
– Turn the ball over and roll it lightly against the counter with your hand to achieve a smooth surface.
Importance of shaping for uniformity in baking
Uniform roll sizes ensure consistent cooking times and textures. If some rolls are larger, they may bake longer and result in uneven textures, while smaller rolls may become dry. Moreover, uniformity in shape adds a pleasing aesthetic to your final presentation.
Visual cues to look for when shaping dough
When shaping dough, look for smooth surfaces and tight seams. The dough should feel slightly tacky but not overly sticky. A well-shaped roll should hold its shape when placed in the baking dish and not flatten out.
Second Rise
The purpose of the second rise in roll-making
The second rise, or proof, is equally important as the first. It allows the gluten to relax, which results in a lighter roll and further fermentation by the yeast. During this stage, the rolls become airy and help develop flavor.
Tips for covering and protecting the rolls during this rise
Cover the shaped rolls with a clean, damp kitchen towel or plastic wrap to safeguard against drafts and moisture loss, which can create a crust on the dough. If the environment is particularly dry, lightly spraying the towel with water can help maintain humidity levels.
Identifying when the rolls are ready for baking
The rolls are ready for baking when they have visibly puffed and increased in size, typically about 1.5 times their original size. You can again perform the “poke test” as mentioned previously, where the dough should hold the indentation left by your finger.
Preheating the Oven
Importance of preheating and achieving the right temperature
Preheating the oven ensures that your rolls begin baking at an optimal temperature, which is vital for achieving a beautifully golden crust. An oven that isn’t preheated can lead to uneven baking and dense rolls.
How oven temperature affects the baking process
If the oven is too hot, the rolls may brown too quickly before they have fully risen, resulting in a hard crust and undercooked interior. Conversely, if the oven temperature is too low, the rolls may spread rather than rise, leading to a flatter, denser product.
Preparing the baking dish for best results
Greasing your baking dish is essential; it helps the rolls release easily post-baking and adds a bit of flavor. Lightly brushing the dish with melted butter or oil will suffice, ensuring all surfaces are covered.
Baking the Rolls
Optimal baking time and temperature discussion
The ideal baking temperature for these dinner rolls is 350°F (175°C). Bake the rolls for 20-25 minutes. Toward the end of baking, keep a close eye on them to prevent overbrowning, as oven temperatures can vary.
Recognizing when rolls are perfectly baked (color and texture)
Perfectly baked rolls should be golden brown on top, with an internal temperature of about 190°F (88°C) when checked with an instant-read thermometer. The rolls should sound hollow when gently tapped on the bottom and have a light, airy texture when broken apart.
Tips for monitoring rolls during the baking process
Rotate the baking dish halfway through baking to ensure even heat distribution. If the tops begin to darken too much, you may lightly tent them with aluminum foil to prevent burning.
Brushing with Butter
The role of brushing with melted butter after baking
Brushing the hot rolls with melted butter when they come out of the oven adds richness, enhances flavor, and creates a beautiful glossy finish. This step adds an inviting aroma and an appealing golden hue to the dinner rolls.
How it enhances flavor and appearance
Melted butter contributes a savory taste that complements the sweetness of the rolls. Additionally, it prevents the crust from hardening, helping maintain the softness of the rolls.
Alternatives for brushing if butter is not preferred
If you prefer a non-dairy option, you can substitute with olive oil or melted coconut oil. For a different flavor, consider using herb-infused oils or garlic butter for an additional kick.
Cooling and Serving
Importance of cooling before serving for best texture
Allowing the rolls to cool slightly before serving is crucial for a better texture. This cooling period allows moisture to redistribute throughout the bread, resulting in a soft interior without becoming gummy.
Ways to serve and enjoy these rolls for different occasions
These rolls can be enjoyed warm with butter, honey, or alongside soups, stews, or as sandwich rolls. Their versatility makes them suitable for everything from family dinners to holiday feasts.
Suggestions for pairing or garnishing the rolls
Consider garnishing with a sprinkle of fresh herbs, such as rosemary, or sesame seeds for an extra touch of flavor and aesthetics. Offering flavored butters or jams on the side can enhance the dining experience.
Presentation Tips
Creative ideas for serving rolls to enhance their rustic charm
Serving rolls in a warm basket lined with a cloth napkin adds a cozy, rustic feel. You could also arrange them on a wooden board or slate for an appealing display at a dinner party.
Garnishing suggestions for visual appeal
Drizzling a bit of honey or a sprinkle of coarse salt can elevate the presentation. For a festive touch, consider placing a few sprigs of fresh herbs around the rolls as a garnish.
Using serving techniques to elevate the dining experience
For an added special touch, you might consider using small ramekins to serve various spreads, such as herb-infused butter or flavored oils, allowing guests to personalize their roll experience.
Conclusion
The delightful taste of these homemade rolls showcases a soft and fluffy texture that will surely complement any meal. This versatile recipe is suitable for various occasions, providing an opportunity to connect with loved ones around the dinner table. The joy of baking from scratch and sharing these rolls adds warmth and satisfaction to any gathering.
Heavenly Homemade Dinner Rolls Recipe - The Ultimate Rolls
Ingredients
- 4 cups all-purpose flour
- 1 packet active dry yeast
- ¼ cup granulated sugar
- 1 teaspoon salt
- 1 cup whole milk
- ¼ cup unsalted butter
- 2 large eggs
- 1 tablespoon honey
- 2 tablespoons additional melted butter
Instructions
- Activate the yeast by combining warmed milk, sugar, and yeast; let sit until frothy.
- Whisk together flour and salt in a large bowl.
- Mix melted butter, eggs, and honey in a separate bowl until smooth.
- Combine the yeast mixture and wet ingredients with the dry ingredients; stir until sticky dough forms.
- Knead the dough on a floured surface for 8-10 minutes until smooth and elastic.
- Place the dough in a greased bowl, cover, and let rise in a warm place for 1 to 1.5 hours.
- Punch down the risen dough, divide into 12 portions, and shape into balls.
- Arrange the balls in a greased baking dish and let rise for another 30-45 minutes.
- Preheat the oven to 350°F (175°C).
- Bake the rolls for 20-25 minutes until golden brown.
- Brush with melted butter after baking and let cool slightly before serving.